Backup and Restore
Understanding Amazon RDS Backup and Restore
ℹ️ Information: Amazon RDS provides automated backups and allows manual snapshots to ensure your database data is protected and can be recovered when needed. These capabilities are essential for disaster recovery planning and maintaining business continuity.
Monitoring Backup Status in Amazon RDS
-
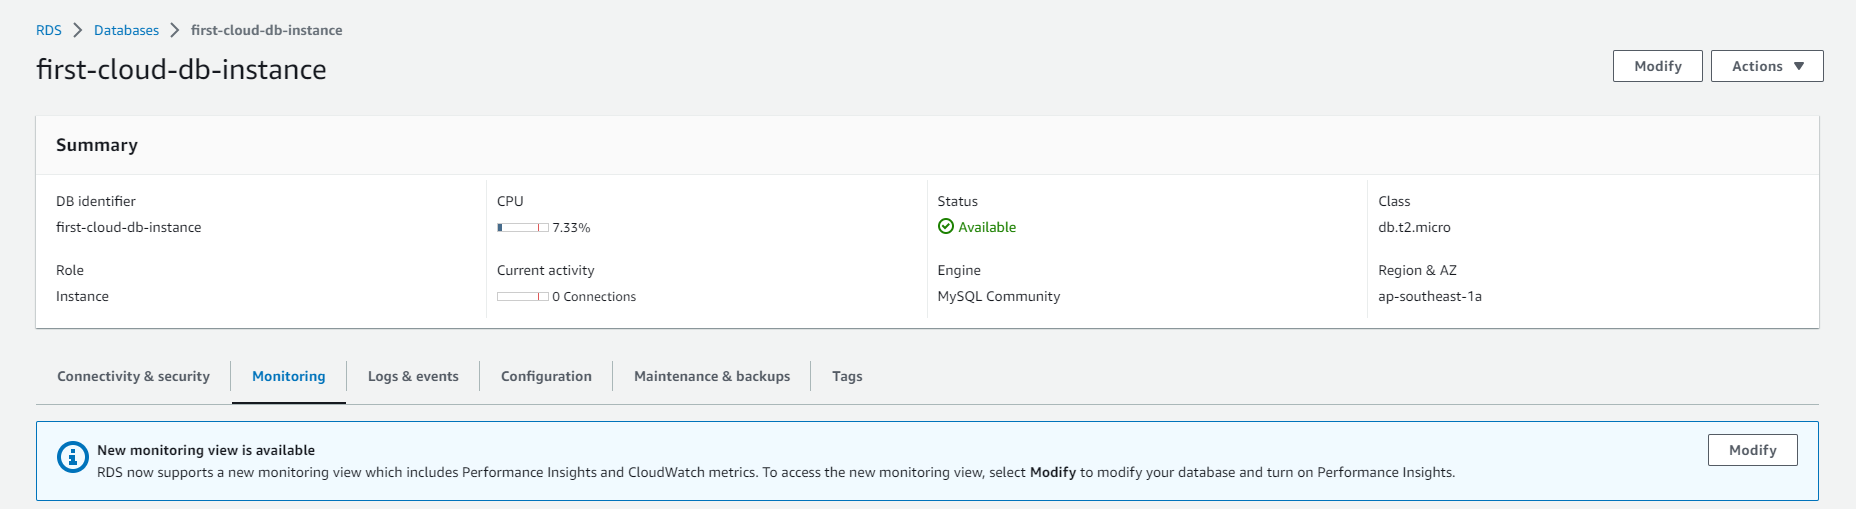
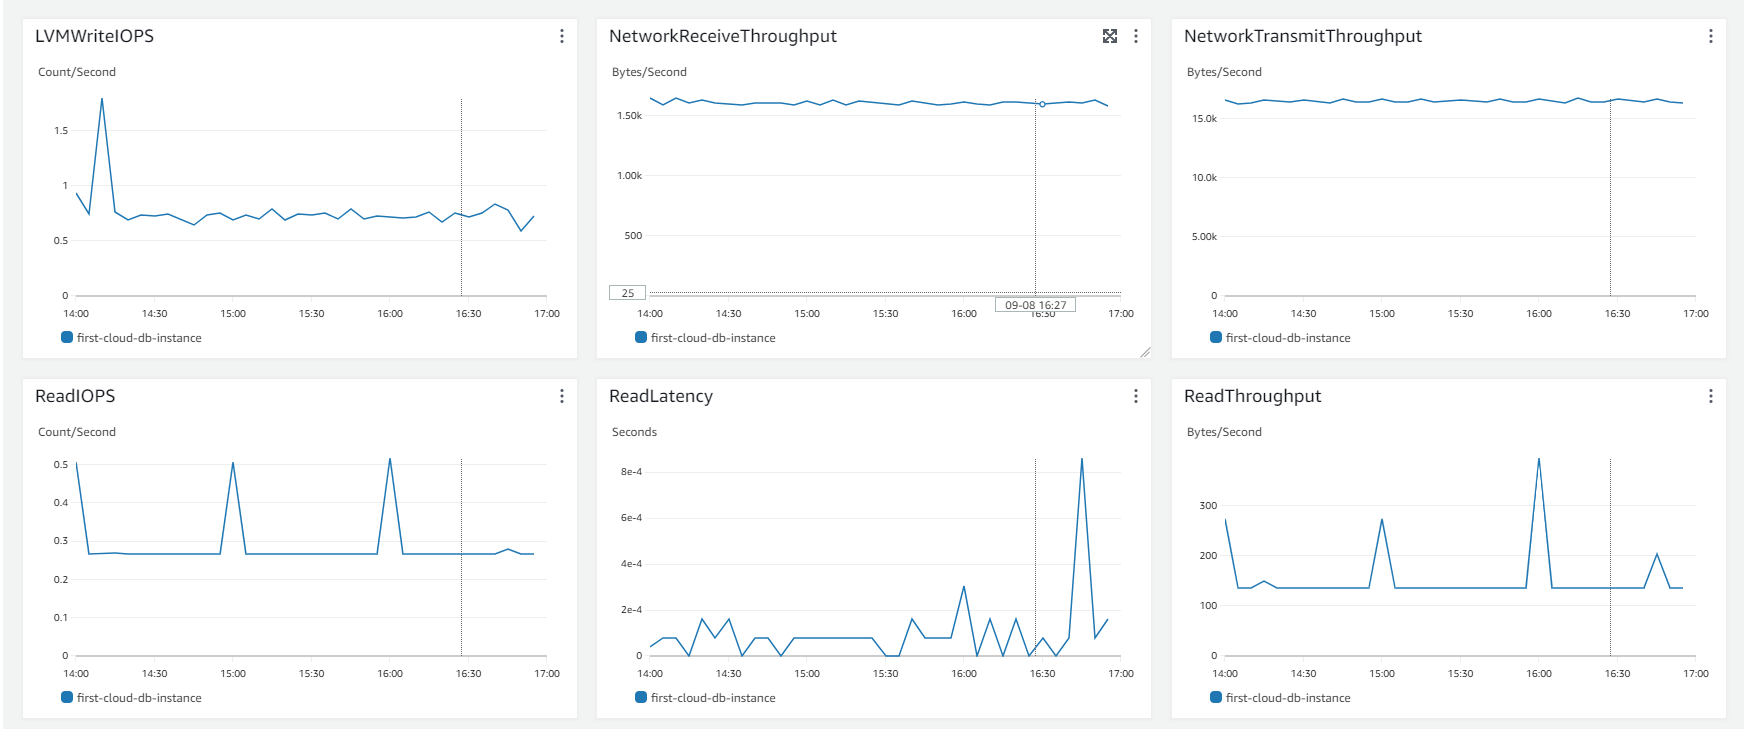
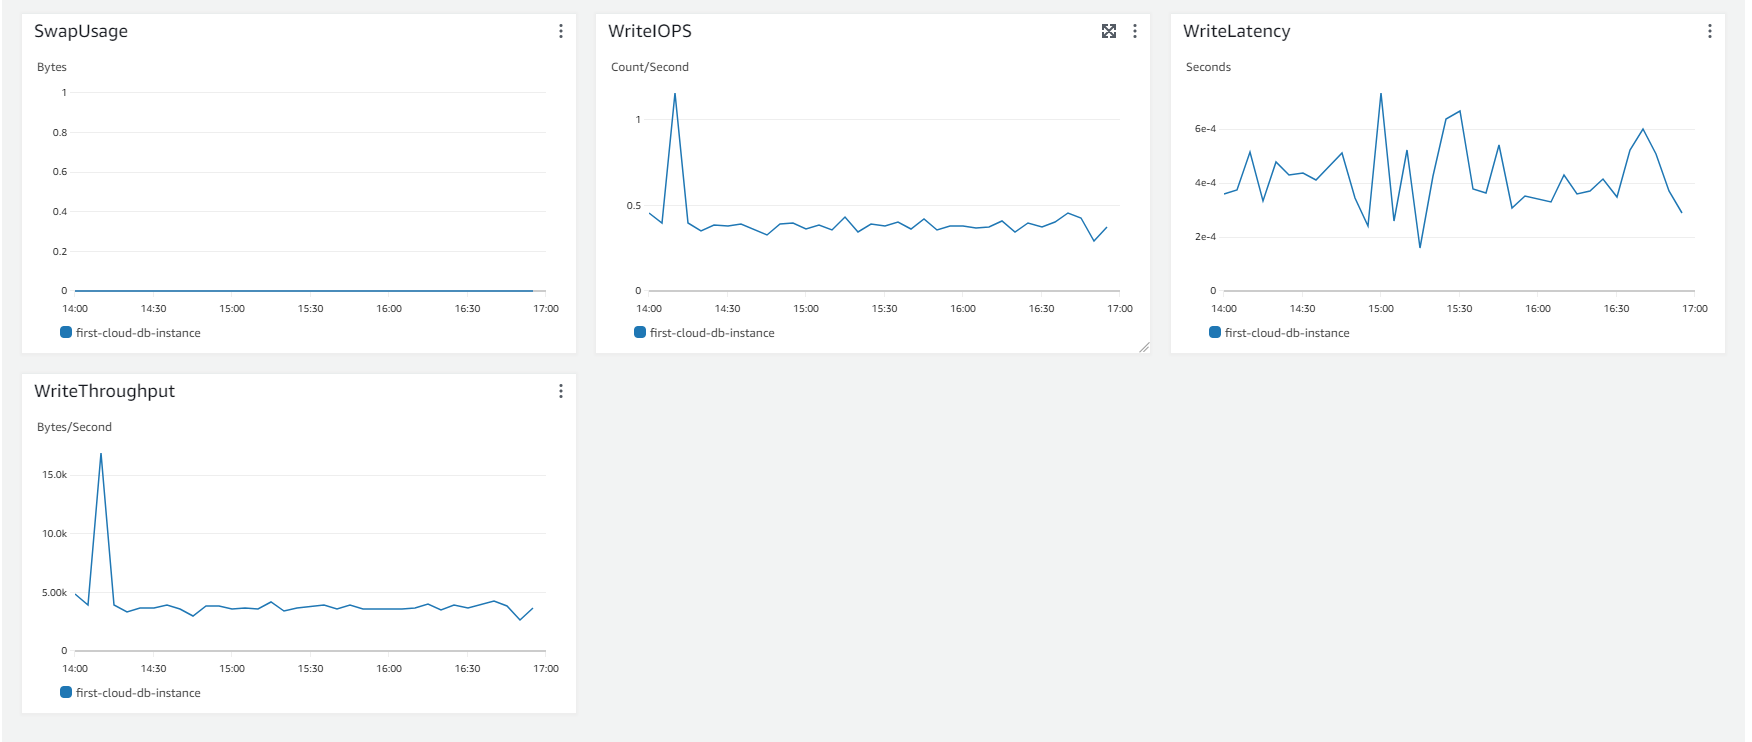
To access backup monitoring in the Amazon RDS console:
- Navigate to the Databases section in the AWS Management Console
- Select your target DB instance
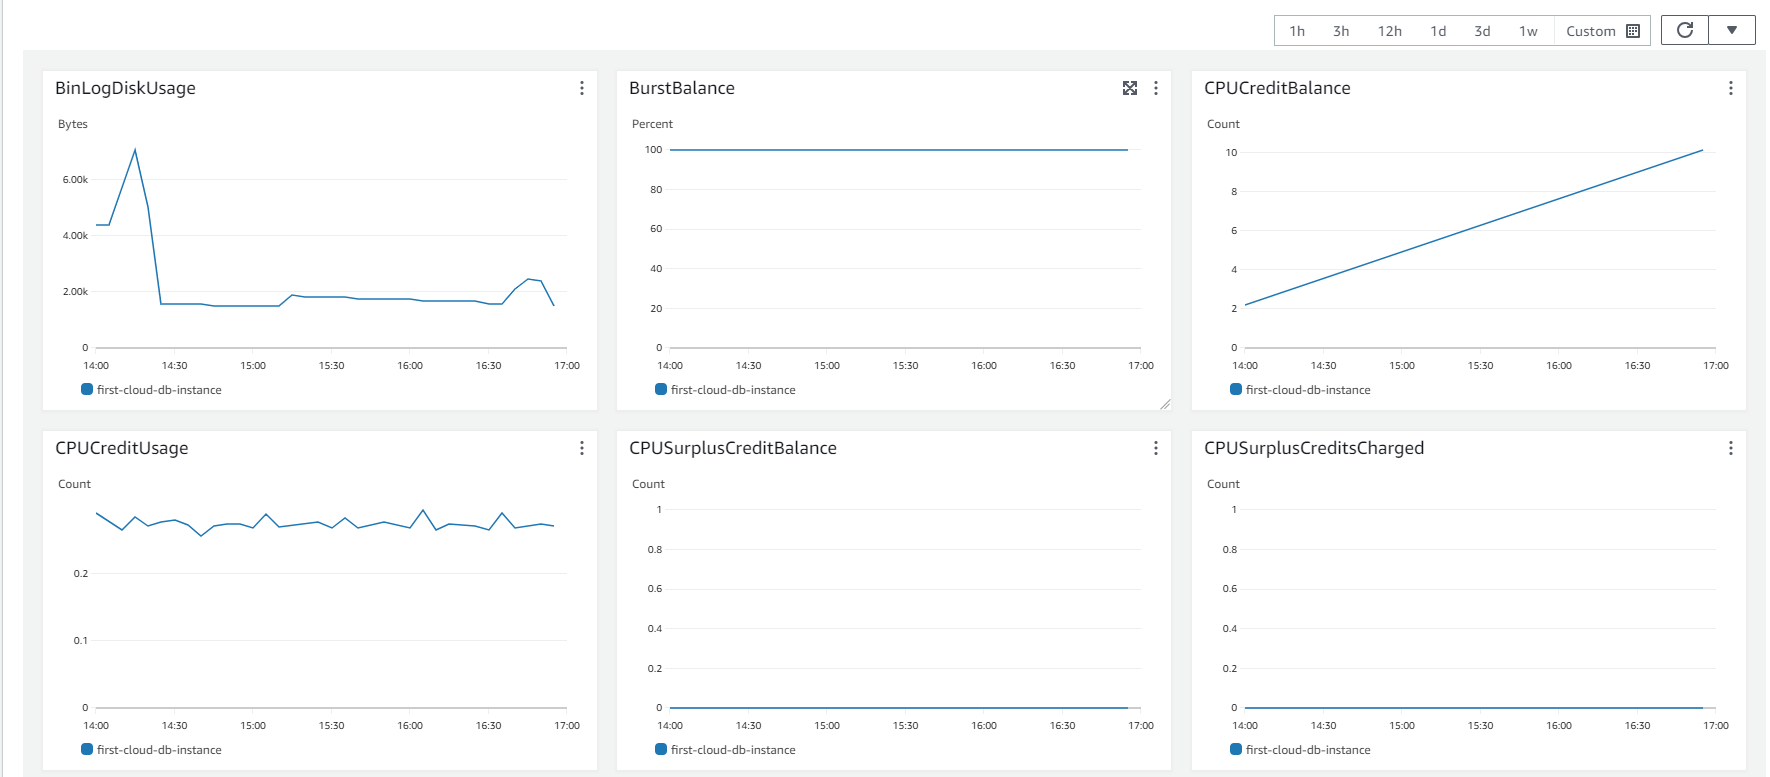
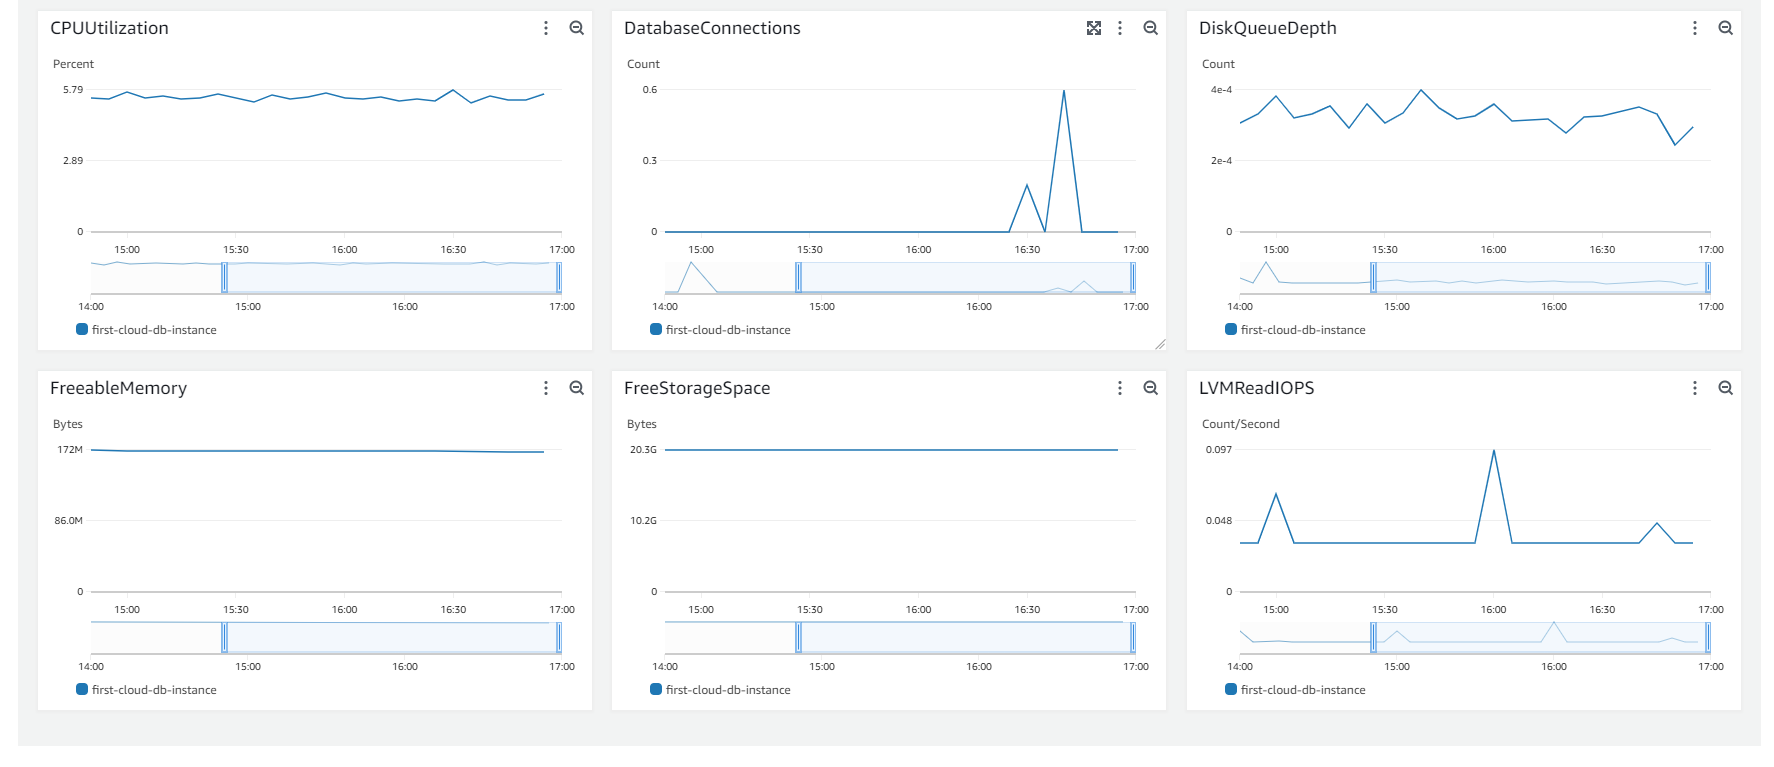
- Click on the Monitoring tab to view performance metrics
Viewing Backup Information
-
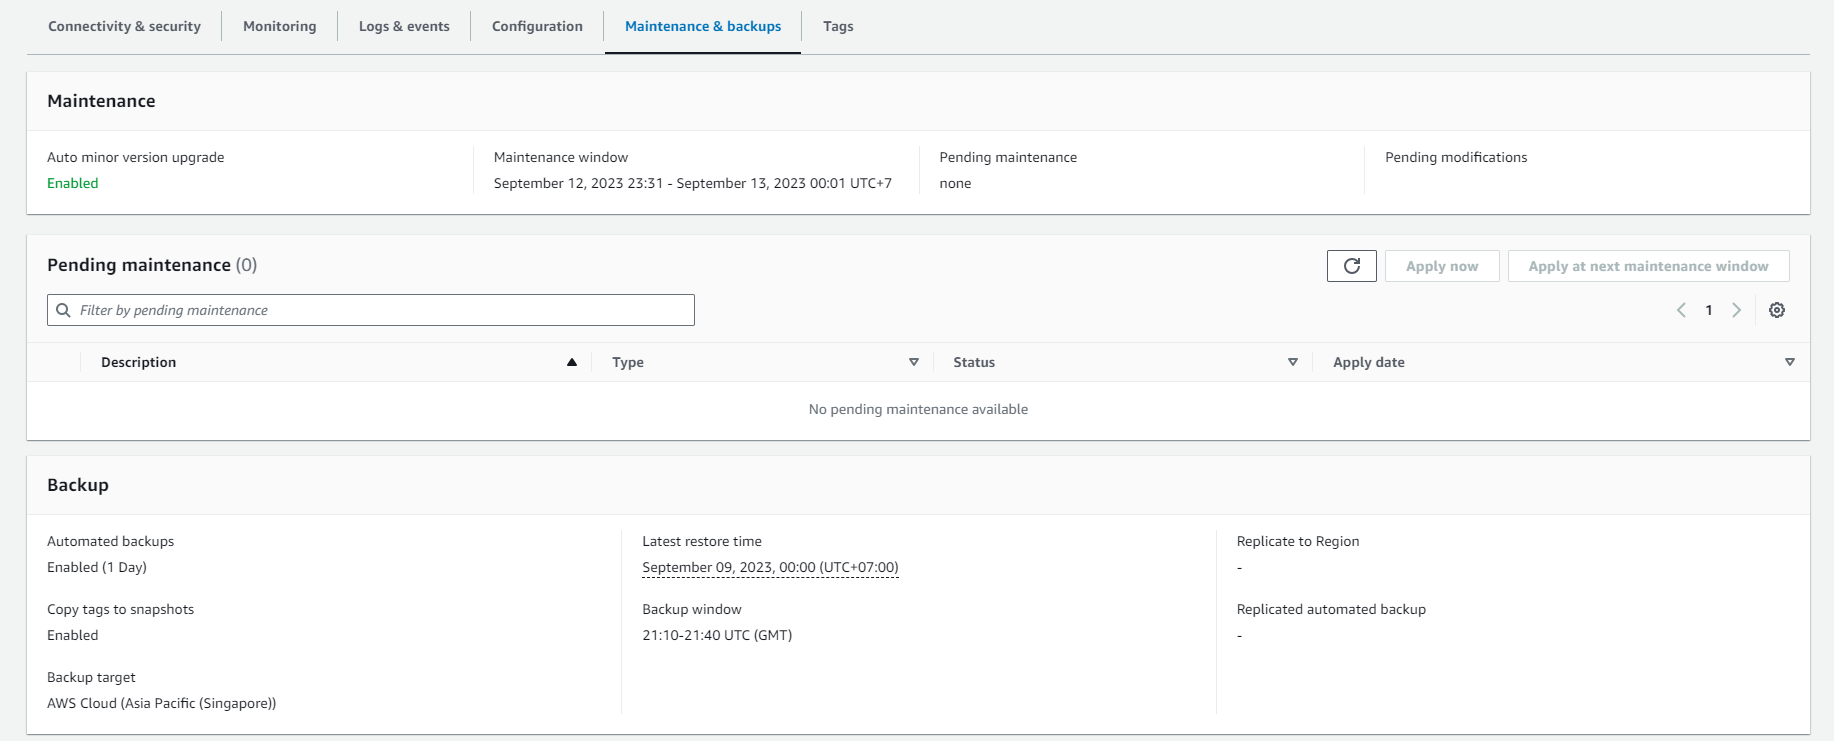
To review backup details for your Amazon RDS instance:
- Sign in to the AWS Management Console
- Select Amazon RDS from the services menu
- In the RDS dashboard, select your DB instance
- Navigate to the Maintenance & backups tab
- Here you can view both automated and manual backup information and configure backup settings
Managing Database Snapshots
-
View your available DB snapshots in the snapshots section:

Restoring from a DB Snapshot
-
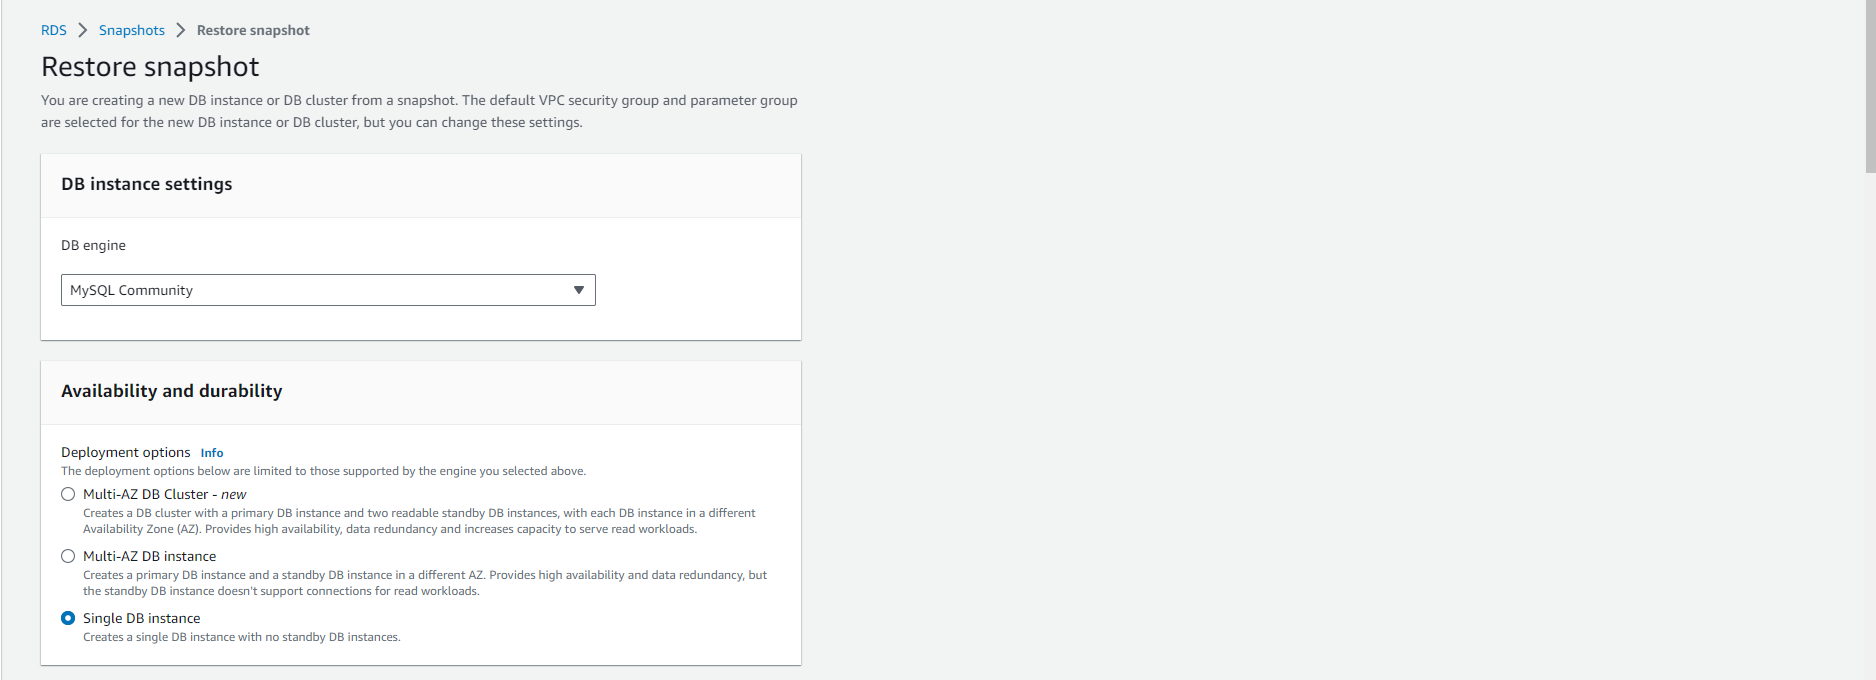
Select the DB snapshot you want to use as your restore point:
- Under the Actions dropdown menu, select Restore snapshot

-
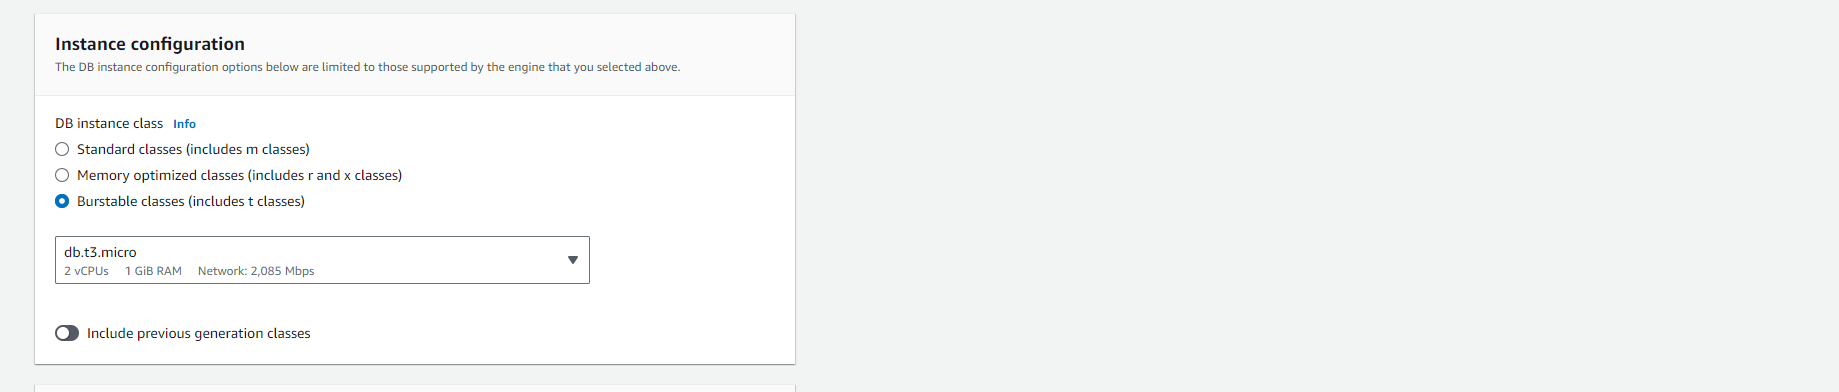
Configure your restored database instance:
- Provide a unique DB instance identifier for the new instance
- Select appropriate instance specifications (compute, storage, etc.)
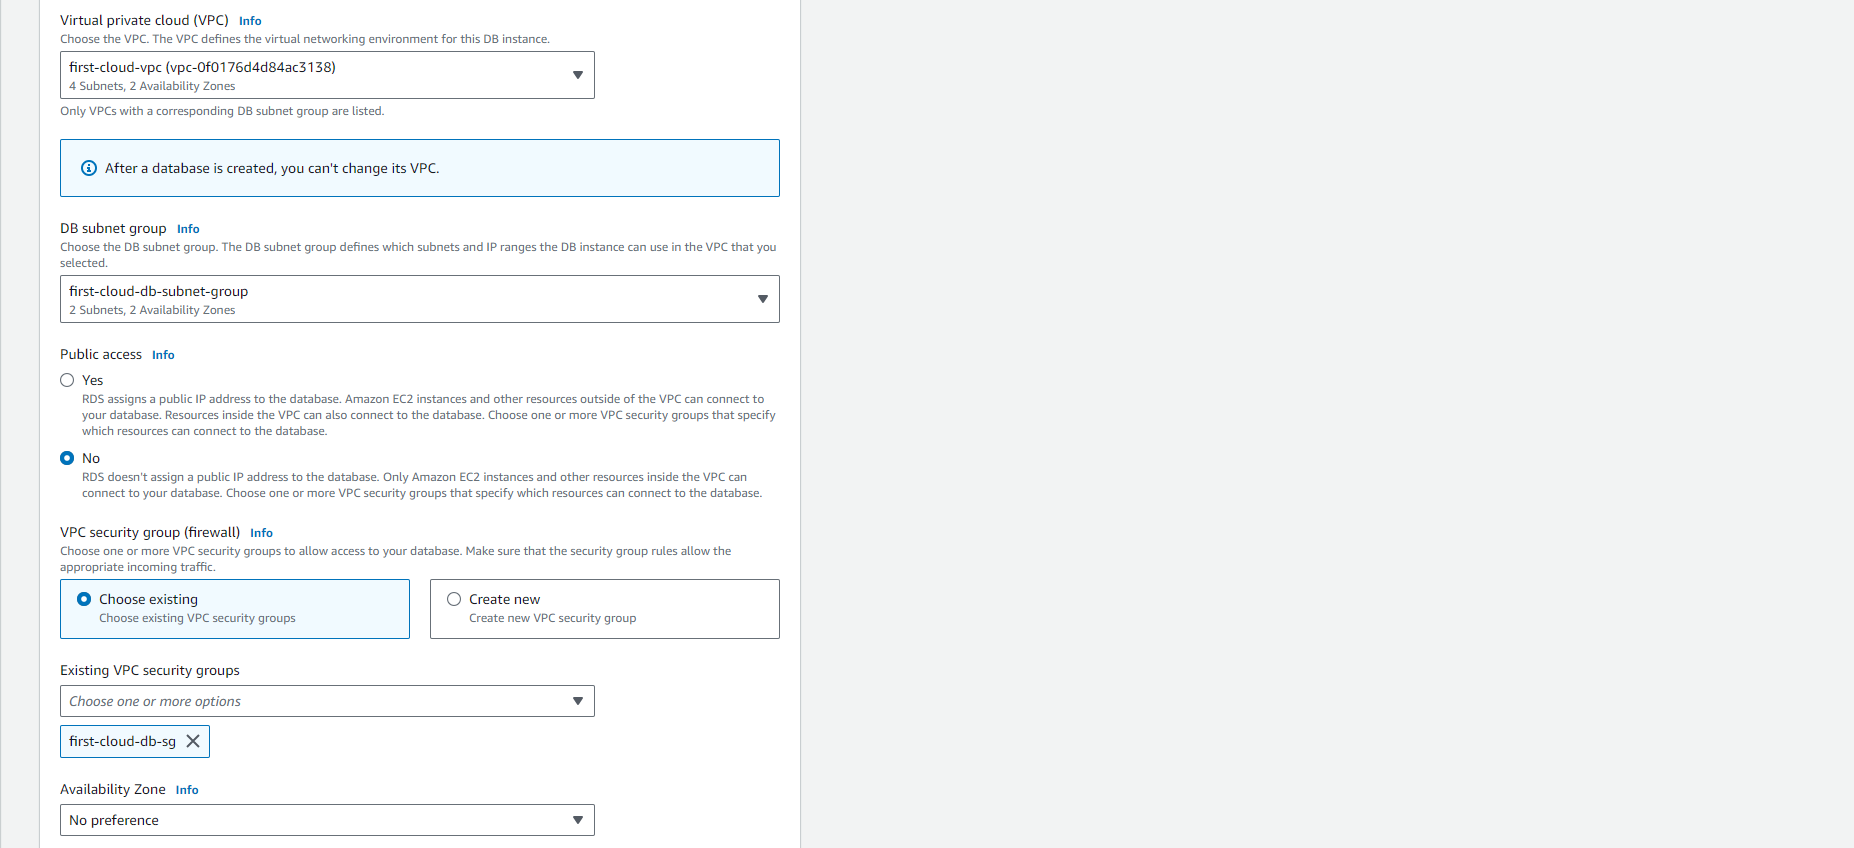
- Configure network and security settings
💡 Pro Tip: When restoring a production database, consider restoring to a smaller instance class first for testing, then scale up as needed to minimize costs during validation.

-
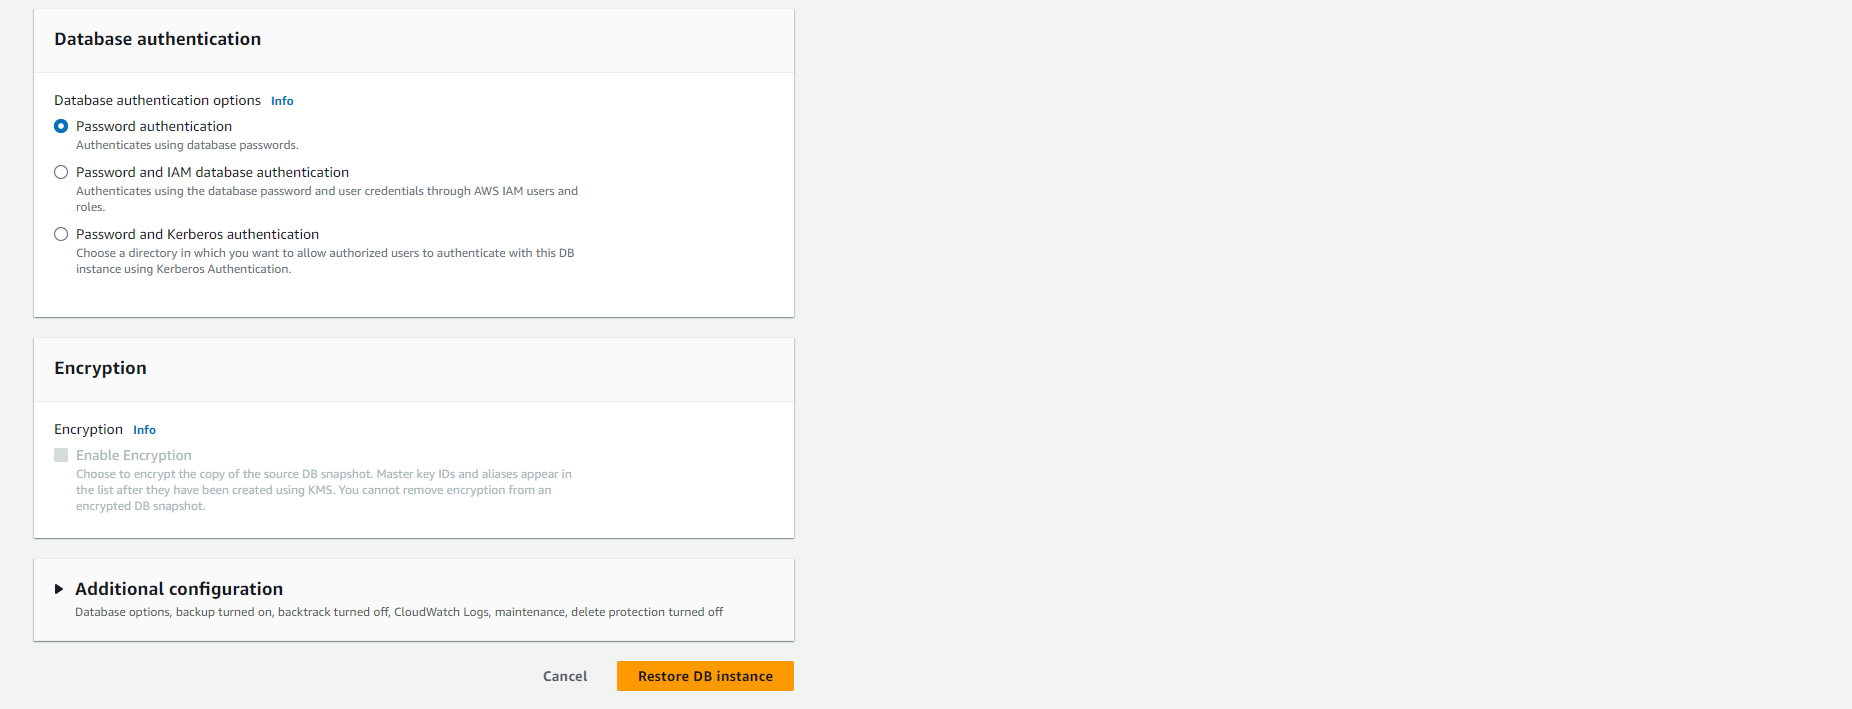
Initiate the restore process:
- Review your configuration settings
- Click Restore DB instance to begin the process
⚠️ Warning: The restore process creates a completely new database instance with its own endpoint. You will need to update your application connection strings to point to this new instance if you intend to use it for production.
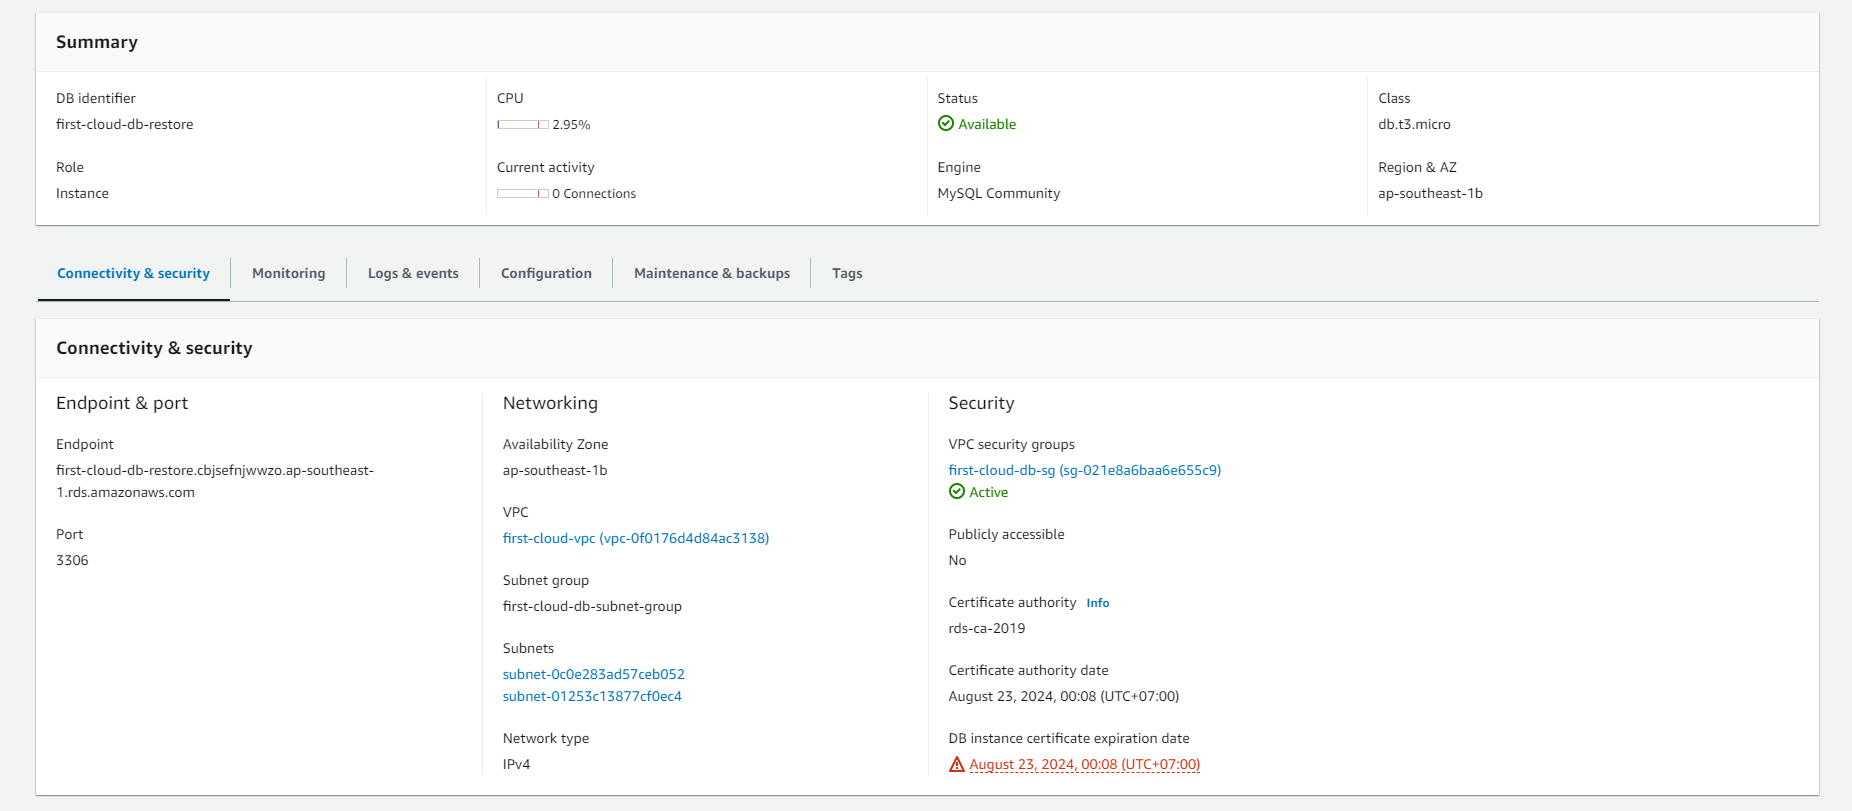
Verifying the Restored Database
-
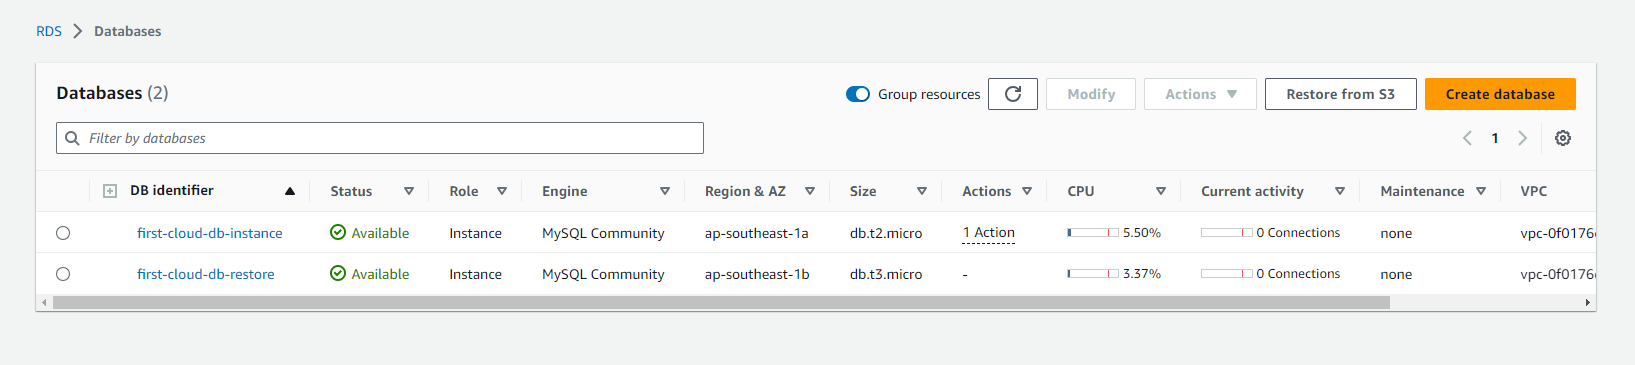
Confirm successful restoration:
- Check that the new DB instance appears in your RDS console
- Verify the status shows as “Available” when the restore completes
- Test connectivity and data integrity before directing production traffic to the restored instance
🔒 Security Note: Remember to configure the same security groups and parameter groups as your original instance if you want identical access controls and database settings.