Application Deployment
Deploy the application
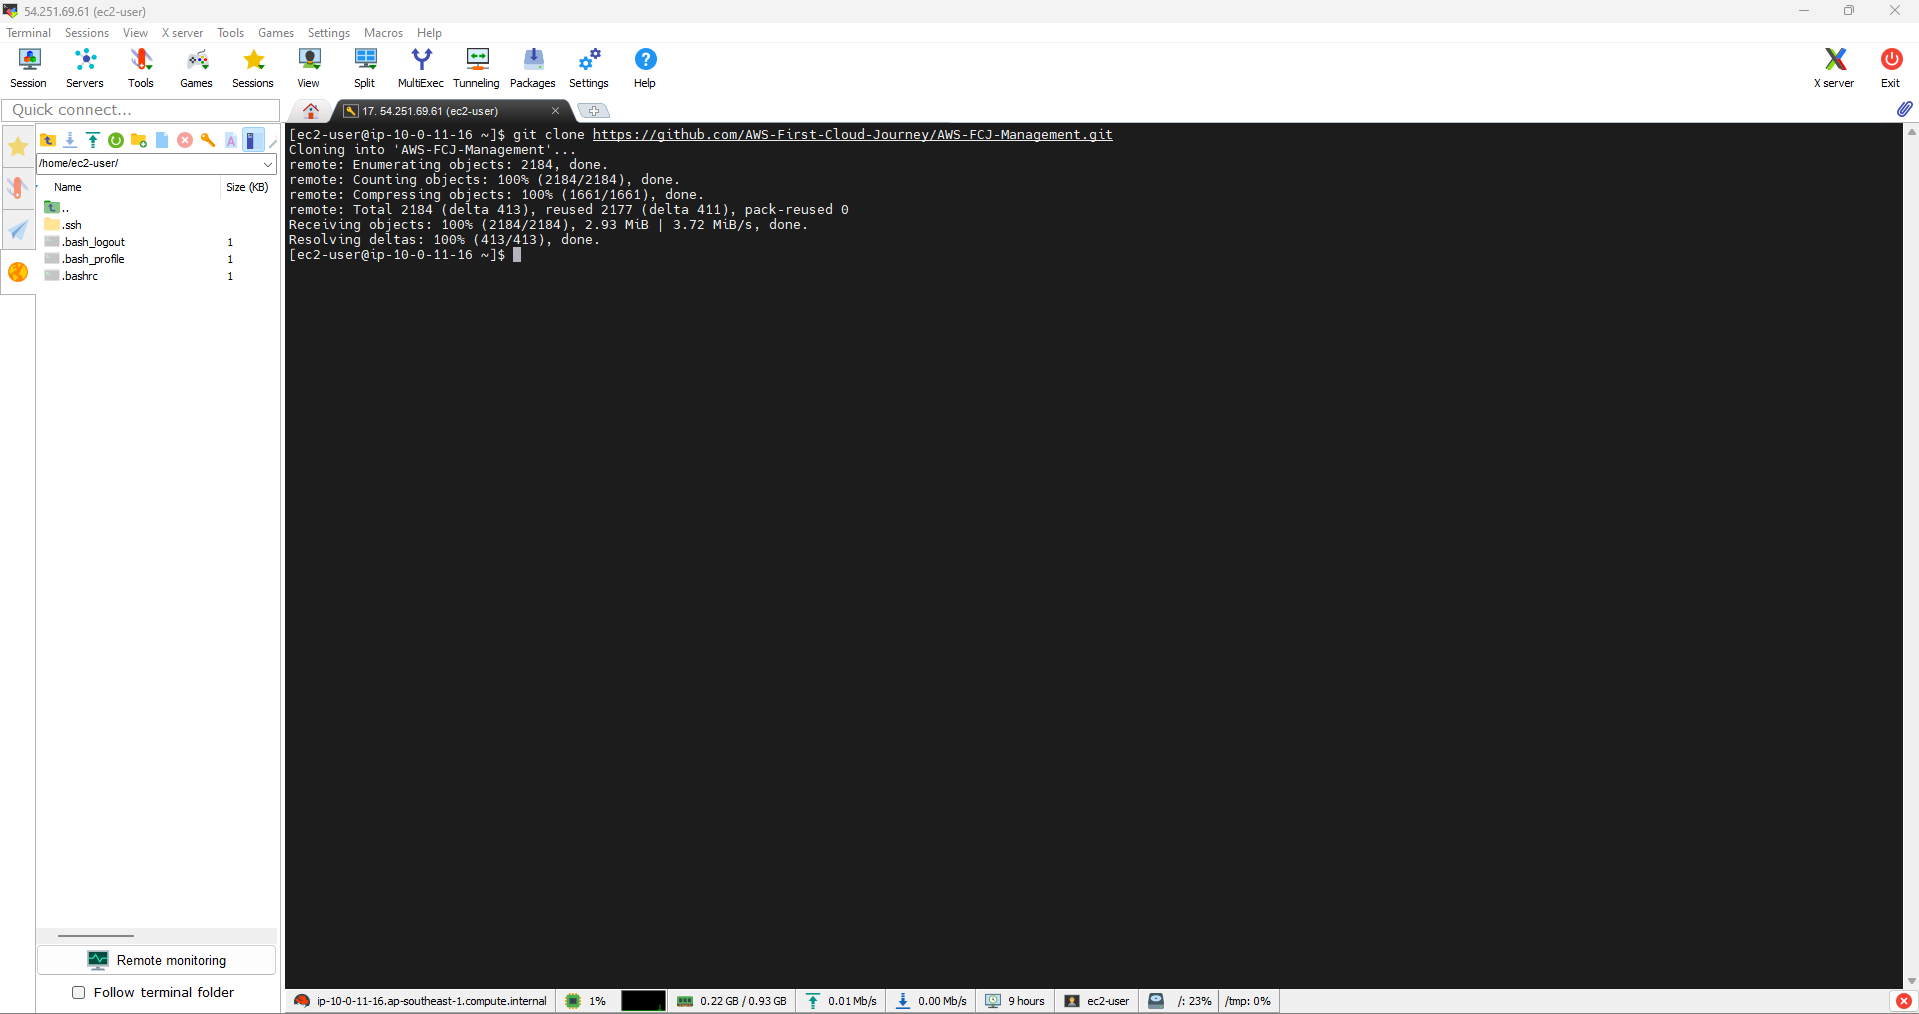
- To clone the repository from GitHub of AWS-First-Cloud-Journey, you can use the following command:
git clone https://github.com/AWS-First-Cloud-Journey/AWS-FCJ-Management
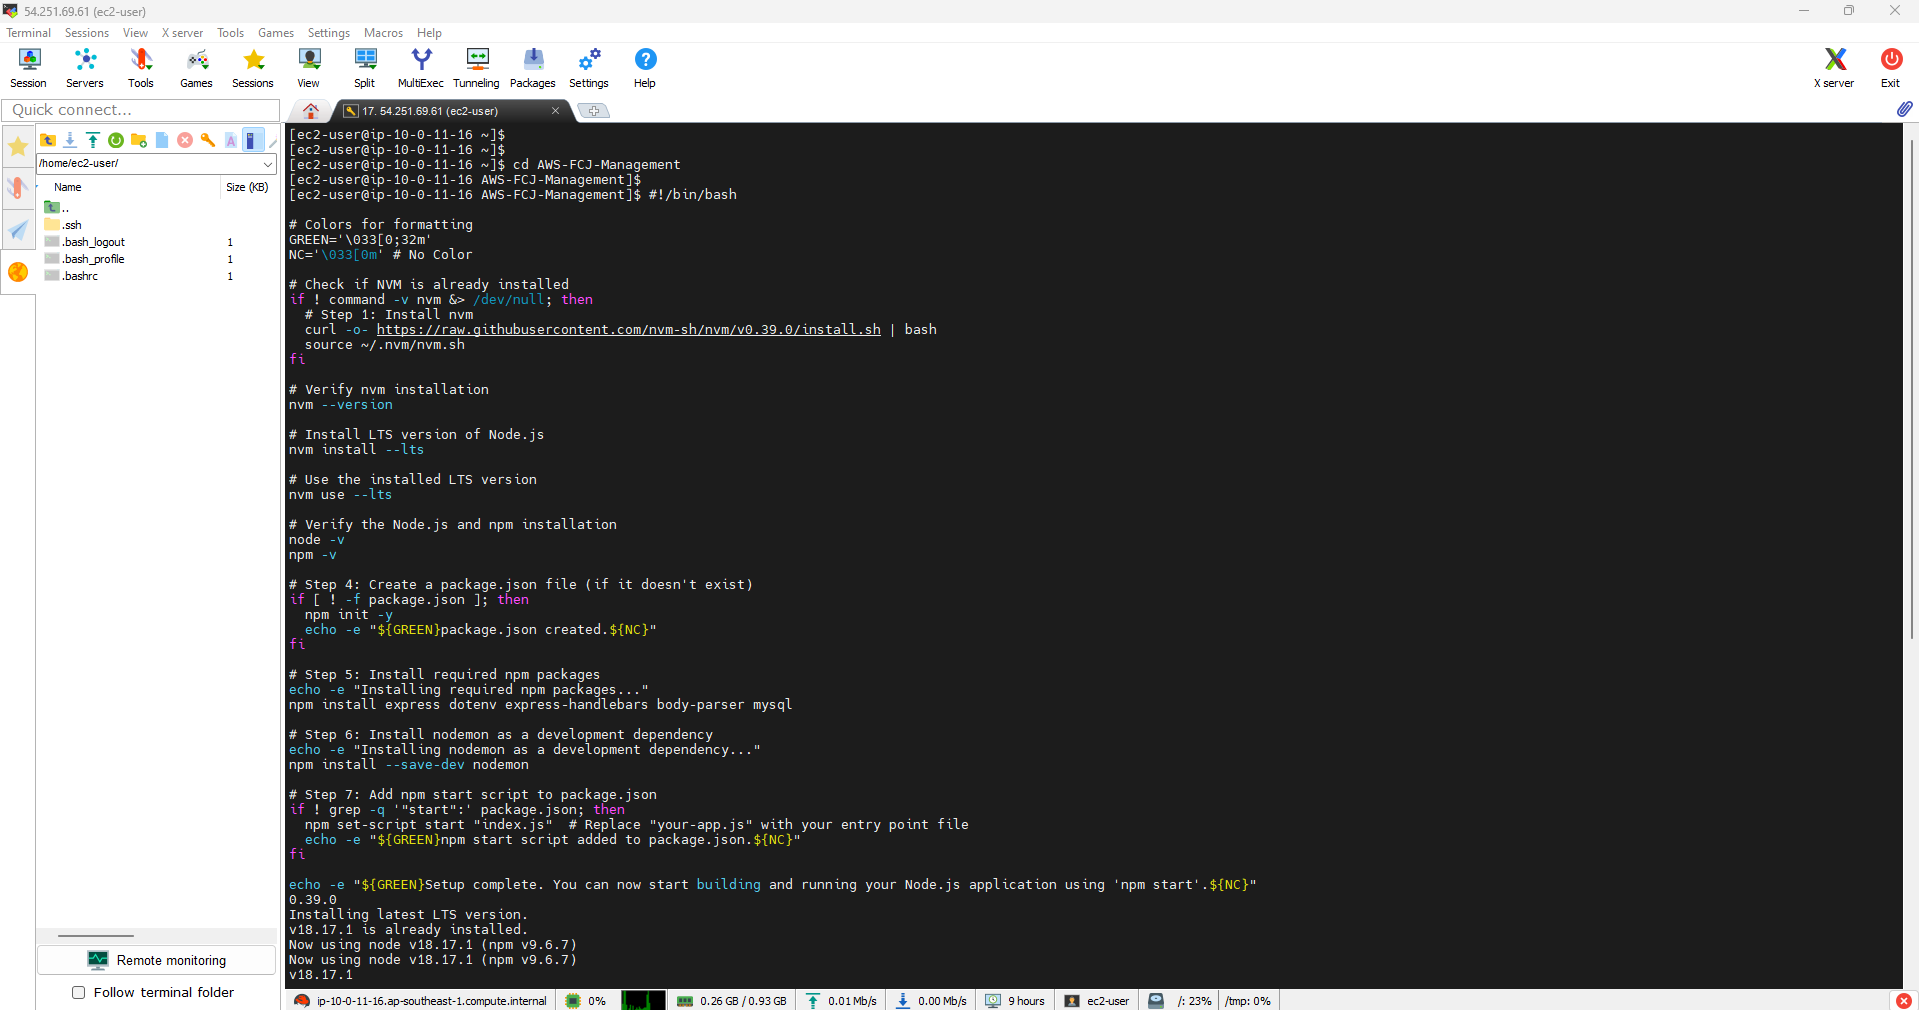
- #Instructions for installing Node.js on Amazon Linux 2023
Below is a Bash script to install Node.js on Amazon Linux. Please copy and execute the following steps:
#!/bin/bash

# Các màu cho định dạng
GREEN='\033[0;32m'
NC='\033[0m' # Không màu

# Kiểm tra xem NVM đã được cài đặt chưa
if ! command -v nvm &> /dev/null; then
  # Bước 1: Cài đặt nvm
  curl -o- https://raw.githubusercontent.com/nvm-sh/nvm/v0.39.0/install.sh | bash
  source ~/.nvm/nvm.sh
fi

# Xác minh việc cài đặt nvm
nvm --version

# Cài đặt phiên bản LTS của Node.js
nvm install --lts

# Sử dụng phiên bản LTS đã cài đặt
nvm use --lts

# Xác minh cài đặt Node.js và npm
node -v
npm -v

# Bước 4: Tạo tệp package.json (nếu nó chưa tồn tại)
if [ ! -f package.json ]; then
  npm init -y
  echo -e "${GREEN}Đã tạo tệp package.json.${NC}"
fi

# Bước 5: Cài đặt các gói npm cần thiết
echo -e "Đang cài đặt các gói npm cần thiết..."
npm install express dotenv express-handlebars body-parser mysql

# Bước 6: Cài đặt nodemon như một phần phát triển
echo -e "Đang cài đặt nodemon như một phần phát triển..."
npm install --save-dev nodemon
npm install -g nodemon

# Bước 7: Thêm script npm start vào package.json
if ! grep -q '"start":' package.json; then
  npm set-script start "index.js"  # Thay thế "your-app.js" bằng tệp điểm nhập của bạn
  echo -e "${GREEN}Đã thêm script npm start vào package.json.${NC}"
fi

echo -e "${GREEN}Cài đặt hoàn tất. Bây giờ bạn có thể bắt đầu xây dựng và chạy ứng dụng Node.js của mình bằng 'npm start'.${NC}"
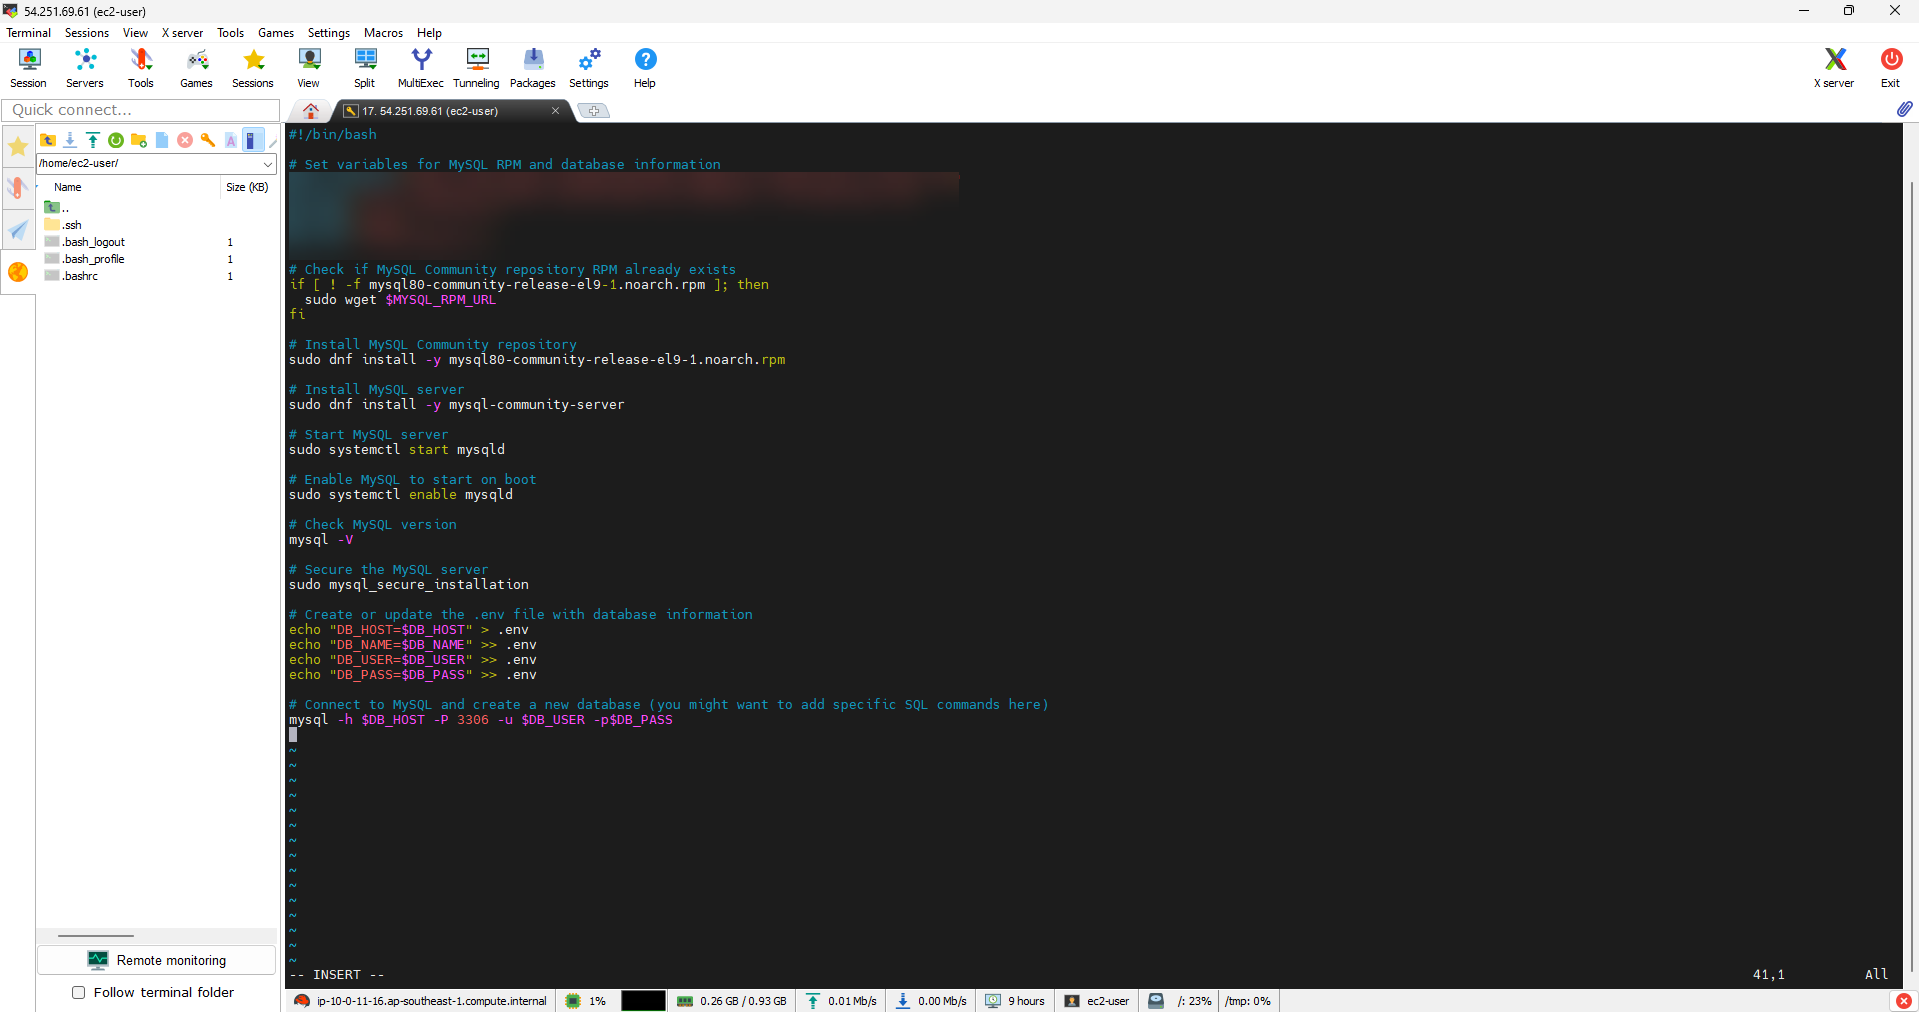
- This is a Bash script used to install and configure MySQL server on a system. This script performs the following steps:
-
Set variables with MySQL RPM path and database information such as RDS address, database name, username and password.
-
Check if the MySQL community repository RPM already exists in the current directory. If it does not exist, it will download the RPM from the specified URL.
-
Install RPM of MySQL community repository and MySQL Server.
-
Start the MySQL server and configure it to automatically start with the system.
-
Check the installed MySQL version.
-
Secure the MySQL server with the mysql_secure_installation command.
-
Create or update an .env file with database information (address, database name, username, and password).
-
Connect to MySQL server with credentials and you can add specific SQL commands here.
Note: To execute this script, you need to have sudo permissions and make sure you have provided the correct database information (RDS Endpoint, database name, username and password) before run script.
#!/bin/bash

# Set variables for MySQL RPM and database information
MYSQL_RPM_URL="https://dev.mysql.com/get/mysql80-community-release-el9-1.noarch.rpm"
DB_HOST="RDS Endpoint"
DB_NAME="Database name"
DB_USER="Database username"
DB_PASS="Database password"


# Check if MySQL Community repository RPM already exists
if [ ! -f mysql80-community-release-el9-1.noarch.rpm ]; then
  sudo wget $MYSQL_RPM_URL
fi

# Install MySQL Community repository
sudo dnf install -y mysql80-community-release-el9-1.noarch.rpm

# Install MySQL server
sudo dnf install -y mysql-community-server

# Start MySQL server
sudo systemctl start mysqld

# Enable MySQL to start on boot
sudo systemctl enable mysqld

# Check MySQL version
mysql -V

# Secure the MySQL server
sudo mysql_secure_installation

# Create or update the .env file with database information
echo "DB_HOST=$DB_HOST" >> .env
echo "DB_NAME=$DB_NAME" >> .env
echo "DB_USER=$DB_USER" >> .env
echo "DB_PASS=$DB_PASS" >> .env

# Connect to MySQL and create a new database (you might want to add specific SQL commands here)
mysql -h $DB_HOST -P 3306 -u $DB_USER -p$DB_PASS
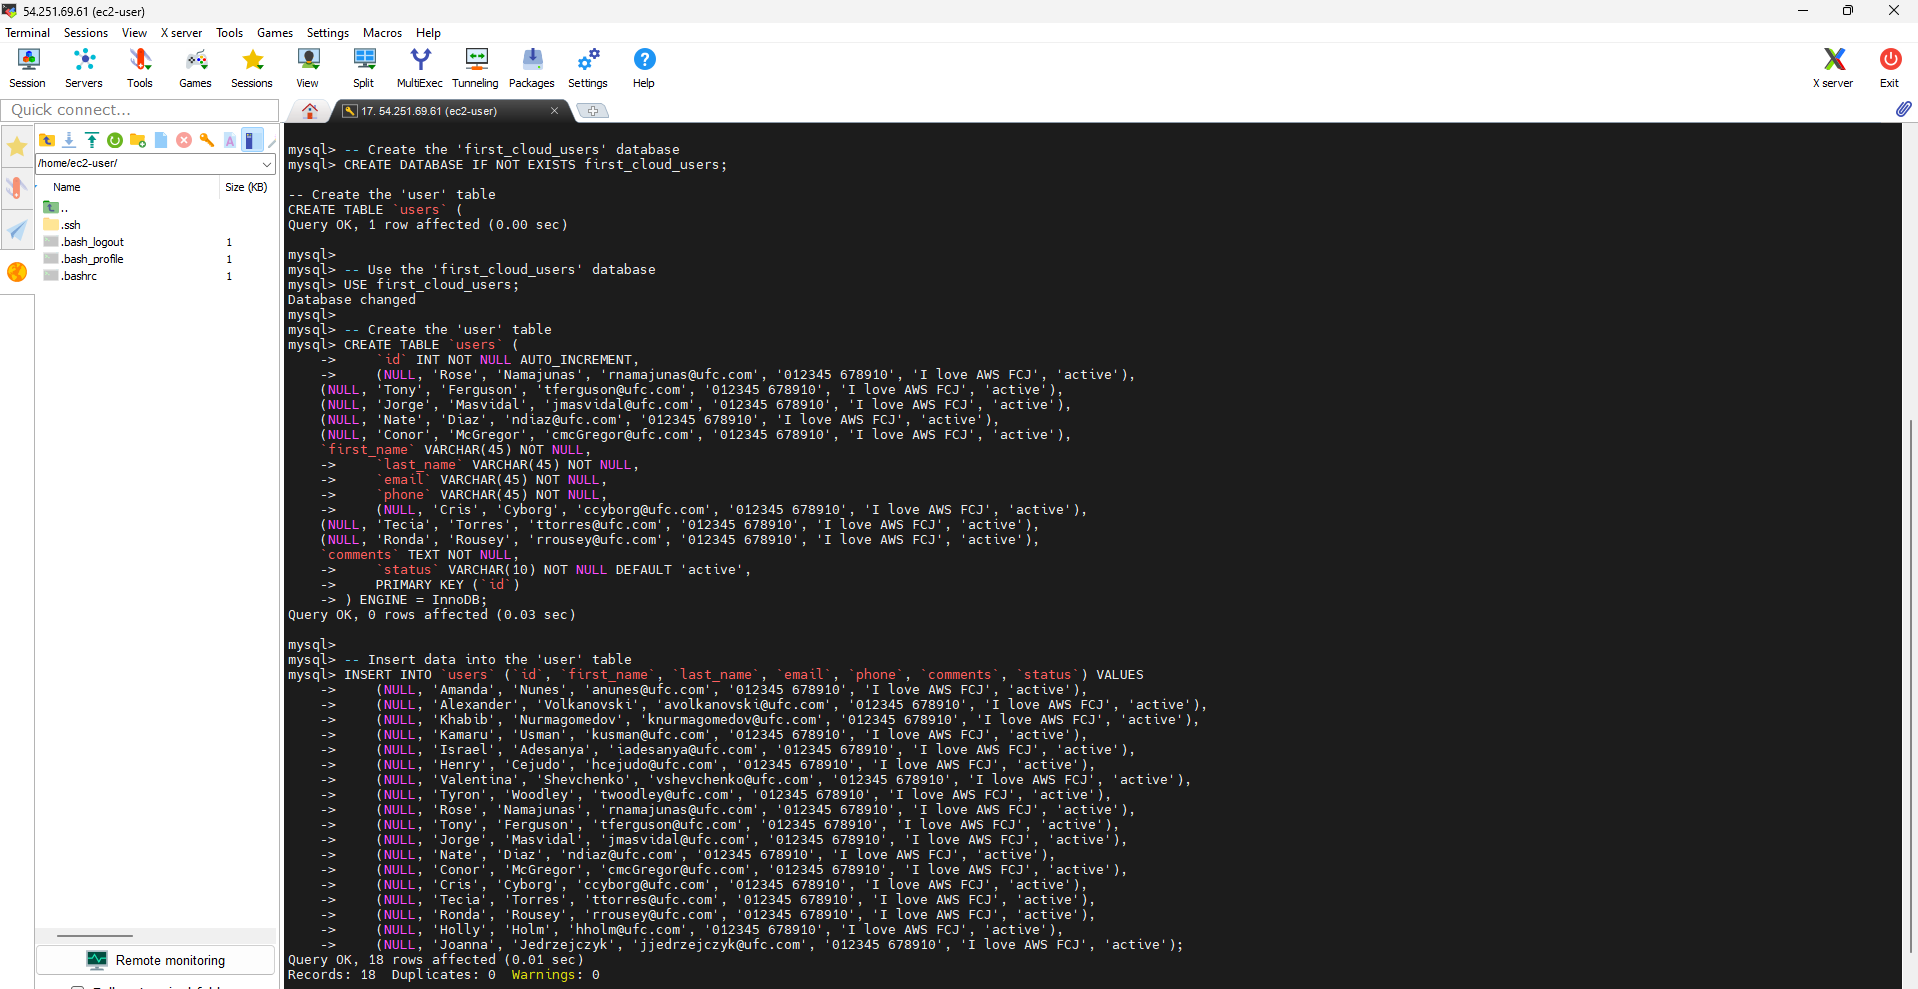
- Create Database and Table in AWS RDS
After successfully connecting to RDS (Relational Database Service) on AWS, we can create a new database and define a table in it using the following SQL script.
Create Database
First, we will create a new database if it does not exist yet. Use the following command:
CREATE DATABASE IF NOT EXISTS first_cloud_users;
This command checks whether the database “first_cloud_users” exists or not. If it does not exist, it will create a new database named “first_cloud_users”.
Using Database
Next, we use the “first_cloud_users” database using the command:
USE first_cloud_users;
This command indicates that all SQL commands will then be executed in the “first_cloud_users” database.
Create Table “user”
We have created the database and used it. Now, we will define a “user” table in this database using the following SQL script:
CREATE TABLE `user`
(
    `id` INT NOT NULL AUTO_INCREMENT PRIMARY KEY,
    `first_name` VARCHAR(45) NOT NULL,
    `last_name` VARCHAR(45) NOT NULL,
    `email` VARCHAR(100) NOT NULL UNIQUE,
    `phone` VARCHAR(15) NOT NULL,
    `comments` TEXT NOT NULL,
    `status` ENUM('active', 'inactive') NOT NULL DEFAULT 'active'
) ENGINE = InnoDB;
This command defines the structure of the “user” table with columns such as “id”, “first_name”, “last_name”, “email”, “phone”, “comments”, and “status”. These columns represent information about the user, and the “id” column is set as the auto-incrementing primary key.
Add Data to Table “user”
Finally, we can add data to the “user” table using the INSERT INTO command. Here is an example that adds some records to a table:
INSERT INTO `user`
(`first_name`, `last_name`, `email`, `phone`, `comments`, `status`)
VALUES
('Amanda', 'Nunes', 'anunes@ufc.com', '012345 678910', 'I love AWS FCJ', 'active'),
('Alexander', 'Volkanovski', 'avolkanovski@ufc.com', '012345 678910', 'I love AWS FCJ', 'active'),
('Khabib', 'Nurmagomedov', 'knurmagomedov@ufc.com', '012345 678910', 'I love AWS FCJ', 'active'),
('Kamaru', 'Usman', 'kusman@ufc.com', '012345 678910', 'I love AWS FCJ', 'active'),
('Israel', 'Adesanya', 'iadesanya@ufc.com', '012345 678910', 'I love AWS FCJ', 'active'),
('Henry', 'Cejudo', 'hcejudo@ufc.com', '012345 678910', 'I love AWS FCJ', 'active'),
('Valentina', 'Shevchenko', 'vshevchenko@ufc.com', '012345 678910', 'I love AWS FCJ', 'active'),
('Tyron', 'Woodley', 'twoodley@ufc.com', '012345 678910', 'I love AWS FCJ', 'active'),
('Rose', 'Namajunas', 'rnamajunas@ufc.com', '012345 678910', 'I love AWS FCJ', 'active'),
('Tony', 'Ferguson', 'tferguson@ufc.com', '012345 678910', 'I love AWS FCJ', 'active'),
('Jorge', 'Masvidal', 'jmasvidal@ufc.com', '012345 678910', 'I love AWS FCJ', 'active'),
('Nate', 'Diaz', 'ndiaz@ufc.com', '012345 678910', 'I love AWS FCJ', 'active'),
('Conor', 'McGregor', 'cmcGregor@ufc.com', '012345 678910', 'I love AWS FCJ', 'active'),
('Cris', 'Cyborg', 'ccyborg@ufc.com', '012345 678910', 'I love AWS FCJ', 'active'),
('Tecia', 'Torres', 'ttorres@ufc.com', '012345 678910', 'I love AWS FCJ', 'active'),
('Ronda', 'Rousey', 'rrousey@ufc.com', '012345 678910', 'I love AWS FCJ', 'active'),
('Holly', 'Holm', 'hholm@ufc.com', '012345 678910', 'I love AWS FCJ', 'active'),
('Joanna', 'Jedrzejczyk', 'jjedrzejczyk@ufc.com', '012345 678910', 'I love AWS FCJ', 'active');
This command adds user records to the “user” table with information such as name, email, phone number, comments, and a default status of “active”.
Here’s how to create and manage a database and tables in AWS RDS using SQL script.
some SQL commands to check database information in a database management system (DBMS) such as MySQL or PostgreSQL:
Display a list of all databases:
SHOW DATABASES;
This command will list all available databases in the system.
Choose a specific database to work with:
USE database_name;
This command will move you from your current database to a database named “database_name”. After using this command, all subsequent SQL commands will apply to this database.
Display tables in the current database:
SHOW TABLES;
This command will list all the tables present in the current database.
Shows the structure of a specific table:
DESCRIBE table_name;
This command will tell you the structure of the table named “table_name”, including the column name, data type, and other column properties.
Display information about database size:
SELECT table_schema "Database Name", SUM(data_length + index_length) / 1024 / 1024 "Database Size (MB)"
FROM information_schema.tables
GROUP BY table_schema;
This command will display information about the size of the databases in the system, in Megabytes (MB).
Remember to replace “database_name” and “table_name” with the specific names of the database and table you want to test. These commands help you manage and examine information about your database.
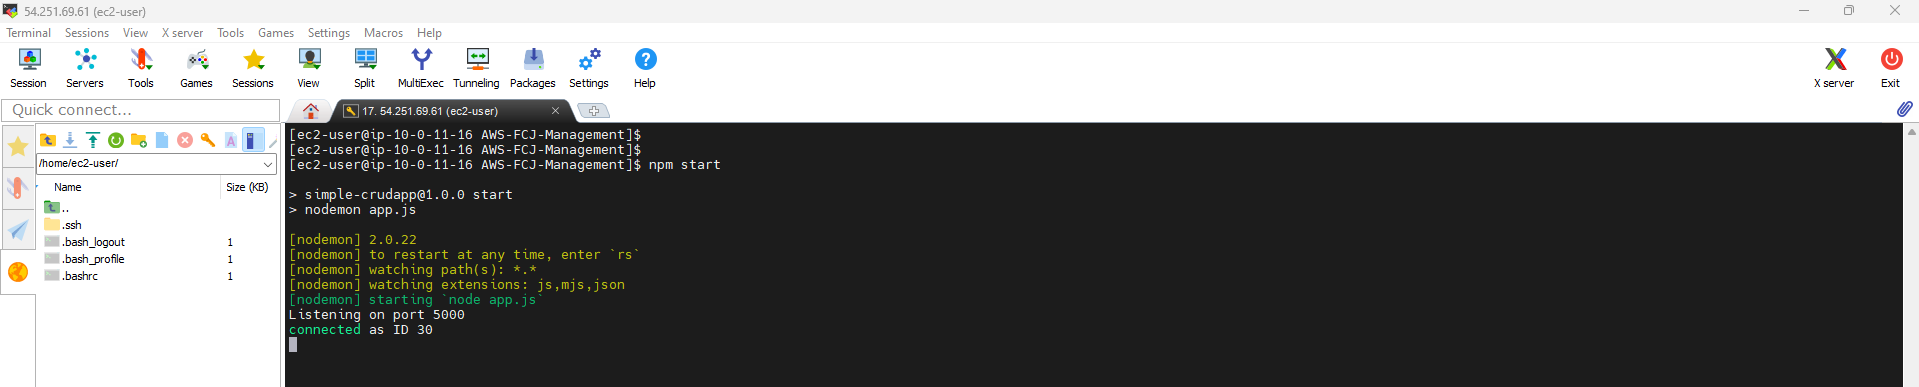
- Once you are in the application directory, run the following command to start the application using npm start:
npm start
- Check EC2 Instance status: Make sure your EC2 Instance is running and functioning properly.
-
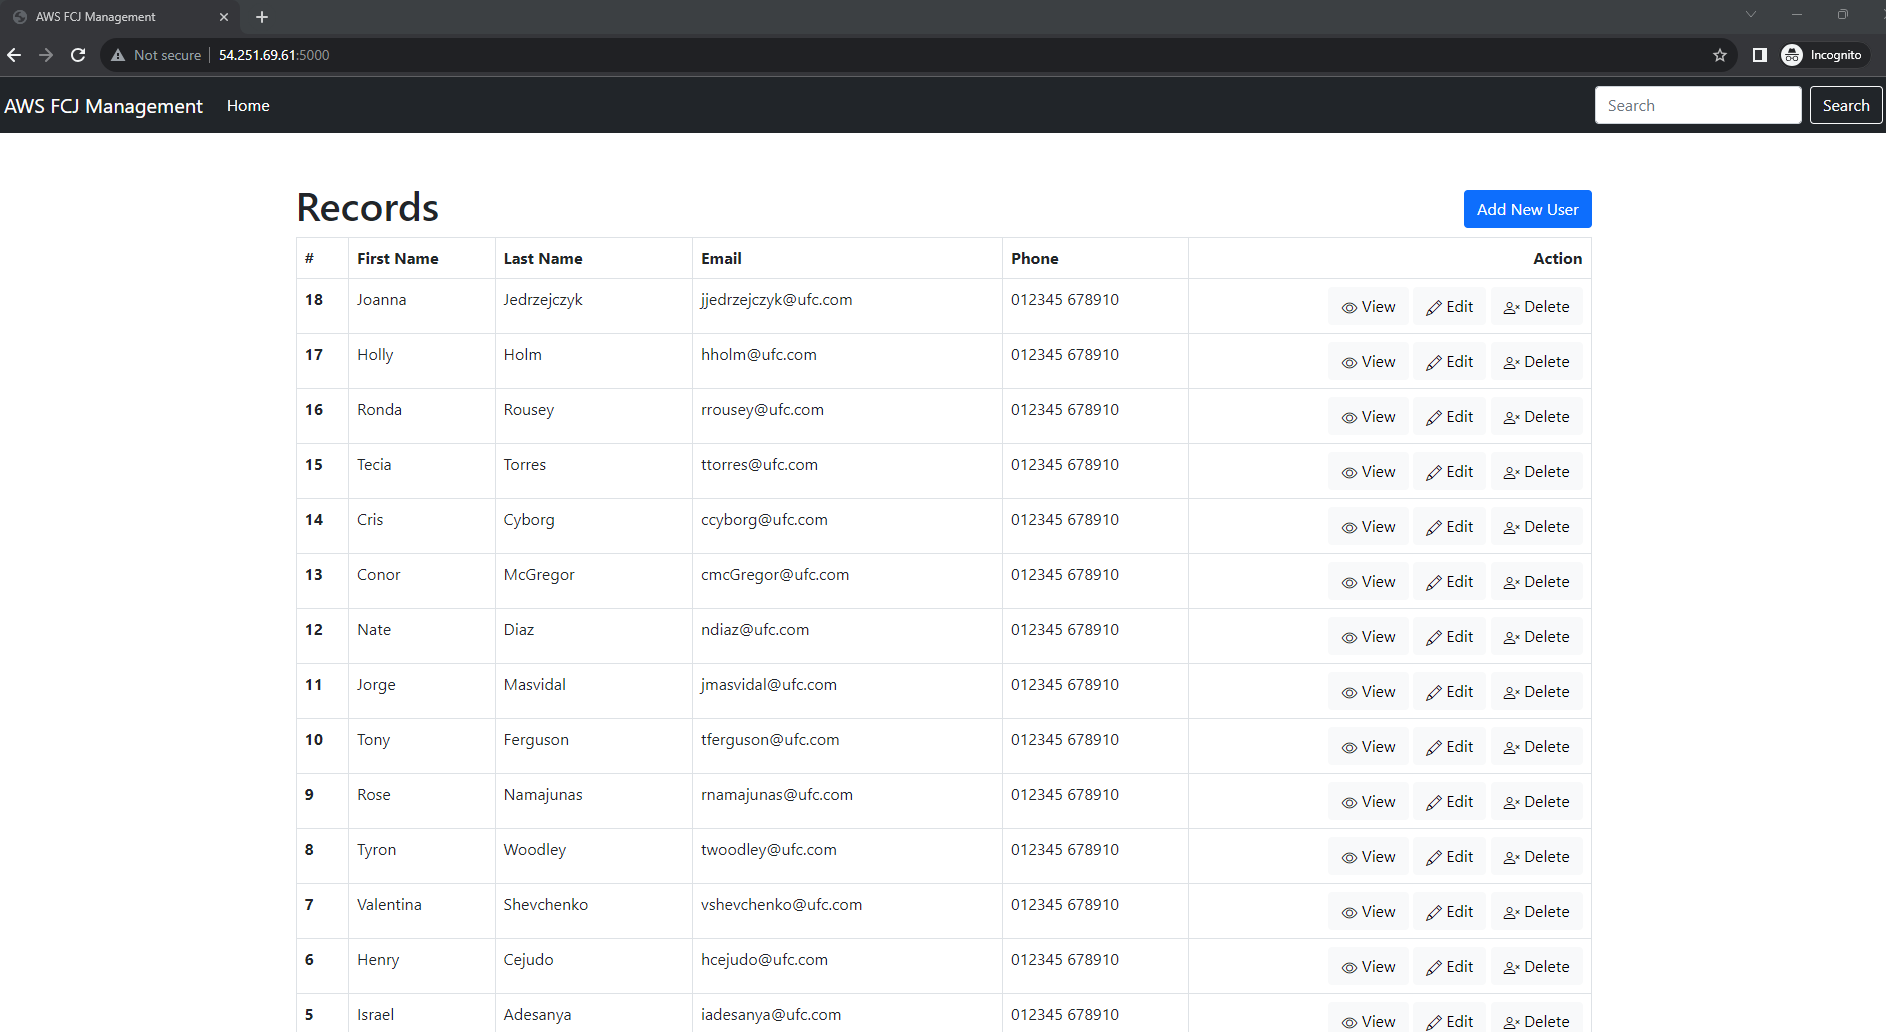
Test the application in the browser: Open a web browser and enter the IP address or domain name of the EC2 Instance, followed by port 5000 (for example:
http://<IP address or domain name> :5000). This will make a connection to your application running on port 5000. -
Test results: The browser will display your application if everything is configured correctly and the EC2 Instance is working. If not, you need to recheck the previous steps to identify the problem and fix it.
http://<IP address or domain name>:5000
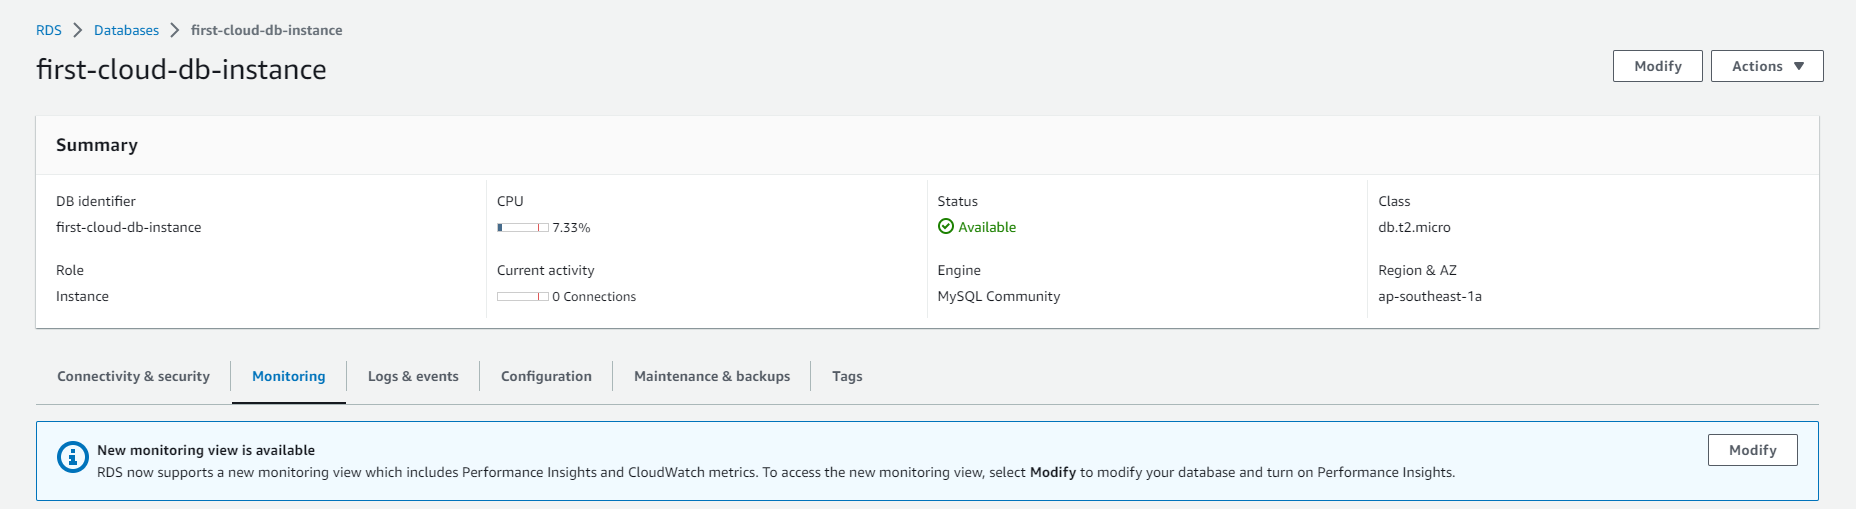
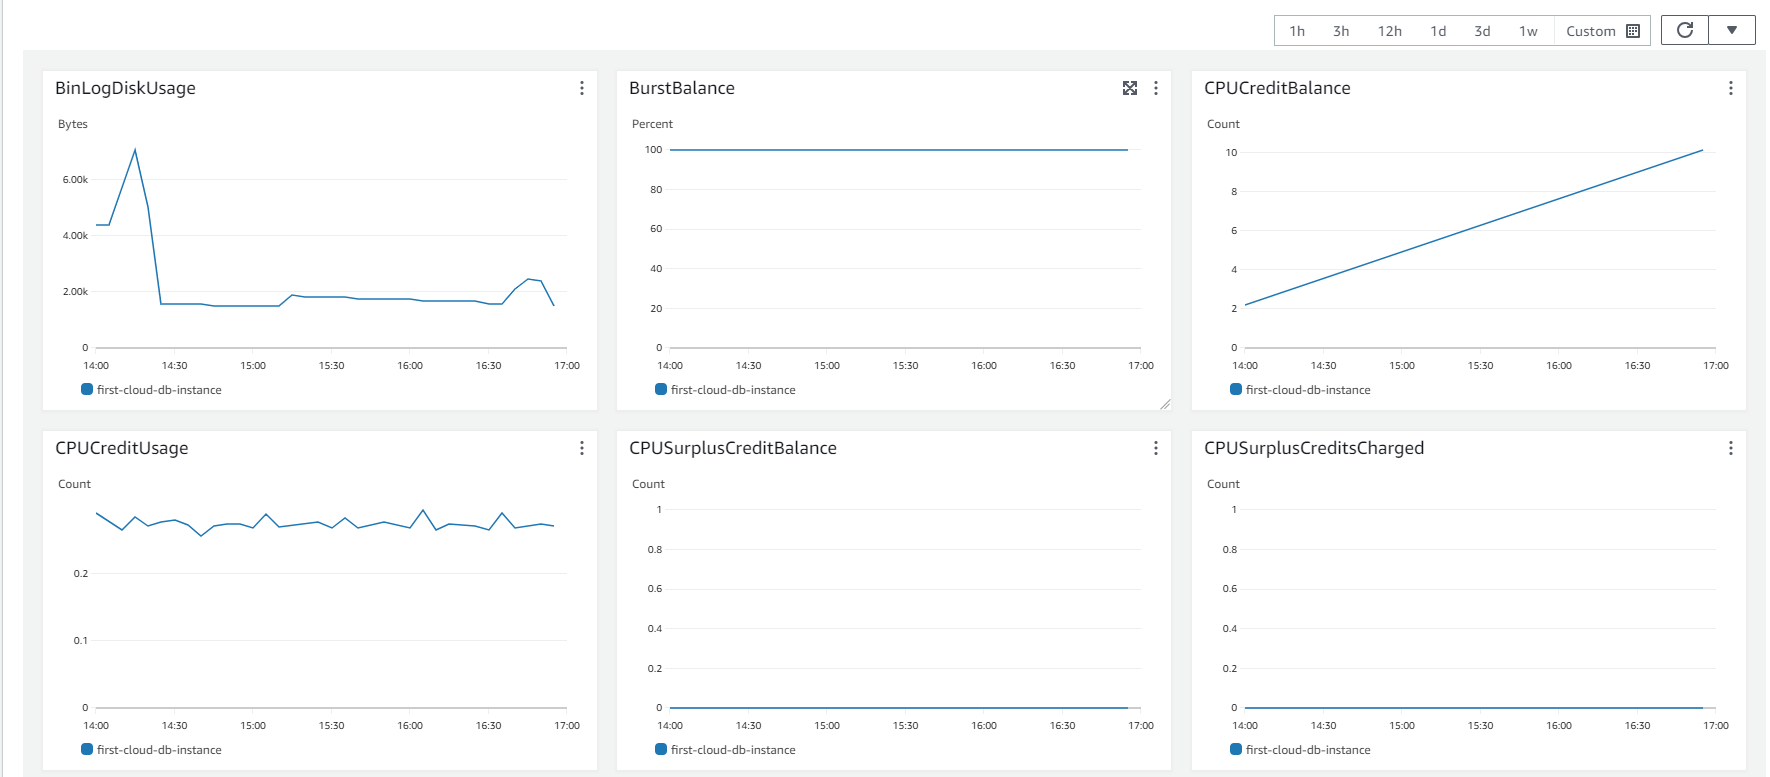
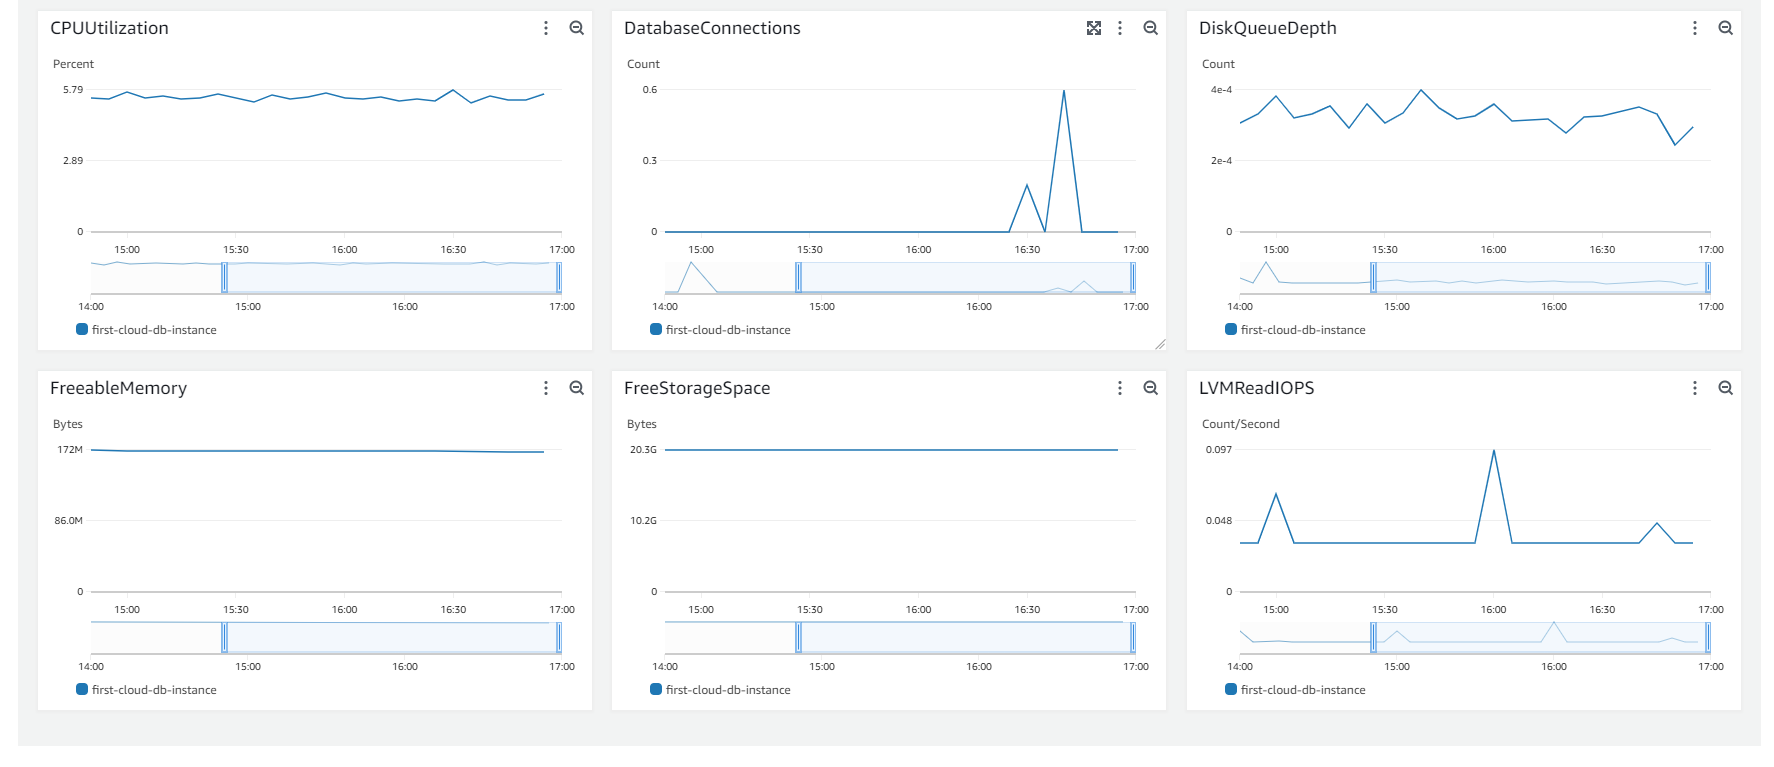
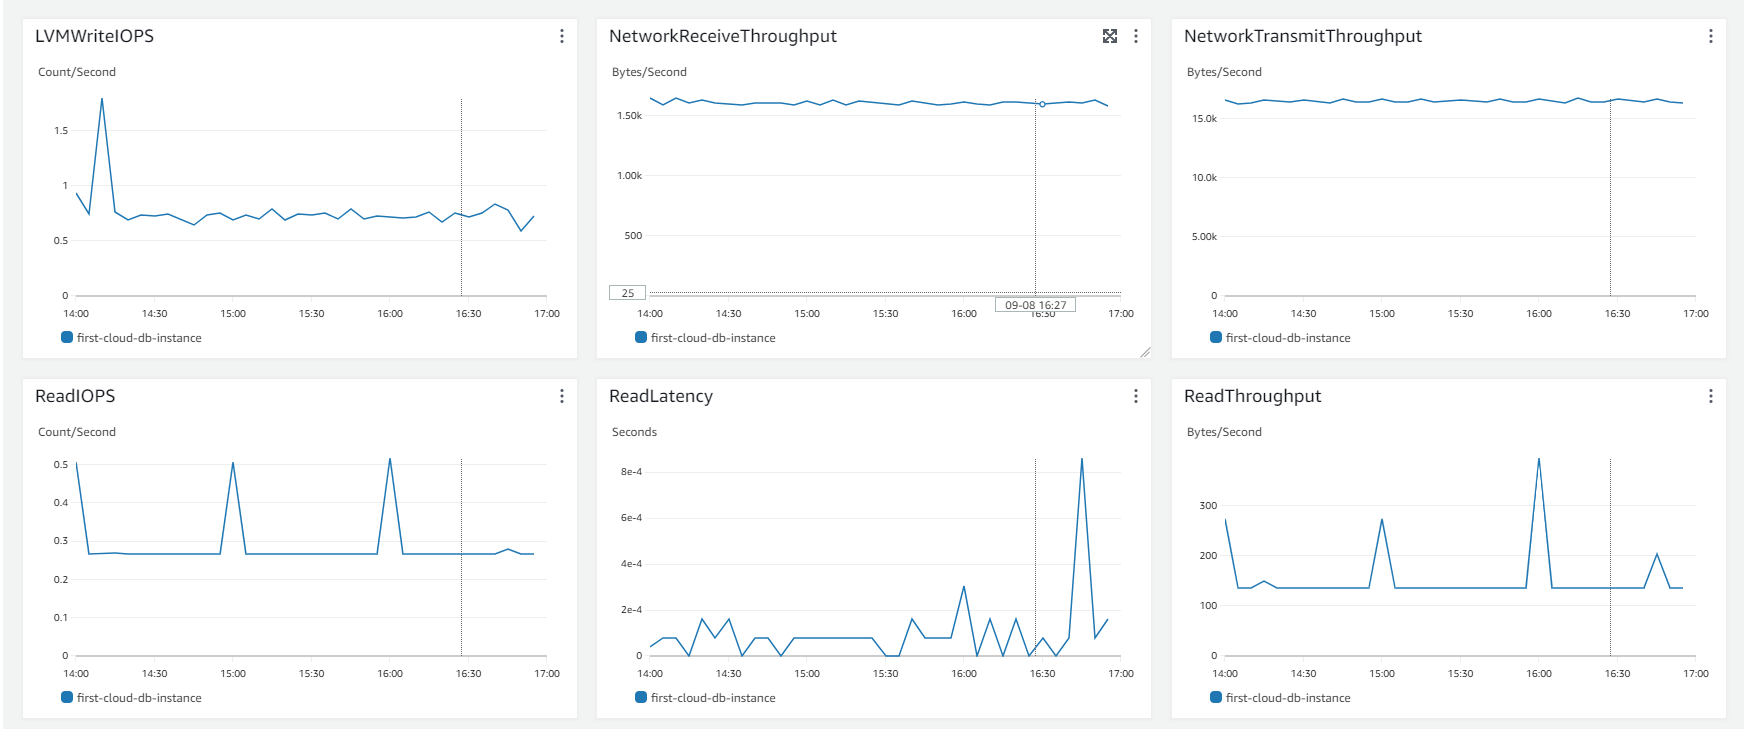
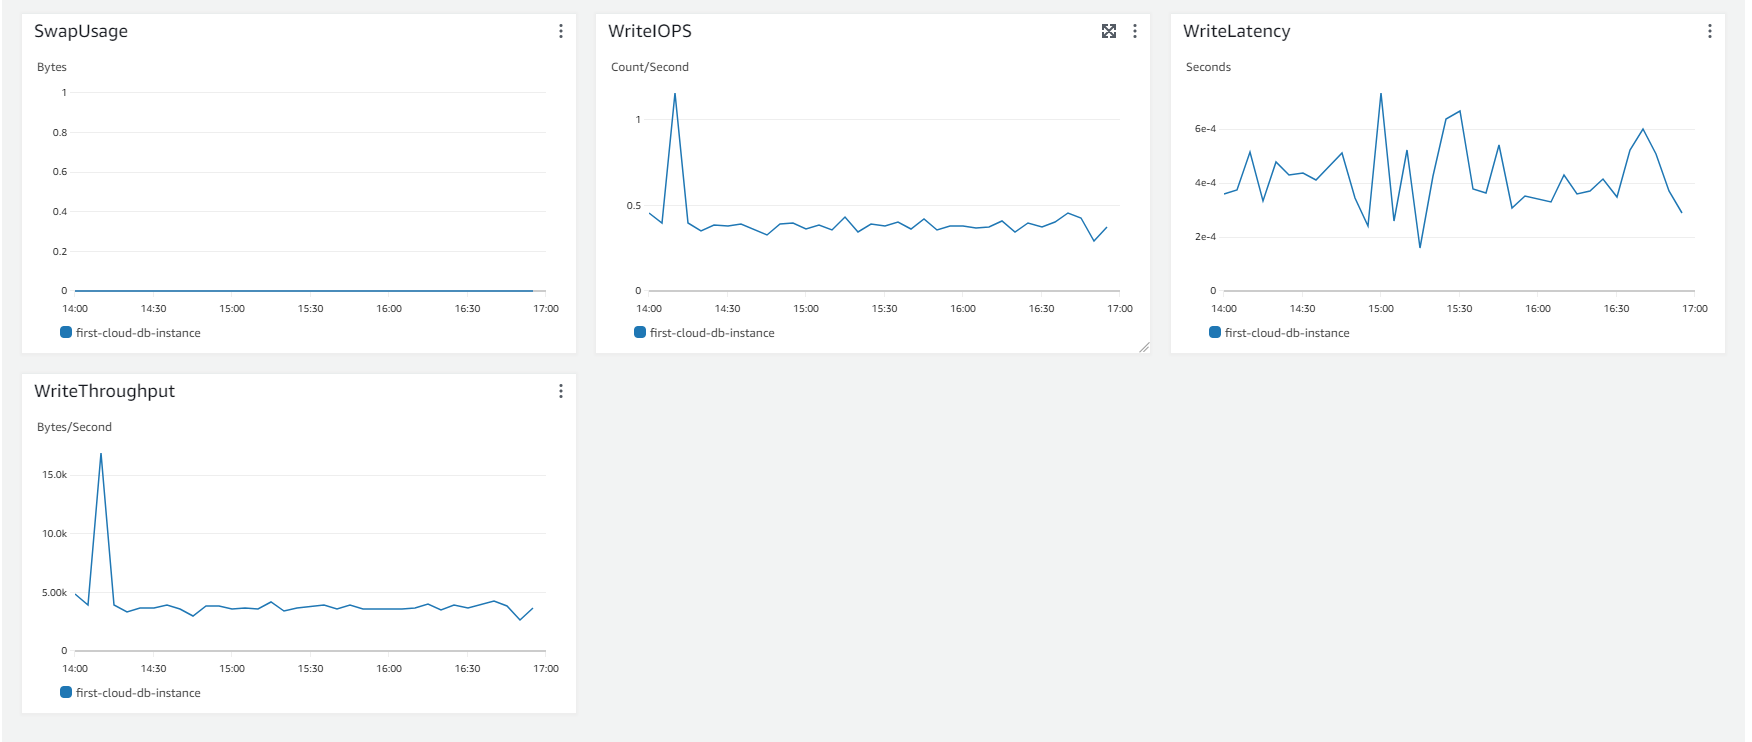
Monitoring AWS RDS
-
On the AWS RDS interface, you can perform the following steps to monitor:
- Select Databases.
- Choose the DB instance you’ve created.
- Select Monitoring.
-
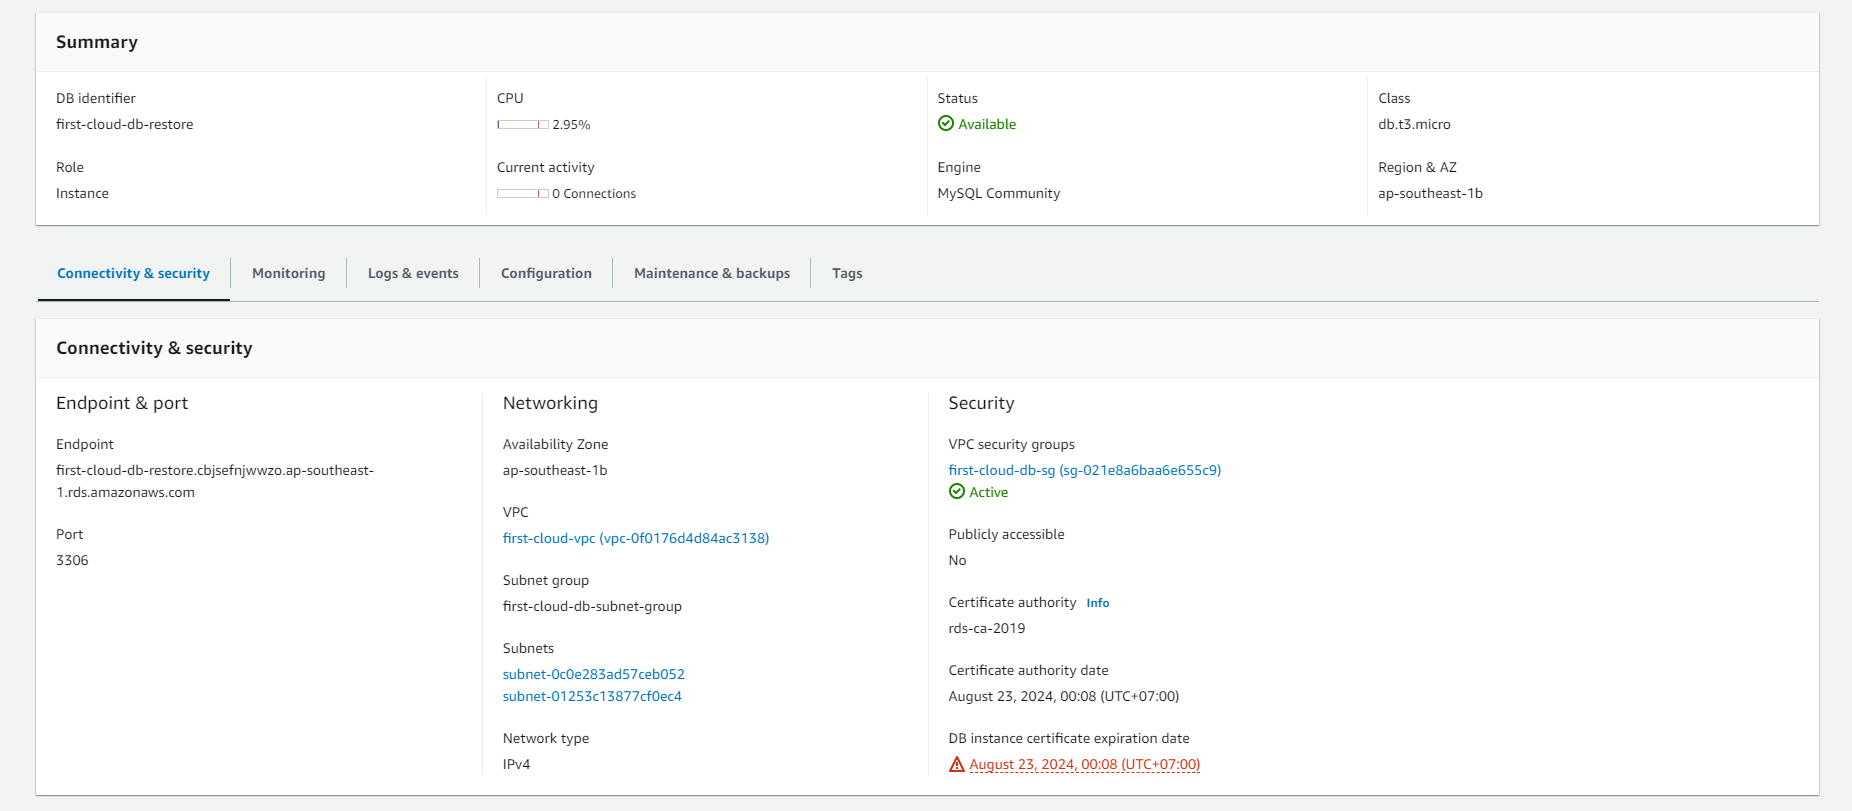
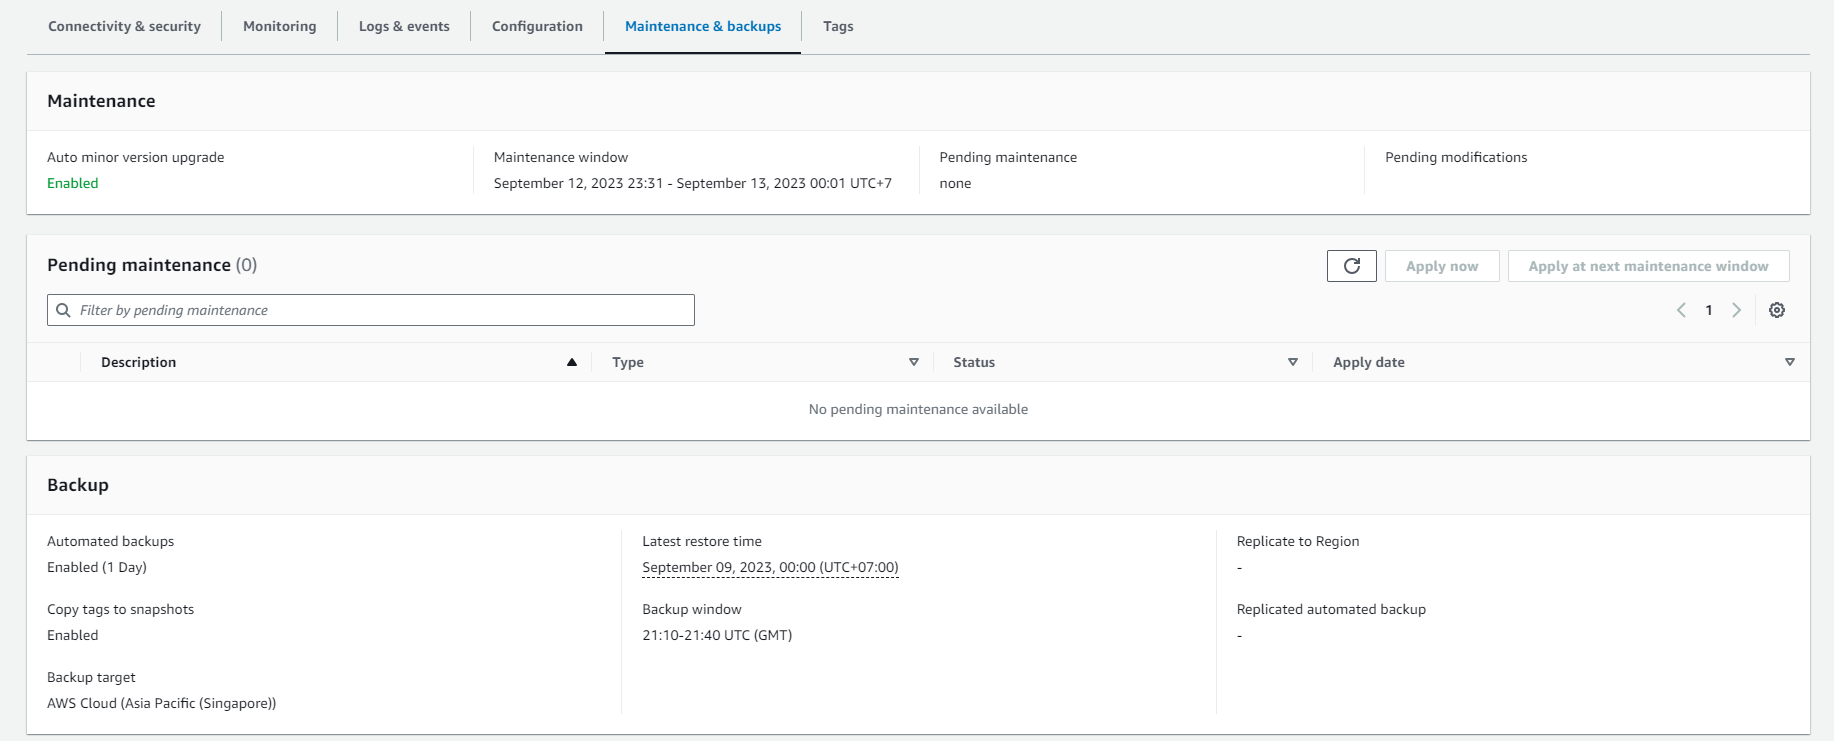
To view information about backups of the DB instance in AWS RDS, follow these steps:
- Log in to the AWS Management Console.
- Select the “Amazon RDS” service from the list of services.
- In the RDS dashboard, choose the DB instance you want to check.
- On the DB instance management page, navigate to the “Maintenance & backups” tab.
- Here, you can view information about automatic and manual backups. You can also configure and manage backup settings.
-
View Snapshot information.

-
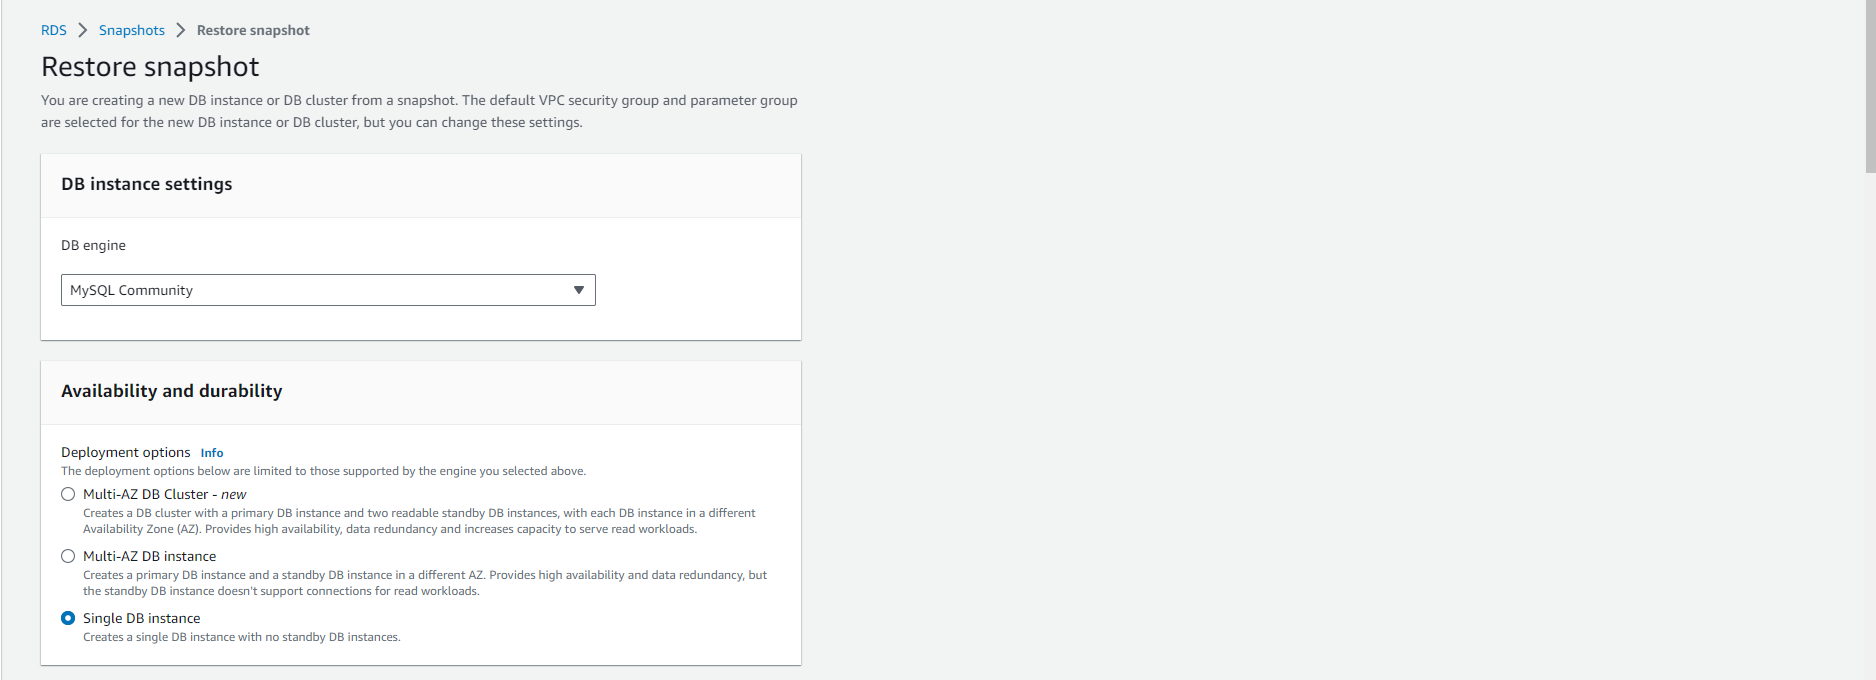
Choose the DB snapshot you want to restore.
- In the Actions section, select Restore snapshot.

-
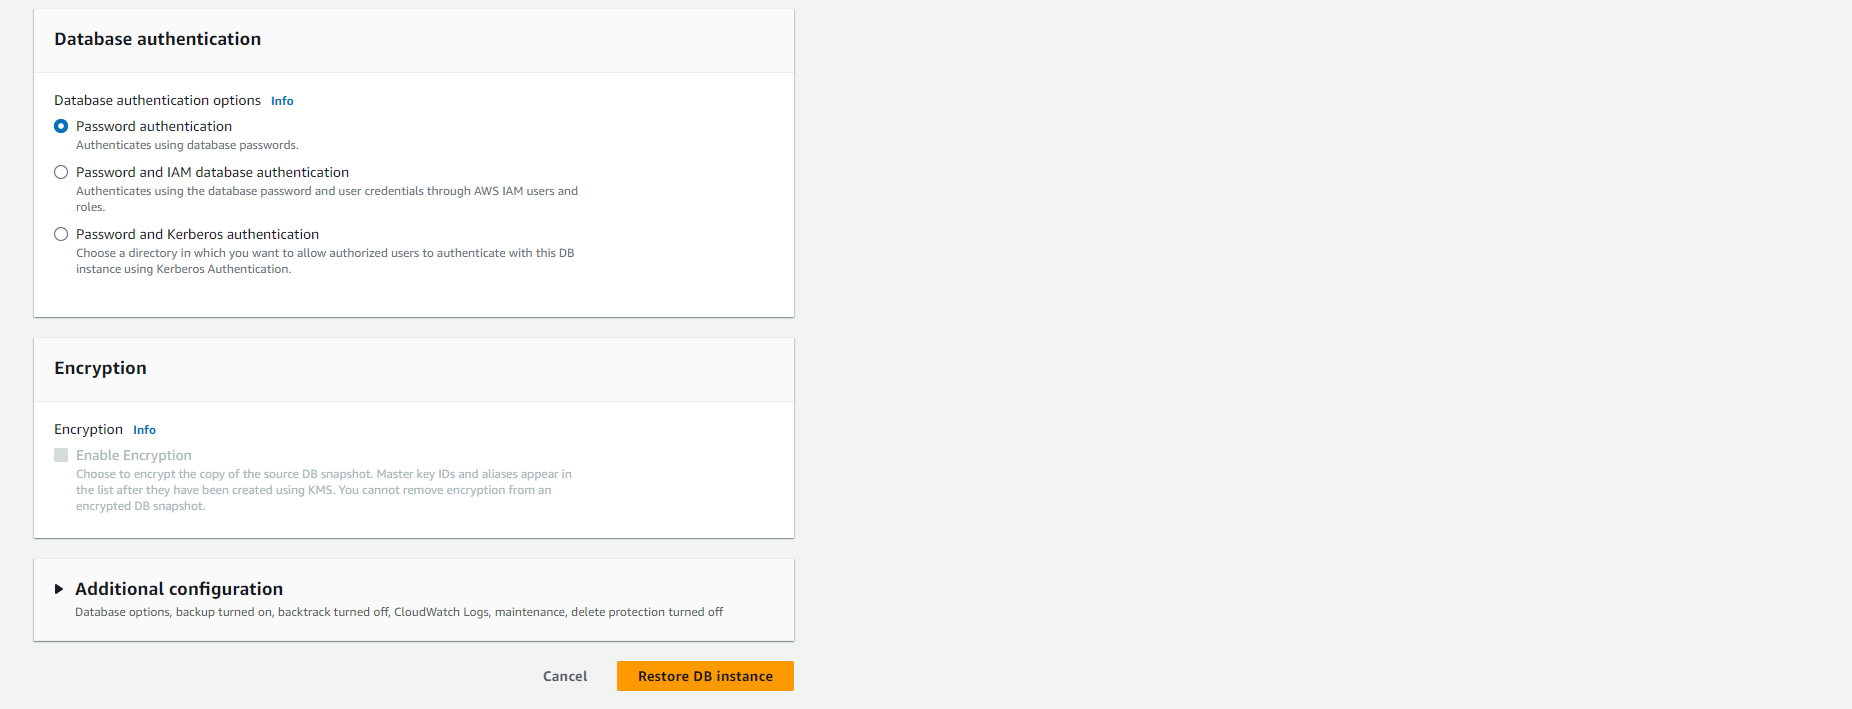
On the Restore snapshot page, enter a name for the DB instance you want to restore in the DB instance identifier field.
-
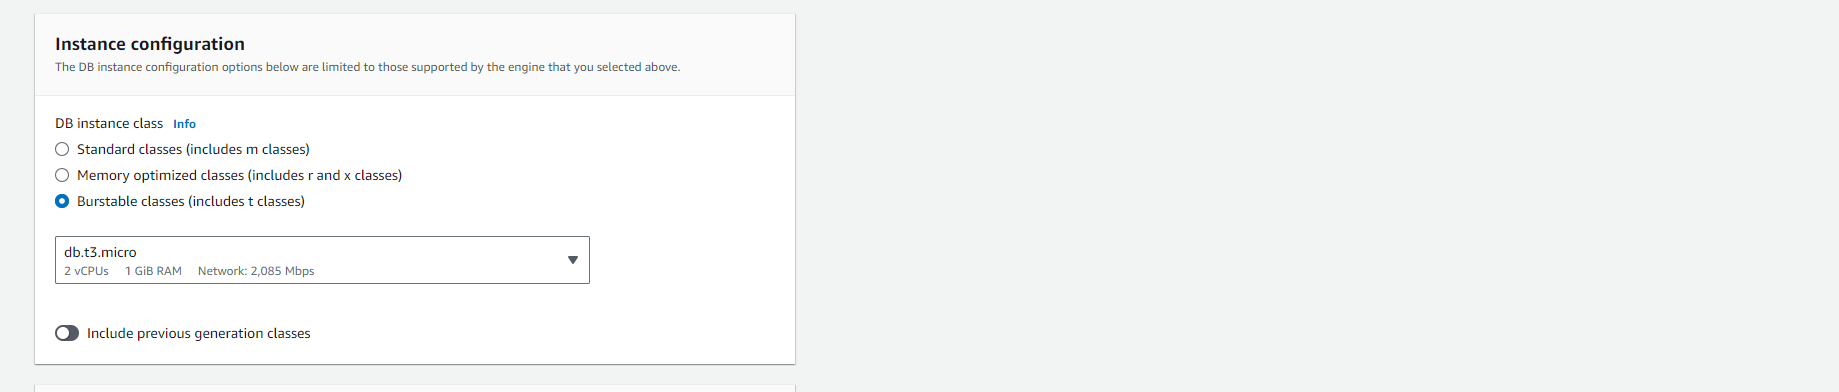
Select other settings such as allocated memory size.
-
For more information on each setting, refer to Settings for DB instances.
-
Finally, select Restore DB instance.

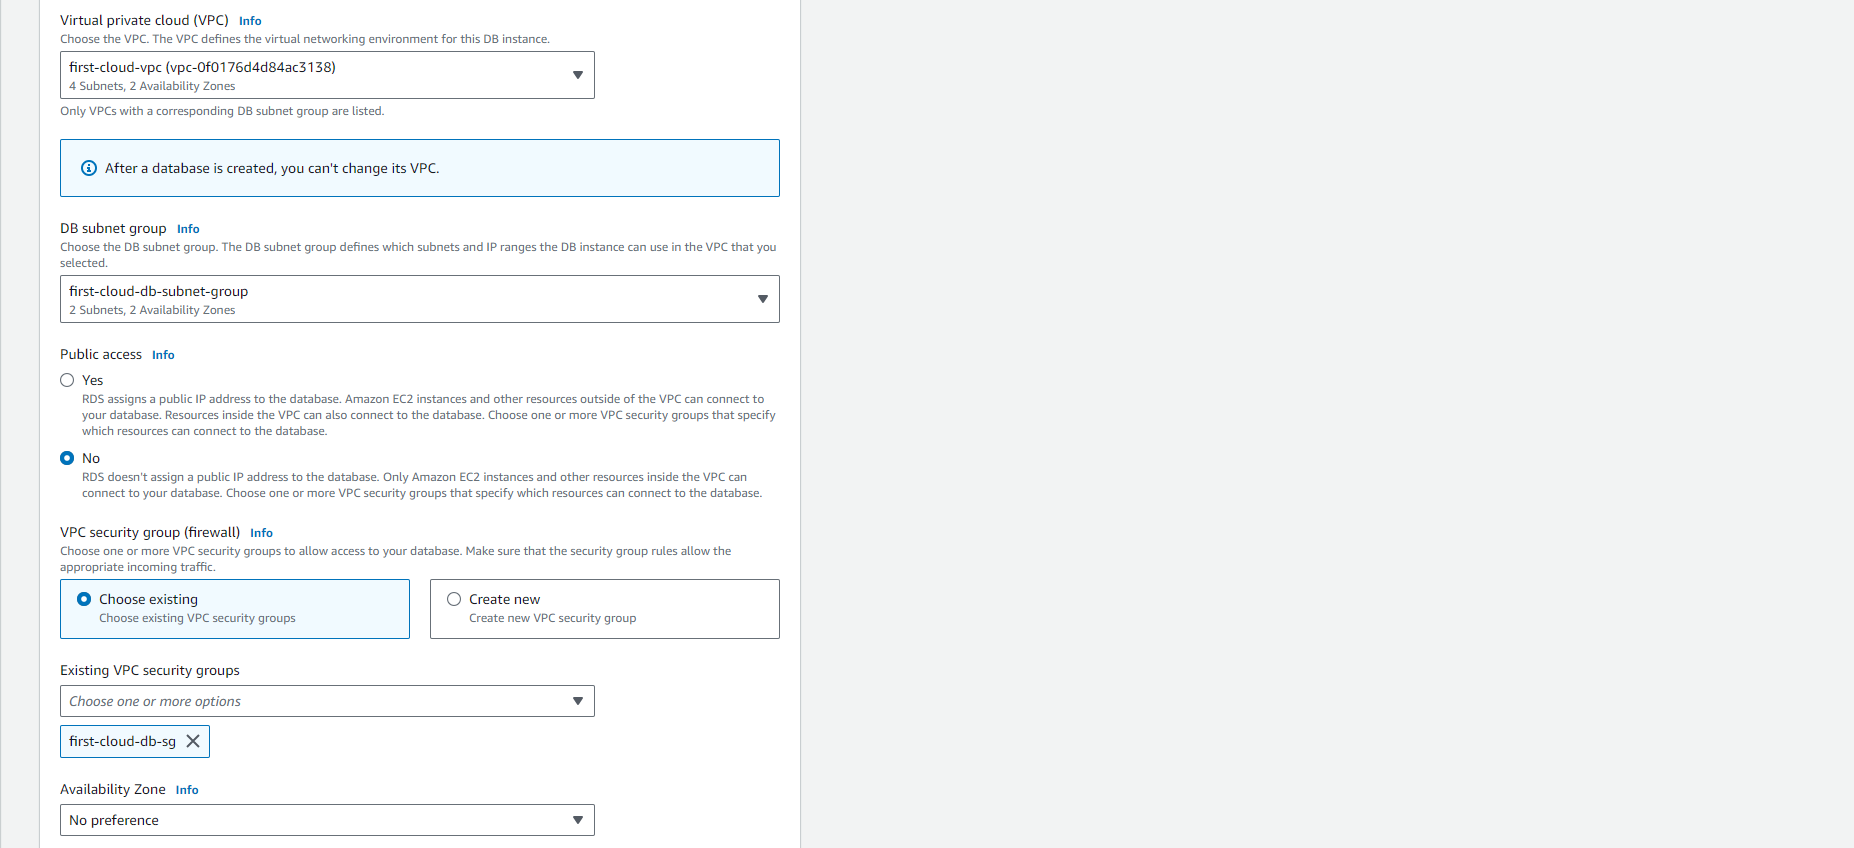
-
-
Complete the restore snapshot process.
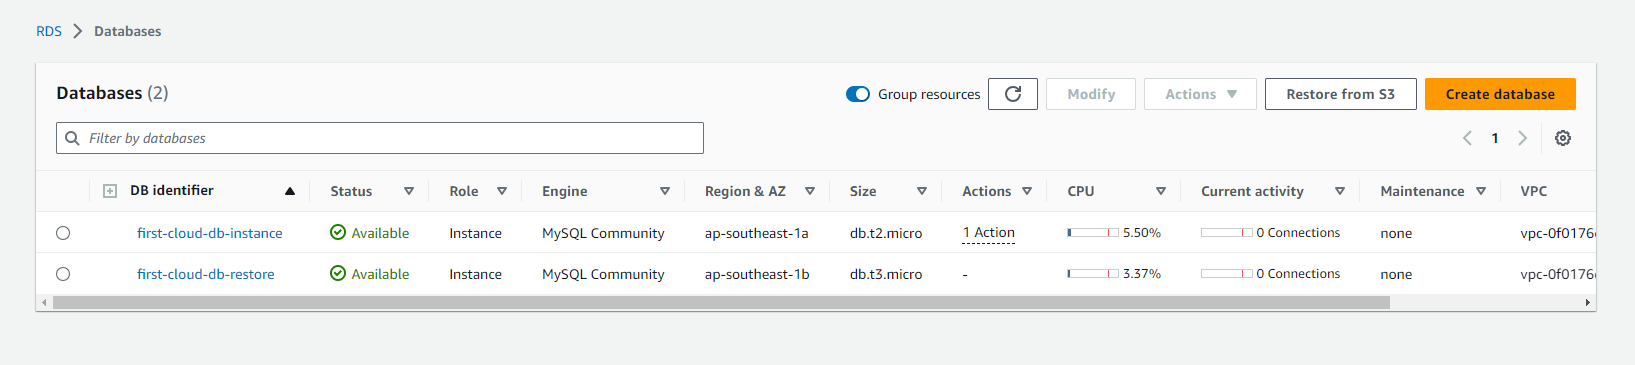
-
Check the restored database instance.