Create RDS database instance
Install Git on Amazon EC2 2023
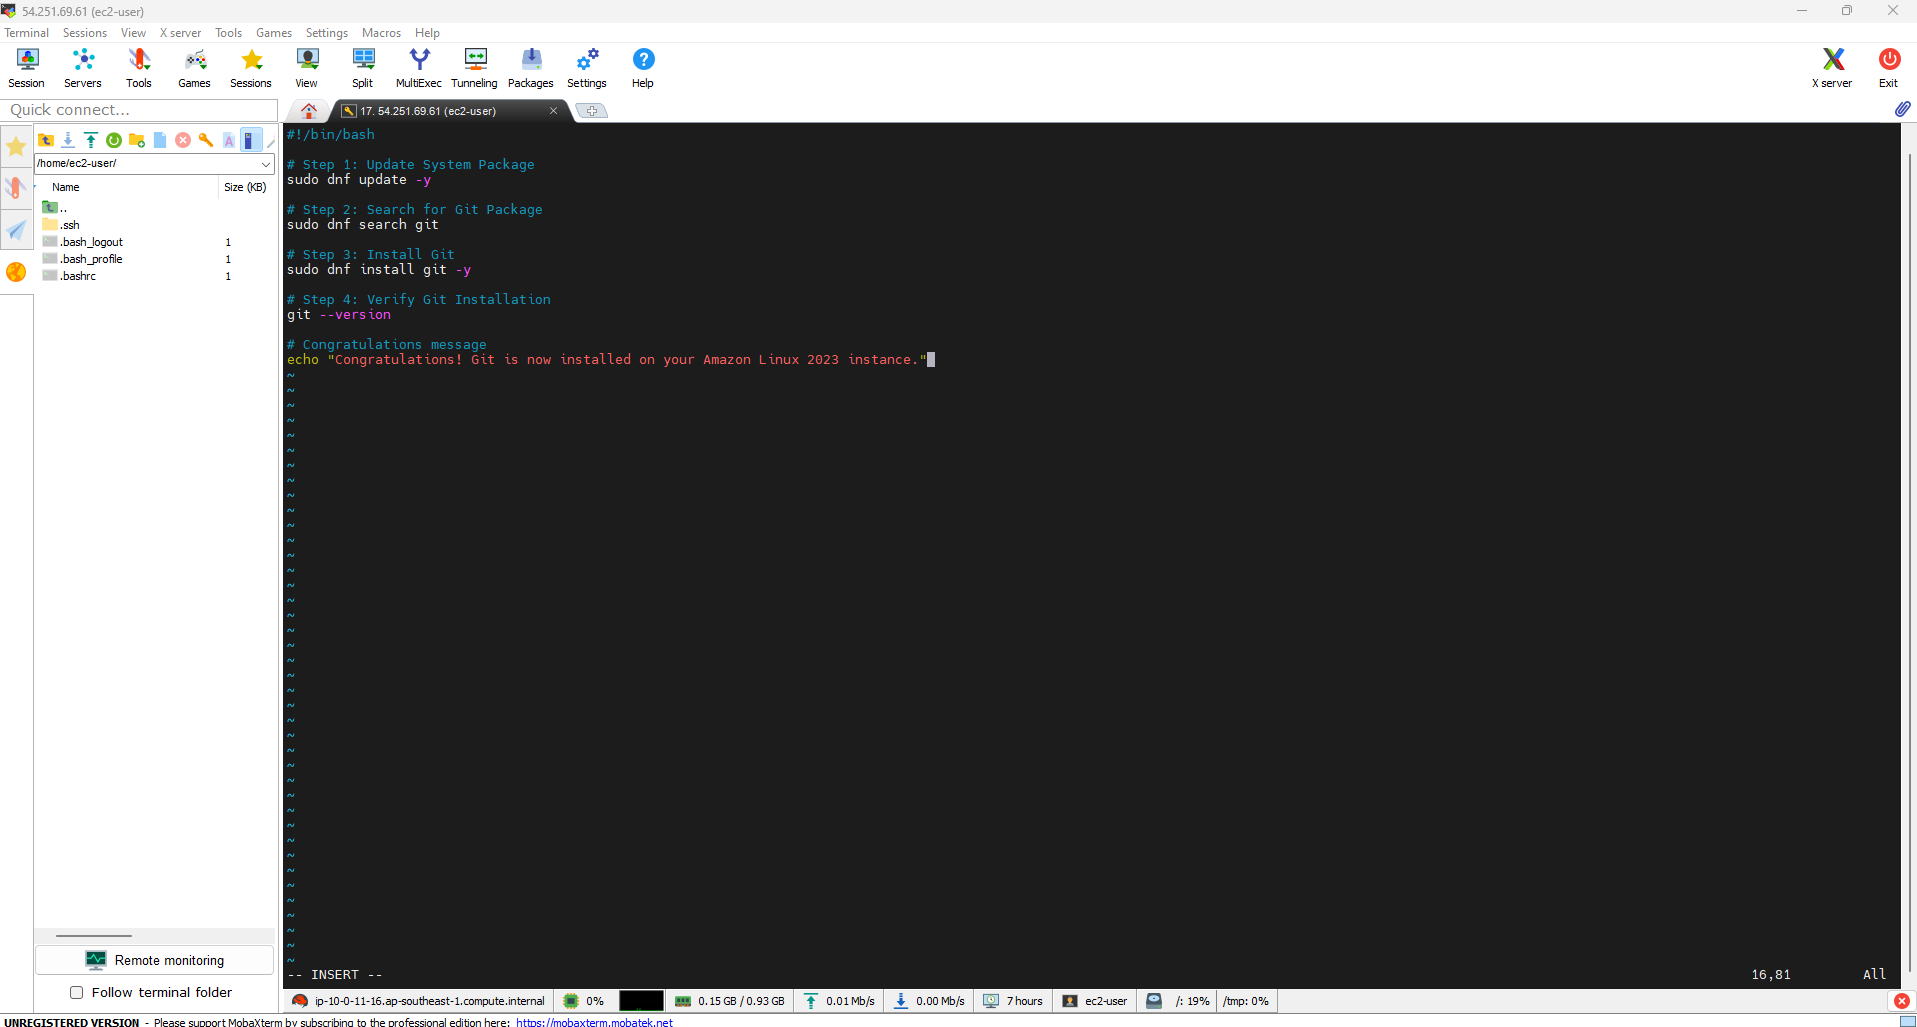
Below are instructions for installing Git on an Amazon EC2 virtual machine running Amazon Linux 2023 using basic steps.
- Update System Packages
First, update your system packages to make sure you’re using the latest version:
sudo dnf update -y
- Find Git Packages. Use the following command to find Git packages in the repository:
sudo dnf search git
- Install Git. Once you find the Git package, you can install it with the following command:
sudo dnf install git -y
- Verify Git Settings. Finally, check the Git version was successfully installed:
git --version
If you see the Git version appear, it means the installation is complete.
- Install Node.js on Amazon EC2 Linux 2023
- Below is a Bash script to install Node.js on Amazon EC2 Linux:
#!/bin/bash

# Color for formatting
GREEN='\033[0;32m'
NC='\033[0m' # Colorless

# Check if NVM is installed
if ! command -v nvm &> /dev/null; then
  # Step 1: Install nvm
  curl -o- https://raw.githubusercontent.com/nvm-sh/nvm/v0.39.0/install.sh | bash
  source ~/.nvm/nvm.sh
fi

# Verify nvm installation
nvm --version

# Install the LTS version of Node.js
nvm install --lts

# Use the installed LTS version
nvm use --lts

# Verify Node.js and npm installation
node -v
npm -v

# Step 4: Create package.json file (if it doesn't exist yet)
if [ ! -f package.json ]; then
  npm init -y
  echo -e **${GREEN}Created file package.json.${NC}**
fi

#Step 5: Install necessary npm packages
echo -e **Installing required npm packages...**
npm install express dotenv express-handlebars body-parser mysql

#Step 6: Install nodemon as a development dependency
echo -e **Installing nodemon as a development dependency...**
npm install --save-dev nodemon
npm install -g nodemon

# Step 7: Add npm start script to package.json
if ! grep -q '**start**:' package.json; then
  npm set-script start **index.js** # Replace **your-app.js** with your entry point file
  echo -e **${GREEN}Added npm start script to package.json.${NC}**
fi

echo -e **${GREEN}Installation completed. You can now start building and running your Node.js application using 'npm start'.${NC}**


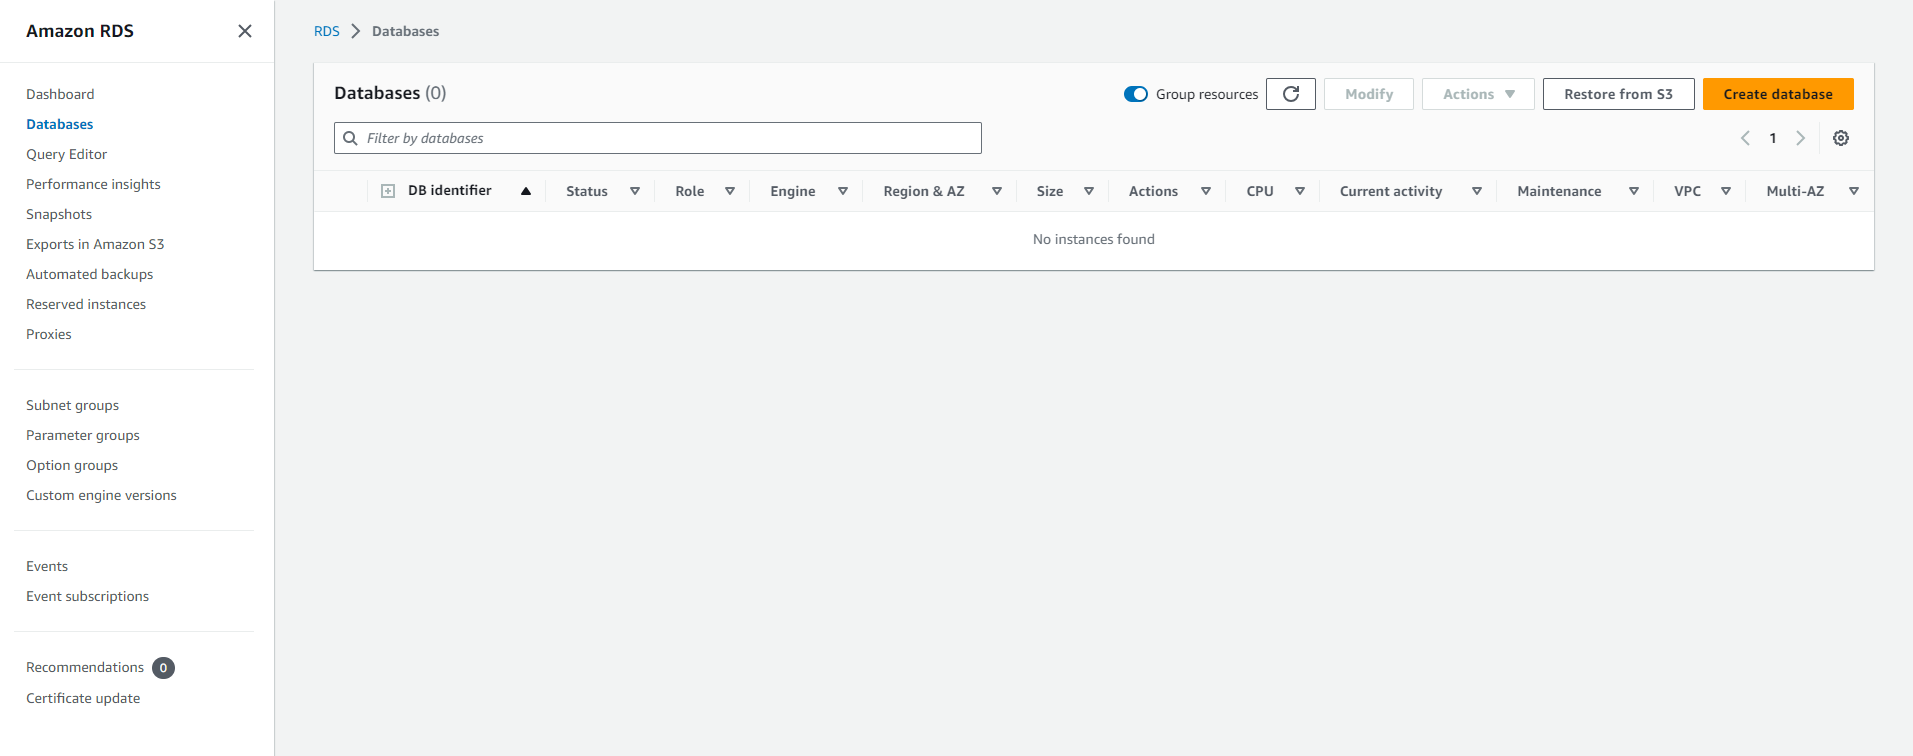
Creating a DB Instance on AWS
To create a DB Instance on AWS, you can use the AWS Management Console with the option of Easy create either enabled or disabled. When Easy create is enabled, you only need to specify the DB engine type, DB Instance size, and DB Instance identifier. Easy create uses default settings for other configuration options. When Easy create is disabled, you need to specify more configuration options when creating a database, including options for availability, security, backups, and maintenance.
Note: In the procedure below, the Standard create option is enabled, and Easy create is not. This procedure uses MySQL as an example.
For an example using Easy create to guide you in creating and connecting sample DB Instances for each engine, see Getting Started with Amazon RDS.
To create a DB Instance:
-
Sign in to the AWS Management Console and open the Amazon RDS console at https://console.aws.amazon.com/rds/.
-
In the upper right corner of the Amazon RDS console, select the AWS region where you want to create the DB Instance.
-
In the navigation pane, choose Databases.
-
Choose Create database, and then select Standard create.
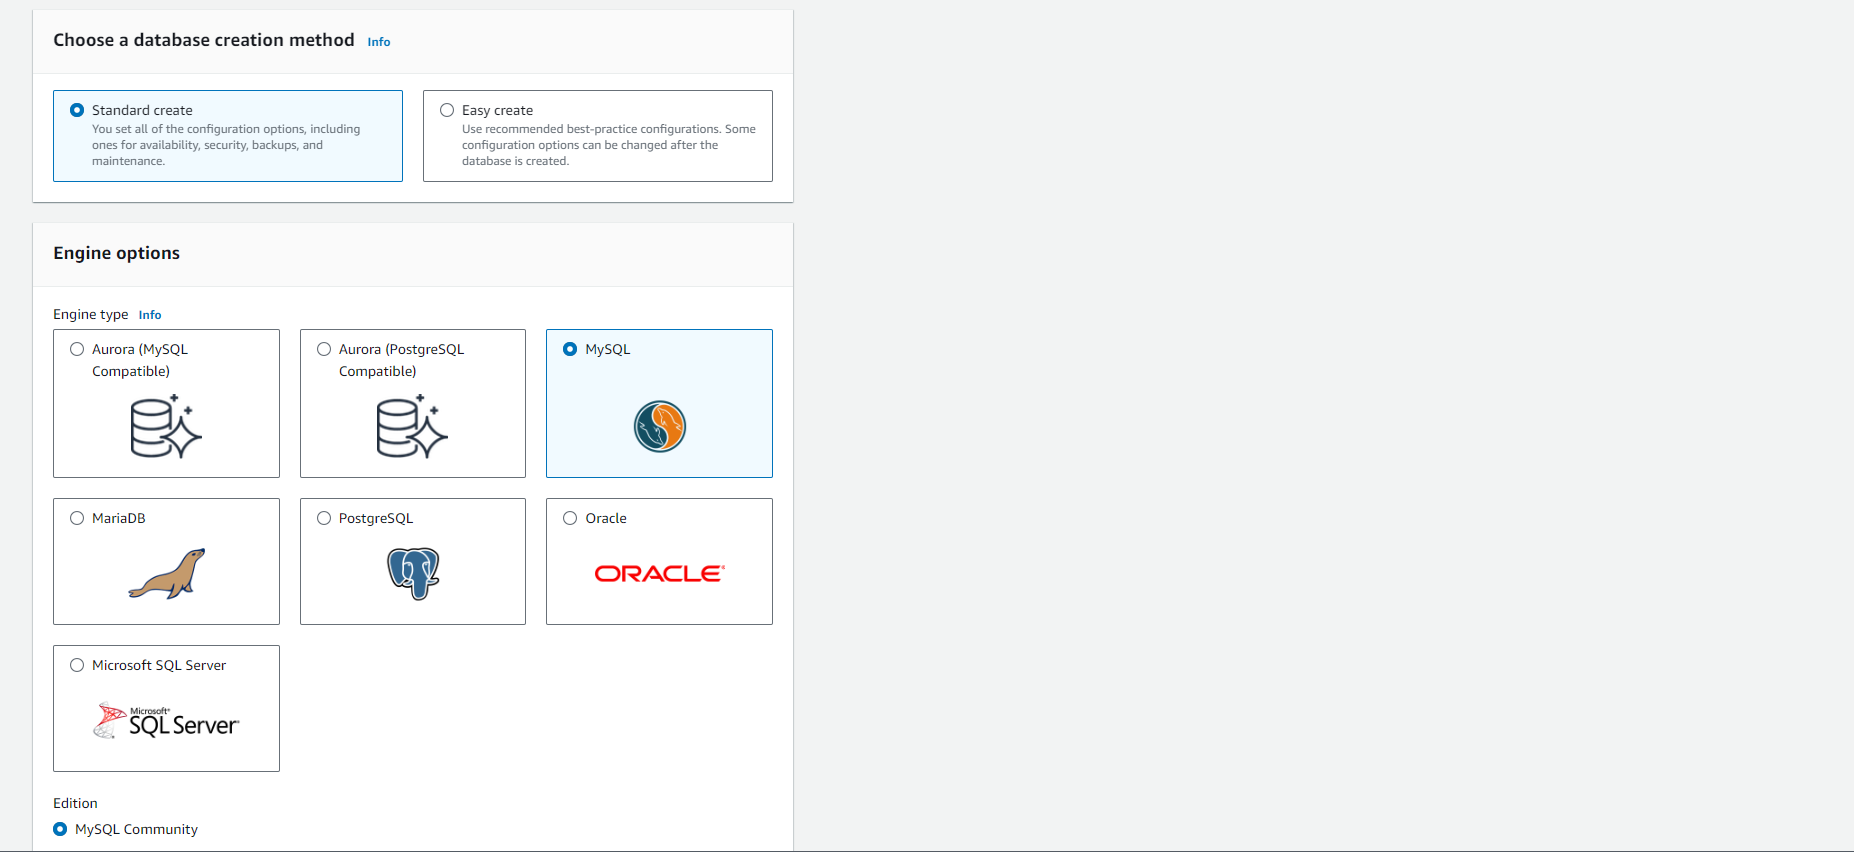
-
For Engine type, choose MariaDB, Microsoft SQL Server, MySQL, Oracle, or PostgreSQL. In this example, we are using Microsoft SQL Server.
-
For Database management type, if you are using Oracle or SQL Server, select Amazon RDS or Amazon RDS Custom.
-
For Edition, if you are using Oracle or SQL Server, select the version of the DB engine you want to use.
-
For Version, select the engine version.
-
In the Templates section, choose a template that matches your use case. If you choose Production, the following options will be pre-selected in the next step:
- Multi-AZ failover option
- Provisioned IOPS SSD (io1) storage option
- Protection against deletion option
We recommend using these features for a production environment.
Note: Template choices may vary by version.
-
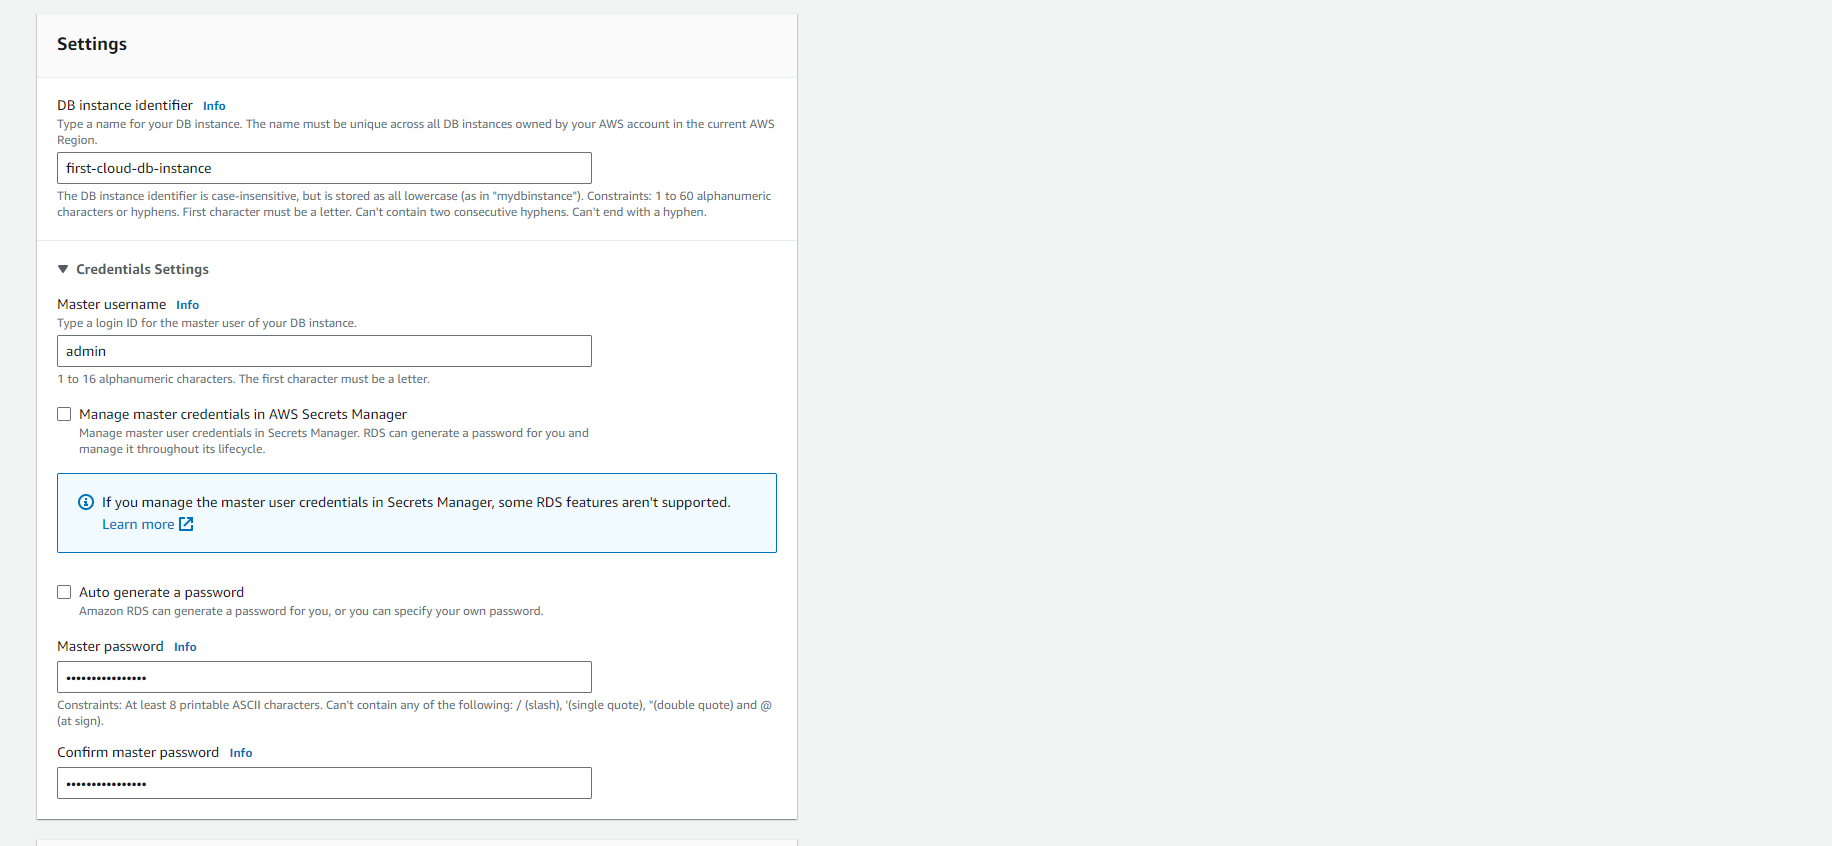
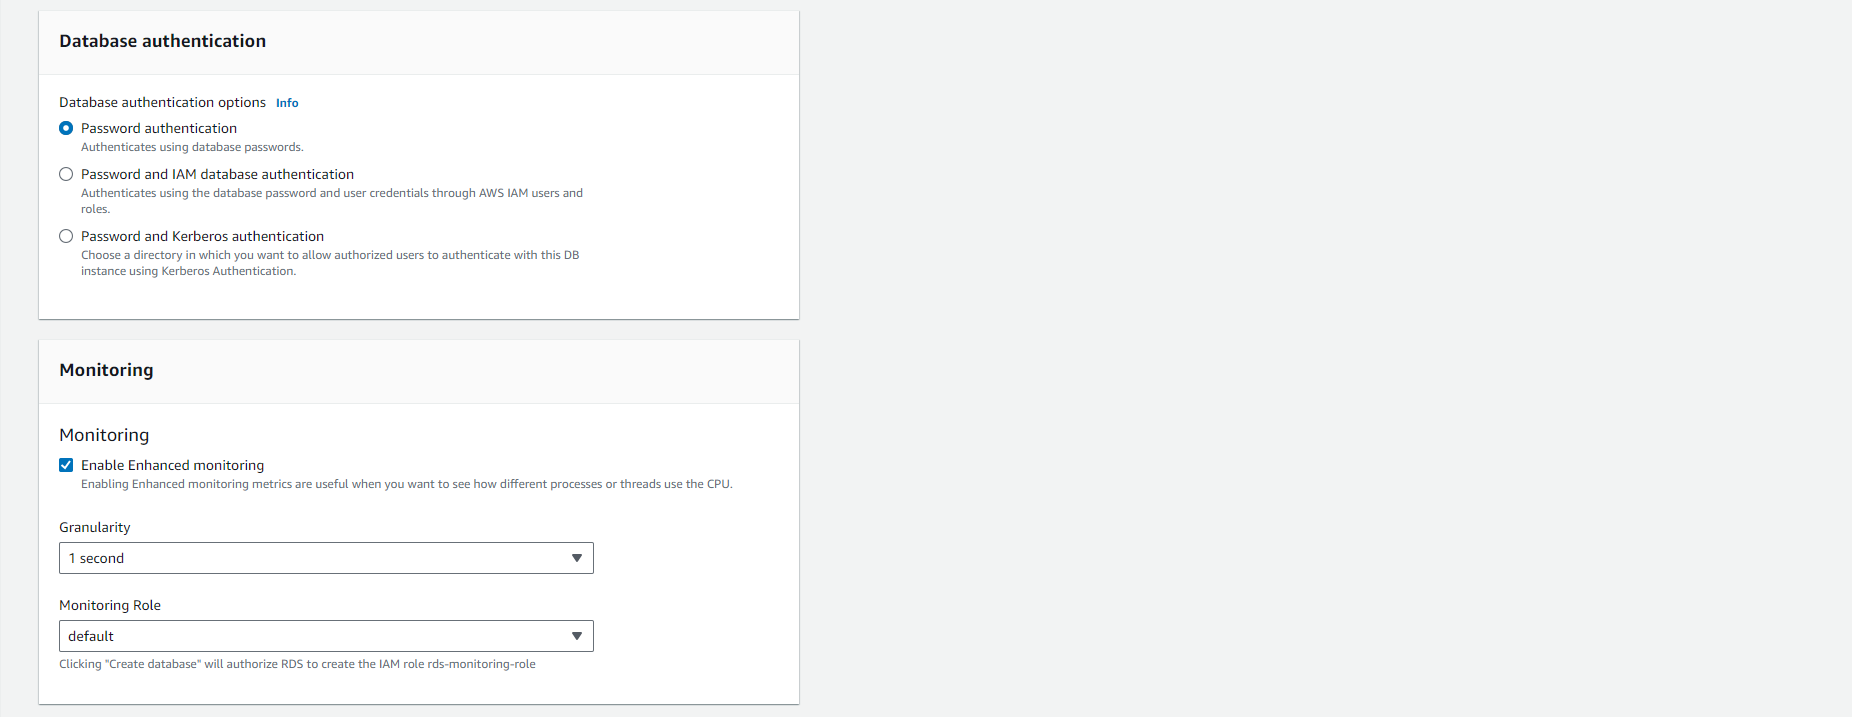
To enter your master password, follow these steps:
- In the Settings section, open Credential Settings.
- If you want to specify a password, uncheck the Auto generate a password box if it’s already selected.
- (Optional) Change the Master username value.
- Enter the same password in both Master password and Confirm password.
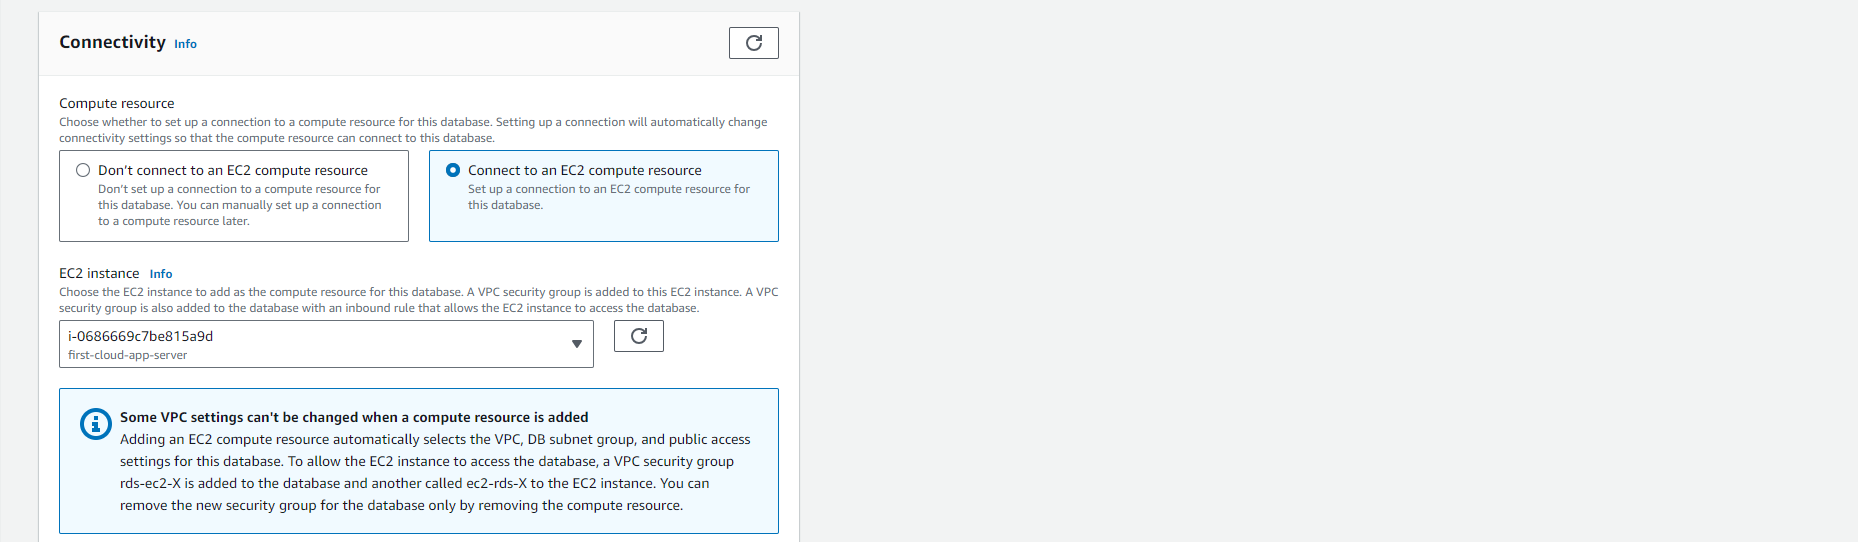
- (Optional) Set up a connection to a compute resource for this DB Instance.

-
You can configure the connection between an Amazon EC2 instance and the new DB Instance during the DB Instance creation process. For more information, see Configuring Automatic Network Connectivity to an EC2 Instance.
-
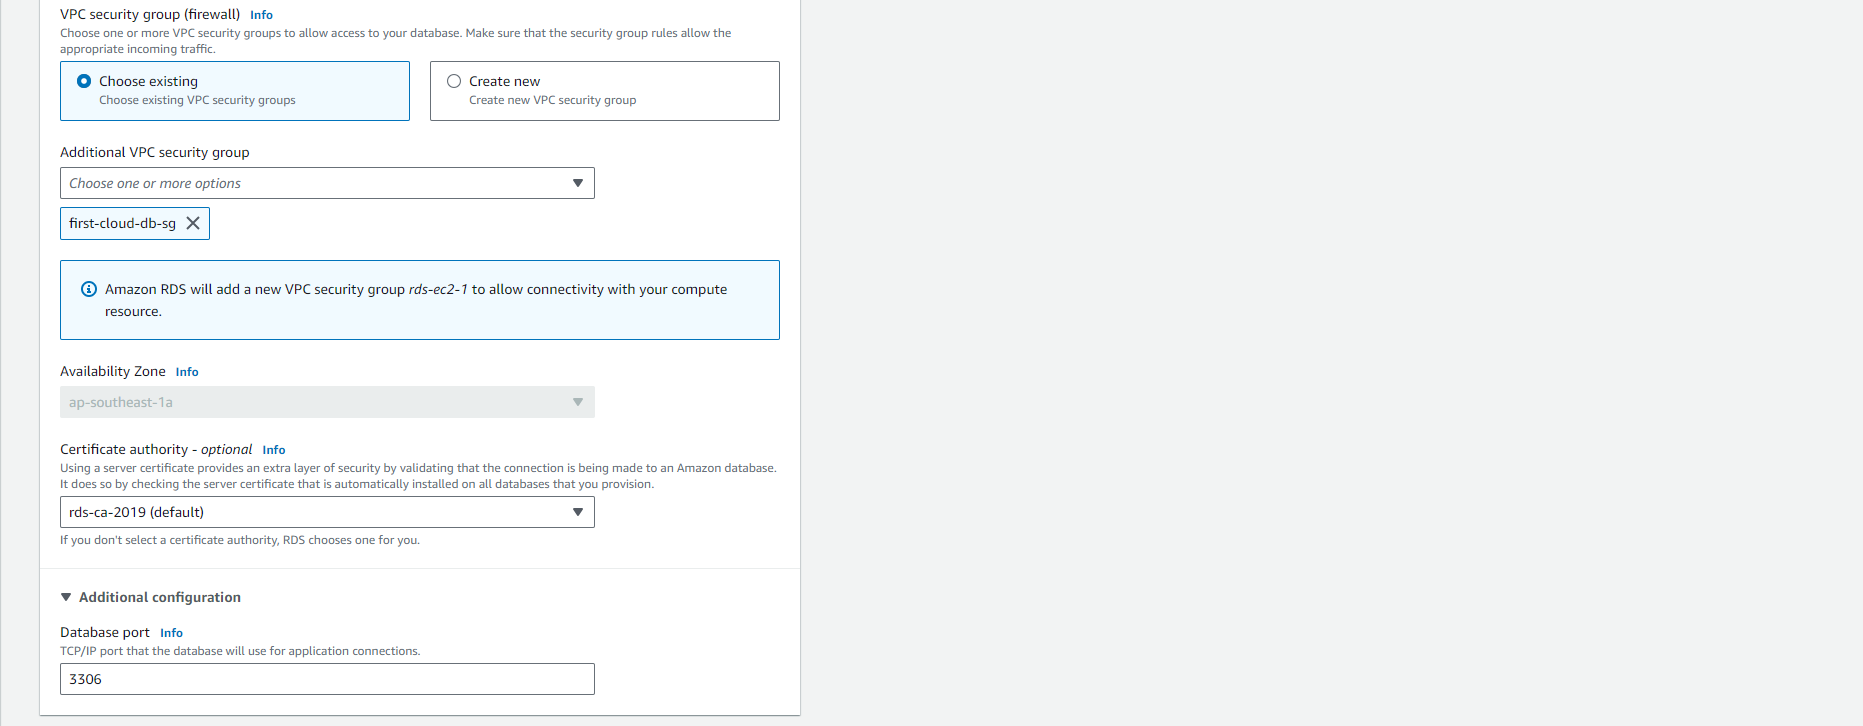
In the Connectivity section under VPC security group (firewall), if you choose Create new, a VPC security group with a login rule allowing your local computer’s IP address to access the database will be created.
-
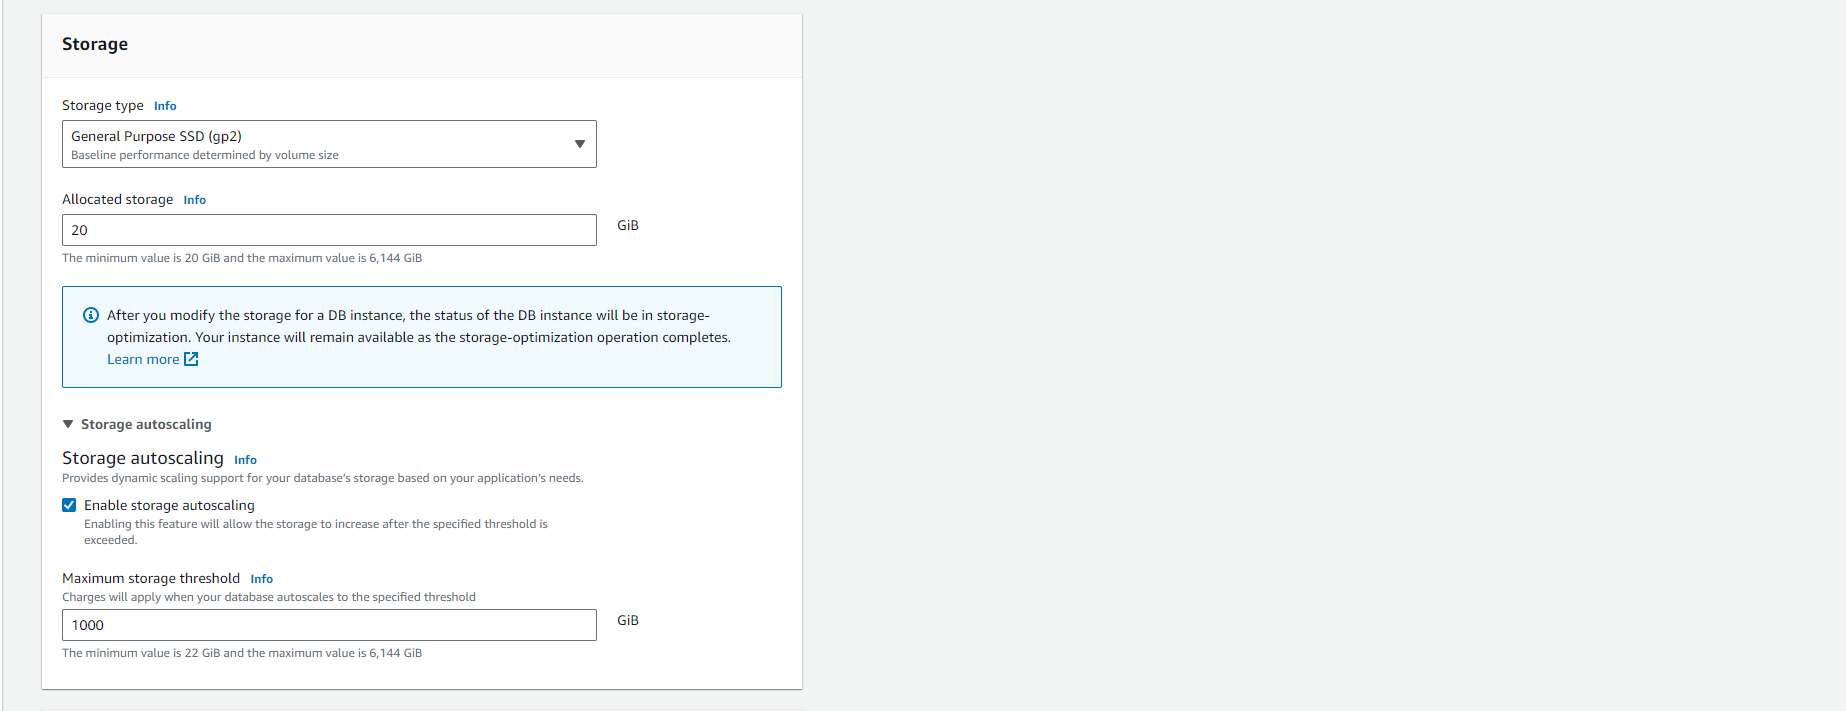
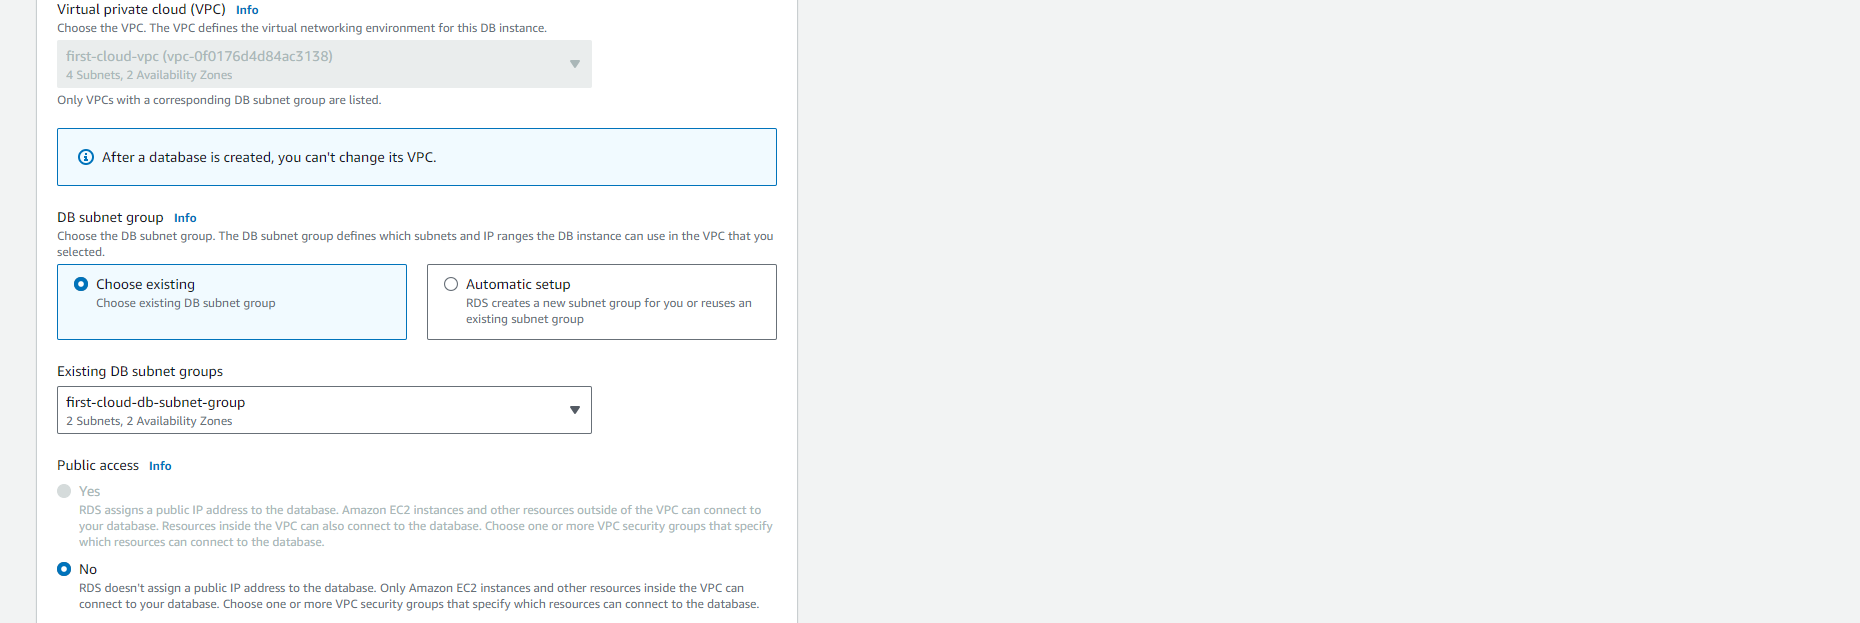
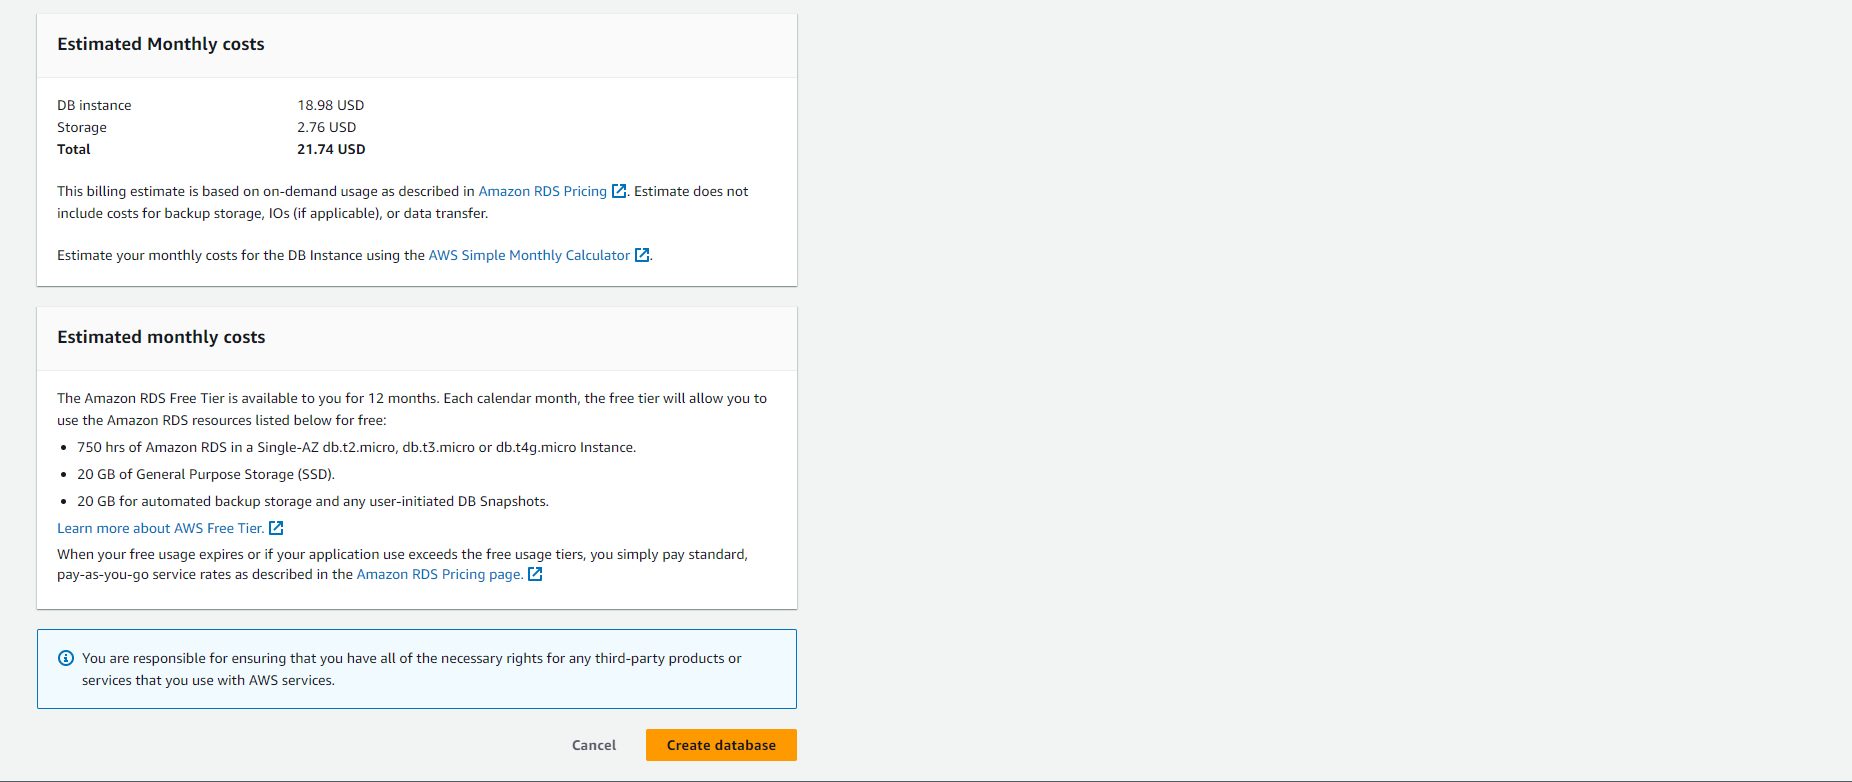
For the remaining sections, specify your DB Instance settings. For more information on each setting, see Settings for DB Instances.
-
Choose Create database.
-
If you choose to use an automatically generated password, the View credential details button will appear on the Databases page.
-
To view the master username and password for the DB Instance, select View credential details.
-
To connect to the DB Instance using the master username, use the displayed username and password.
Important: You cannot review the master user password. If you don’t record it, you may need to change it. If you need to change the master user password after the DB Instance is available, you can modify the DB Instance to do this. For more information on modifying a DB Instance, see Modifying an Amazon RDS DB Instance.
- Under Databases, select the name of the new DB Instance.
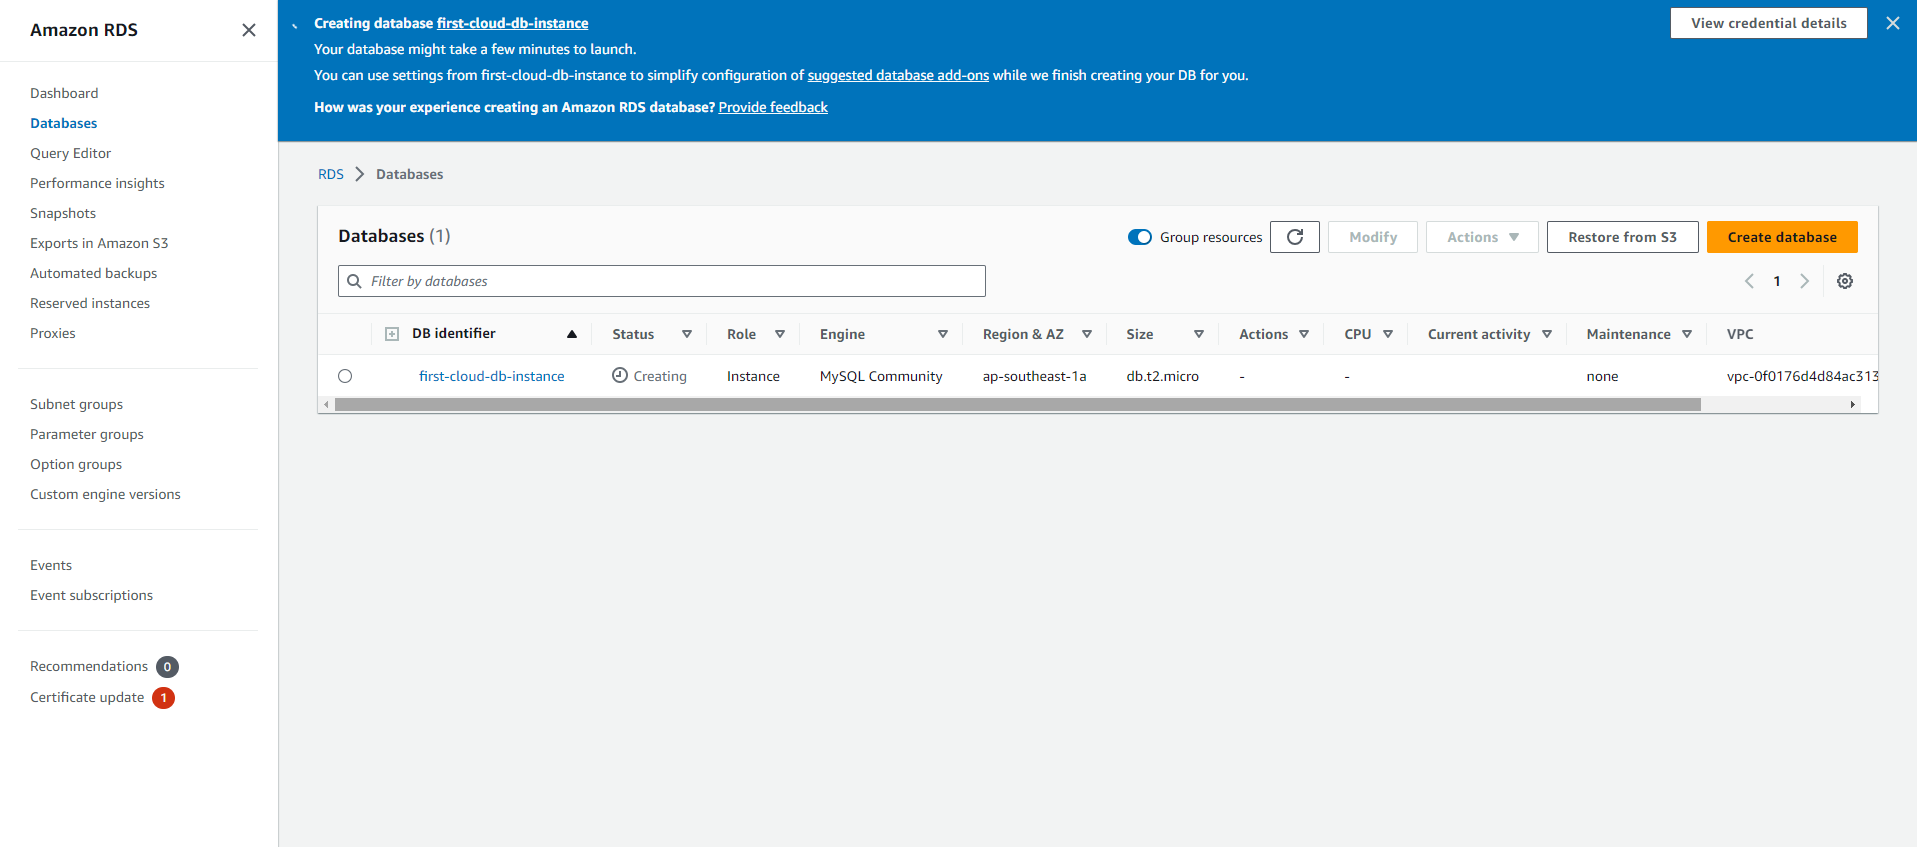

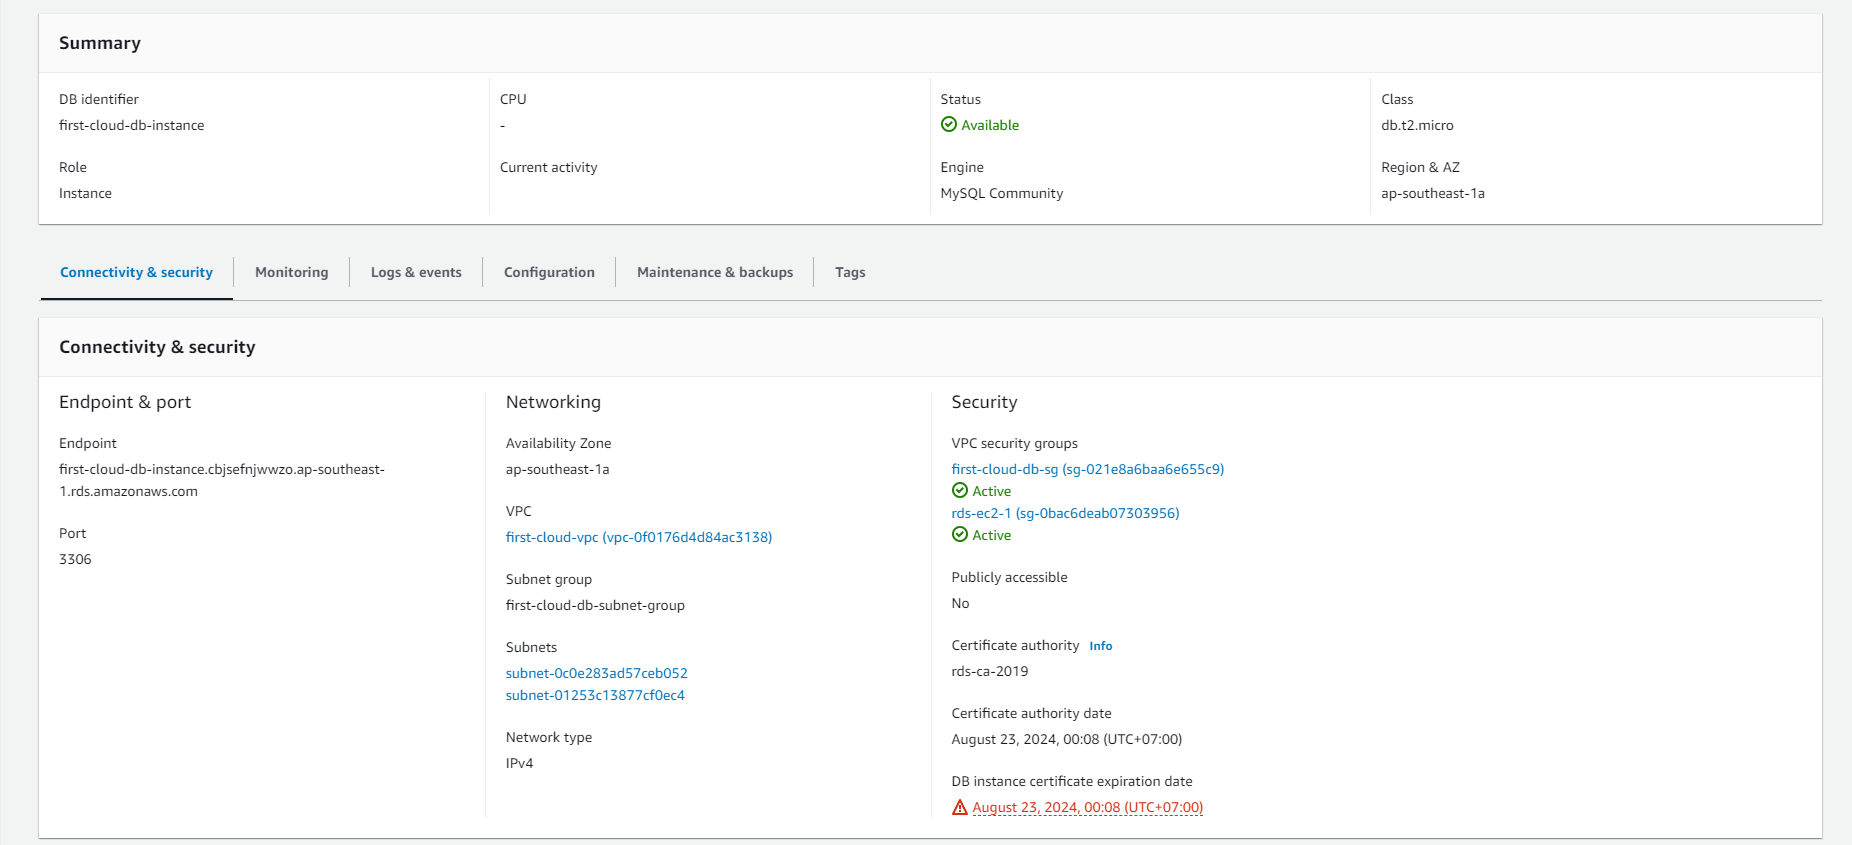
- On the RDS console, information about the new DB Instance will appear. The DB Instance will have a Creating status until it is created and ready for use. Once the status changes to Available, you can connect to the DB Instance. Depending on the DB Instance class and allocated storage, it may take a few minutes for the new DB Instance to be available.

- Check RDS
- In the details page of the RDS instance, you can find connection-related information such as Endpoint, Port, and Username.
- The Endpoint is the URL or IP address you use to connect to the RDS database.

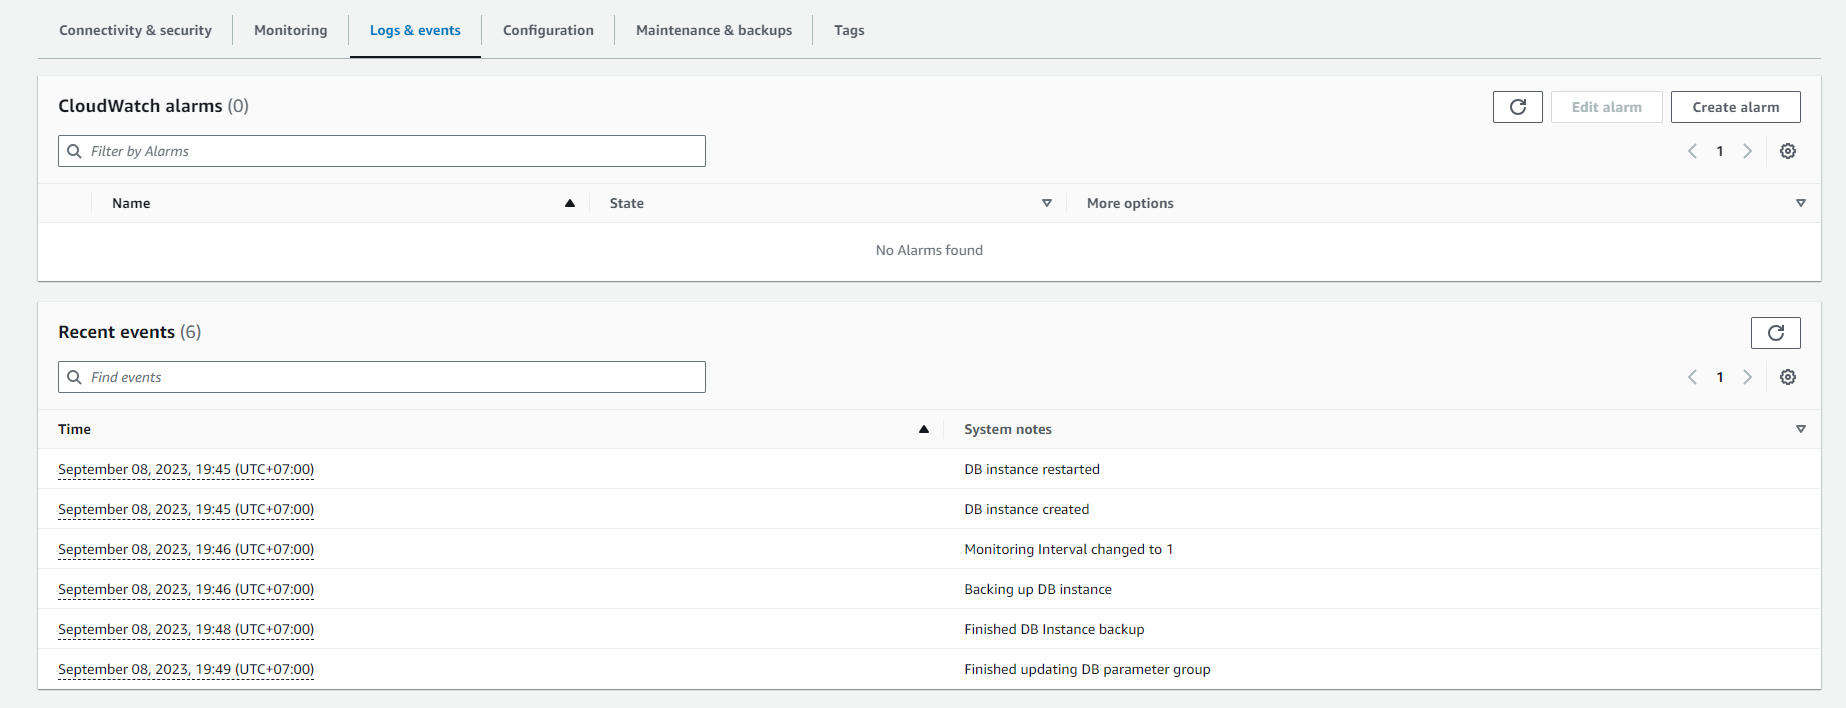
Viewing Logs and Events on AWS RDS
To monitor Logs and Events on Amazon RDS (Relational Database Service), you can follow these steps:
-
Sign in to the AWS Management Console.
-
Choose the Amazon RDS service from the AWS dashboard.
-
Select the RDS instance you want to view Logs and Events for.
-
In the instance details page, you will see the following tabs:
- DB instance details: Displays basic information about the instance.
- Configuration: Allows you to view and modify the instance’s configuration.
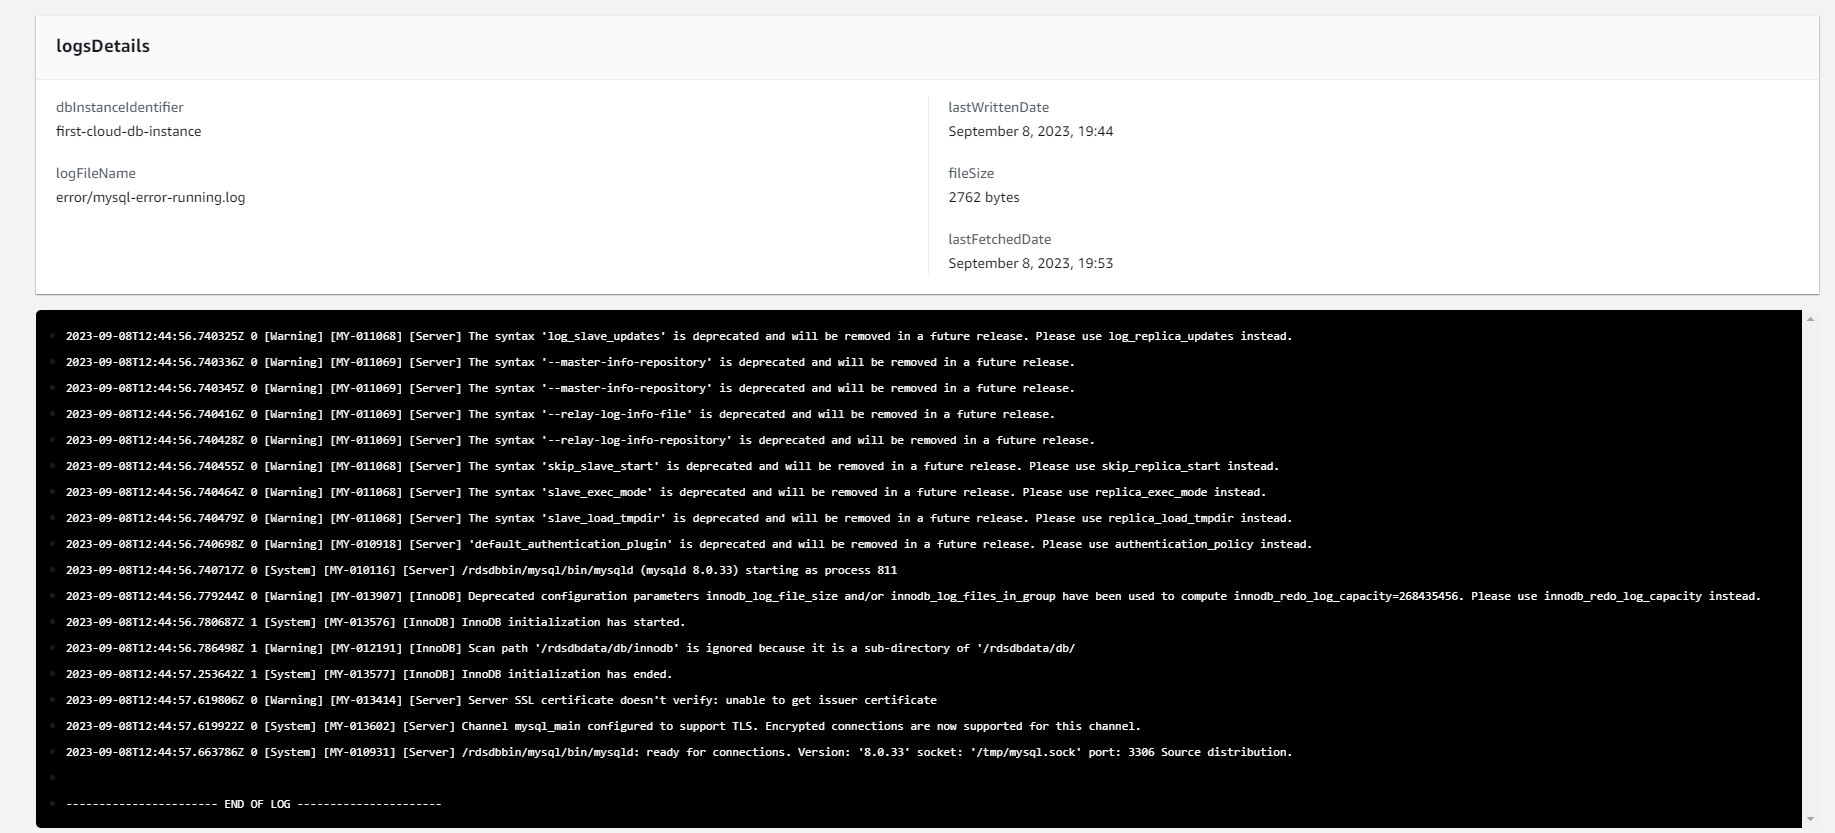
- Log & events: This is where you can view Logs and Events.
-
Click on the Log & events tab. Here, you can view various logs such as:
- Error log: Records errors that occur on the instance.
- General log: Records general activities on the instance.
- Slow query log: Records slow queries.
- Event log: Displays important events related to the instance.
-
You can customize settings for viewing Logs and Events here, such as the time range you want to view logs or setting up email notifications for important events.
Remember to regularly review logs and events to monitor the status of your Amazon RDS instance and detect any issues early.


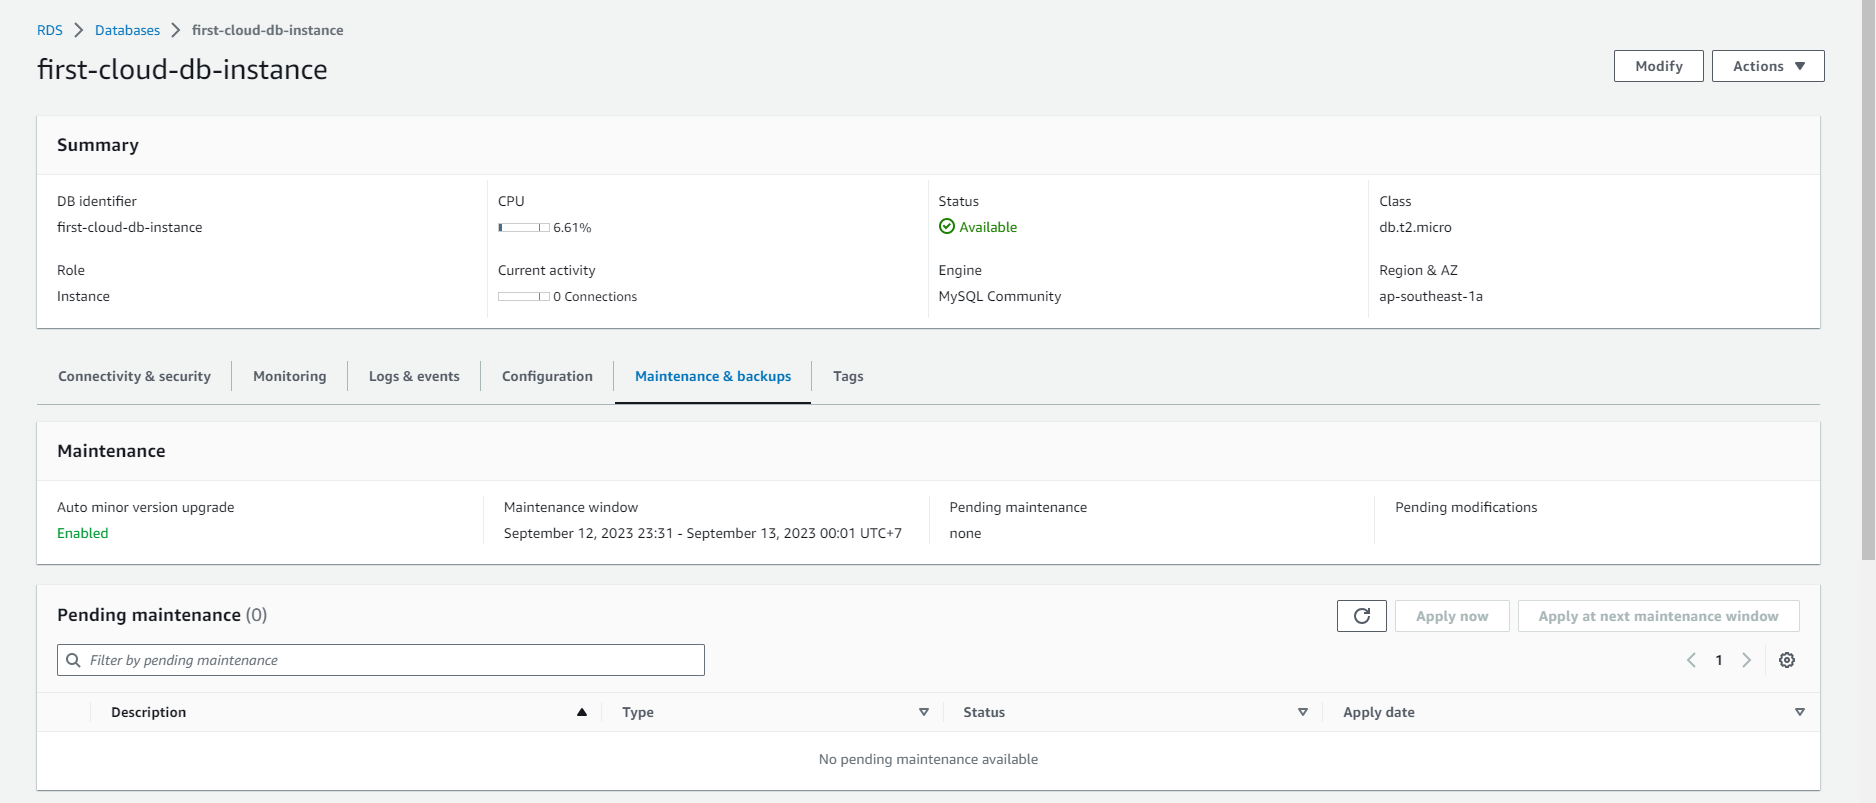
Viewing Maintenance and Backups on AWS RDS
In Amazon Web Services (AWS), Amazon Relational Database Service (RDS) provides an easy-to-manage relational database with automation for various tasks, including maintenance and backups. Here’s how you can view information about maintenance and backups in AWS RDS:
Viewing Maintenance Information
To view information about maintenance for a DB instance in RDS, you can follow these steps:
-
Sign in to the AWS Management Console.
-
Choose the Amazon RDS service from the list of services.
-
In the RDS dashboard, select the DB instance you are interested in.
-
In the DB instance management page, navigate to the Maintenance & backups tab.
-
Here, you will see information about the maintenance schedule, including the times when the DB instance will be automatically backed up and maintenance tasks will be performed. You can also view the history of previous maintenance events.
Viewing Backup Information
To view information about backups of a DB instance in AWS RDS, follow these steps:
-
Sign in to the AWS Management Console.
-
Choose the Amazon RDS service from the list of services.
-
In the RDS dashboard, select the DB instance you want to check.
-
In the DB instance management page, navigate to the Maintenance & backups tab.
-
Here, you can view information about automatic backups and manual backups. You can also configure and manage backup settings.
Make sure to follow relevant rules and policies when performing any tasks on AWS RDS to ensure the security and safety of your data.
