Create EC2 instance
Creating an EC2 Instance
ℹ️ Information: Amazon EC2 (Elastic Compute Cloud) provides scalable computing capacity in the AWS Cloud, eliminating the need to invest in hardware upfront.
To create a Linux EC2 instance using the AWS Management Console, follow these instructions. This guide helps you quickly launch your first instance with essential configurations. For advanced options, refer to the Launch Instance documentation.
Access the AWS Console
- Open a web browser and navigate to the Amazon EC2 console at https://console.aws.amazon.com/ec2/.
Launch Your Instance
-
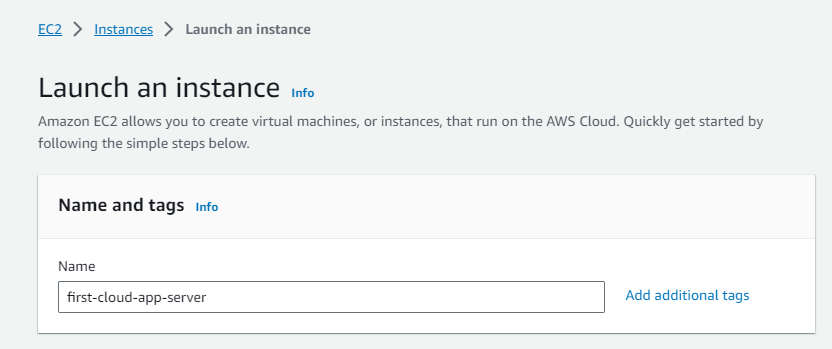
On the EC2 console dashboard, locate the Launch instance box, select Launch instance, then choose Launch instance from the dropdown menu.
Configure Instance Details
-
Under the Name and tags section, enter a descriptive name for your instance.
-
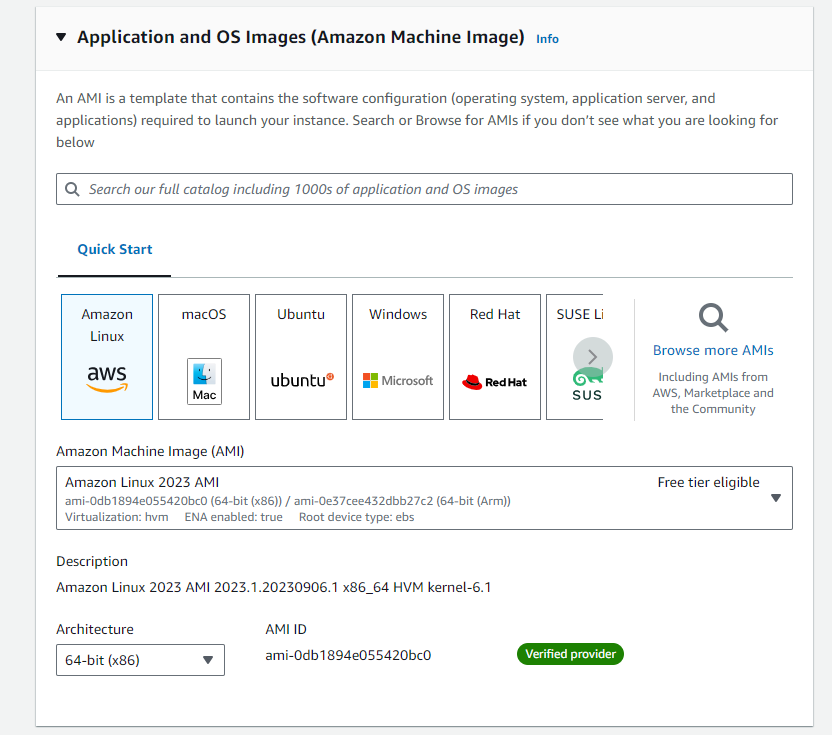
Under Application and OS Images (Amazon Machine Image), configure the following:
- Select Quick Start, then choose Amazon Linux
- From the Amazon Machine Image (AMI) options, select an HVM version of Amazon Linux 2023
💡 Pro Tip: Look for AMIs marked as Free tier eligible to avoid unexpected charges if you’re using the AWS Free Tier.
-
Under Instance type, select t2.micro (pre-selected by default).
ℹ️ Information: The t2.micro instance type qualifies for the AWS Free Tier. In regions where t2.micro isn’t available, you can use t3.micro under the Free Tier. For more details, see AWS Free Tier.

-
Under Key pair (login), select the key pair you created during your AWS setup.
⚠️ Warning: Do not select Proceed without a key pair (Not recommended). Without a key pair, you won’t be able to connect to your instance.

-
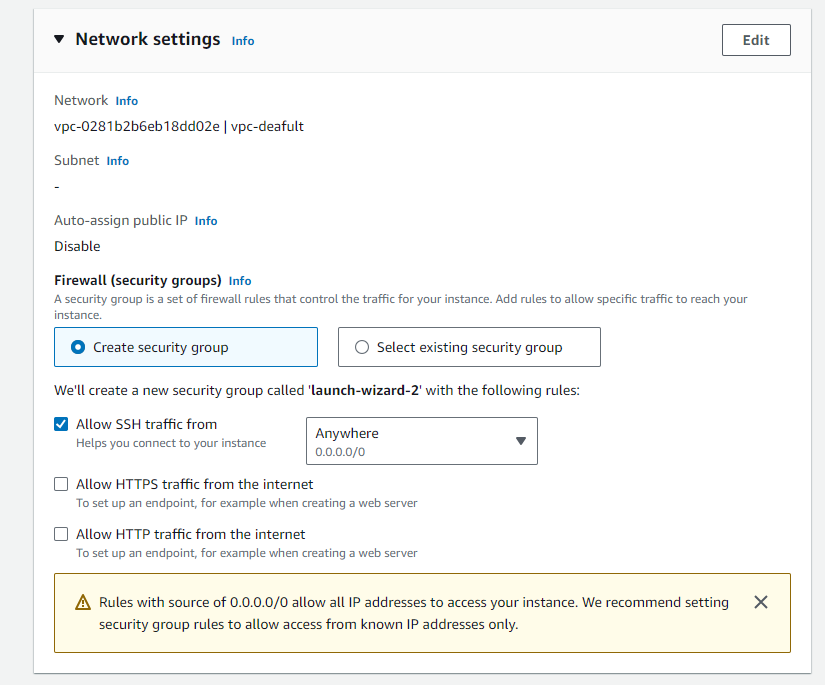
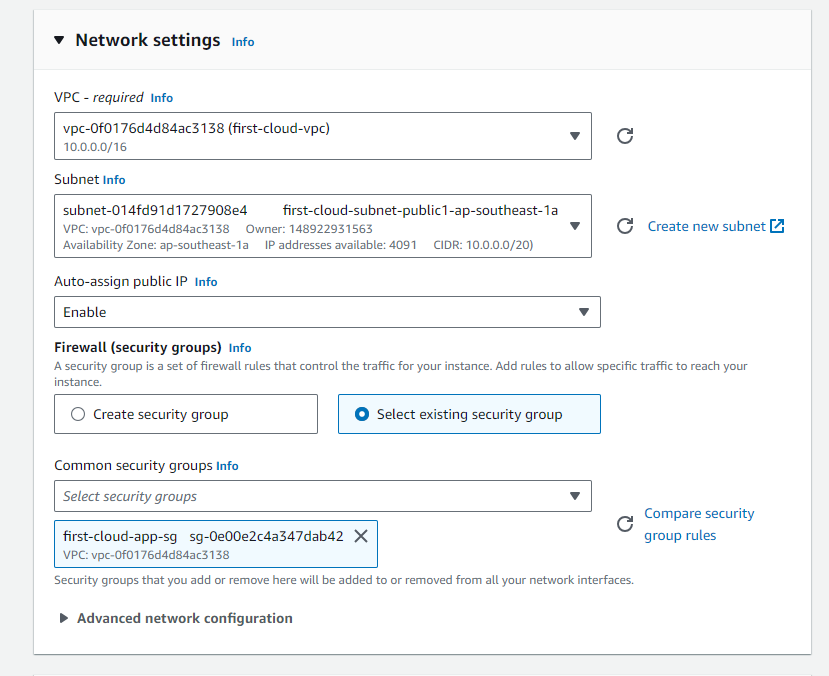
Under Network settings, click Edit and configure your security group:
- You can use the auto-created security group, or
- Select Select existing security group and choose a security group you created previously
🔒 Security Note: Security groups act as virtual firewalls that control inbound and outbound traffic to your instance. Ensure your security group allows SSH access (port 22) from your IP address only.
Launch and Verify Your Instance
-
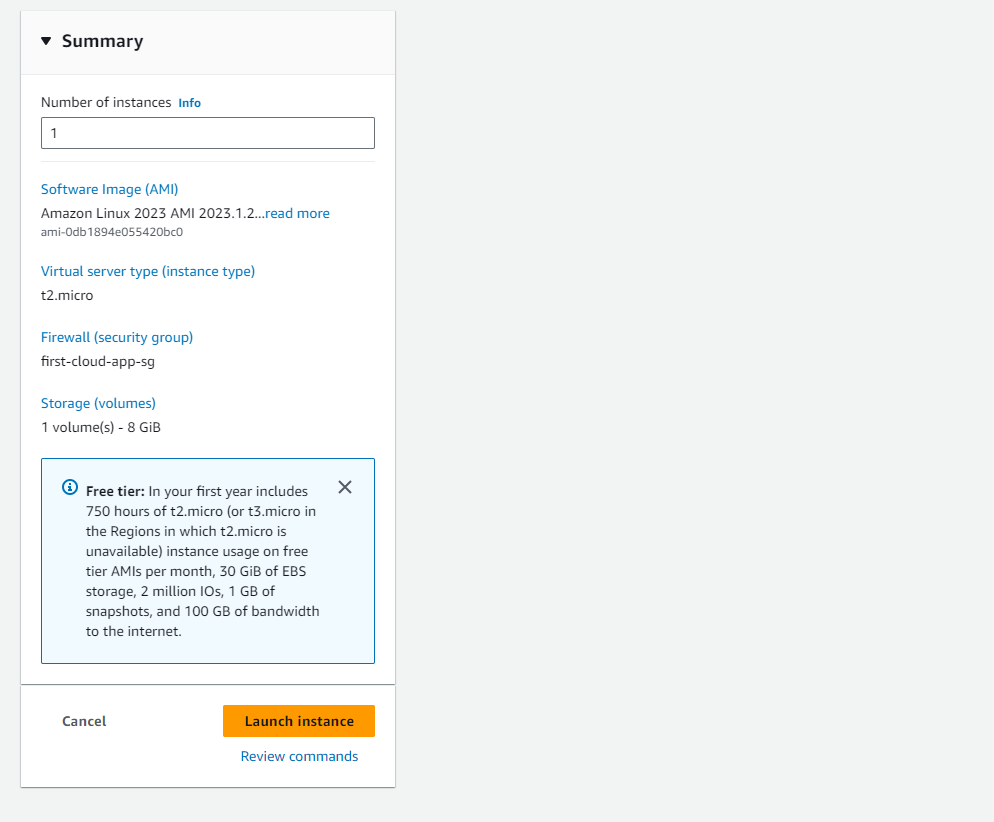
Review the instance configuration summary in the Summary panel.
-
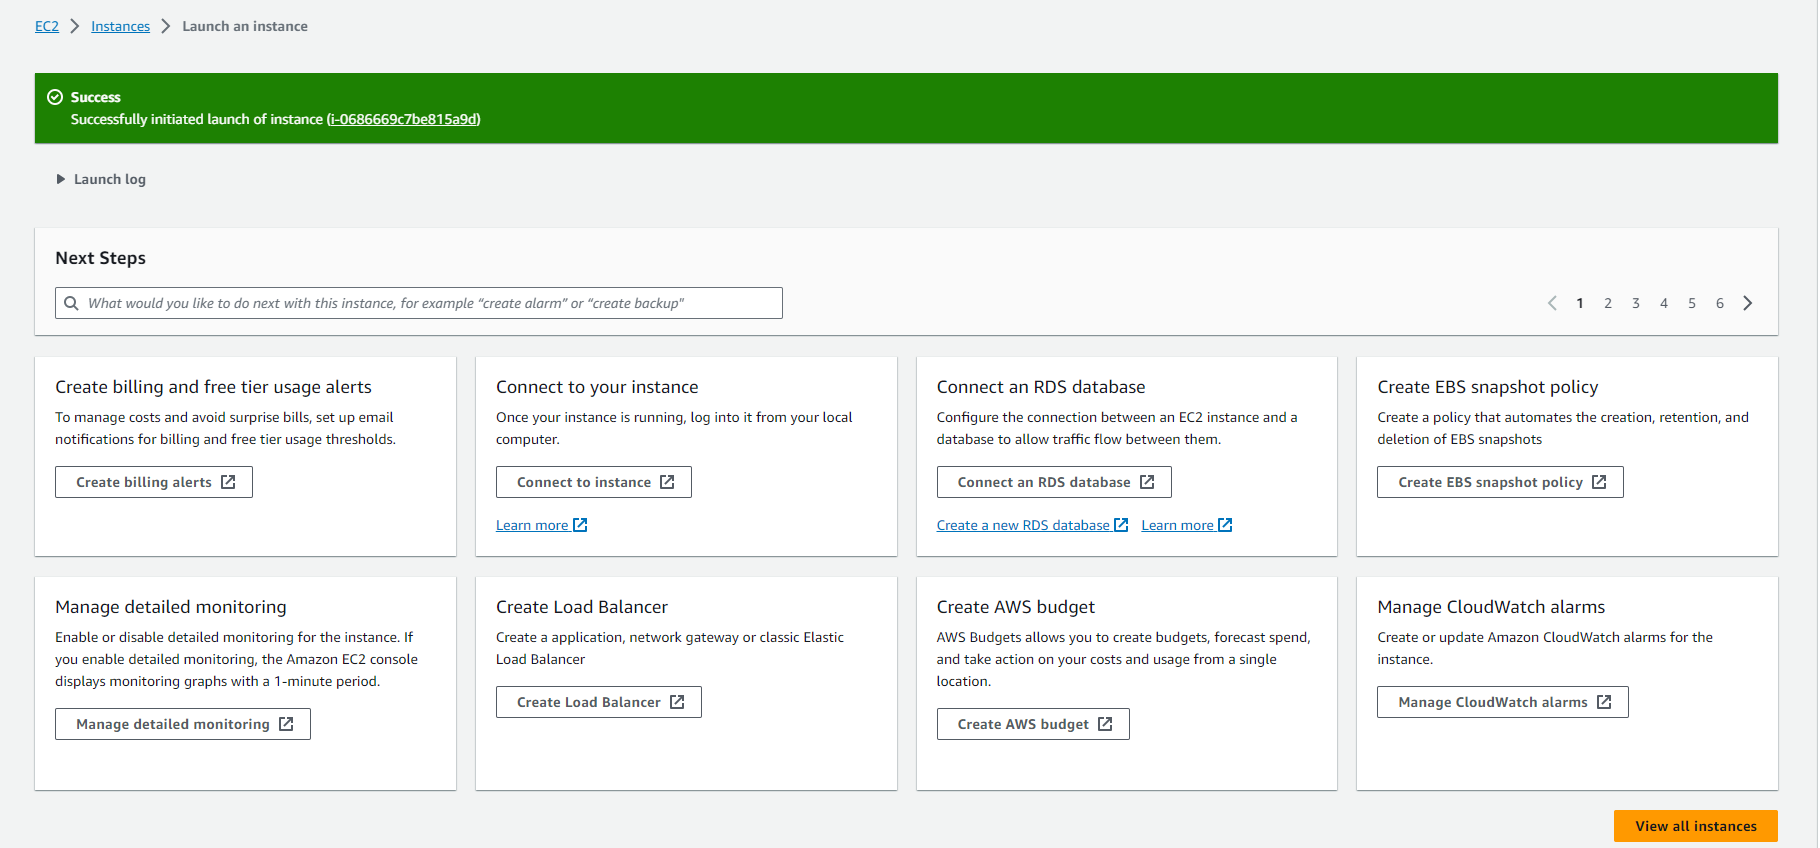
When ready, click Launch instance.
-
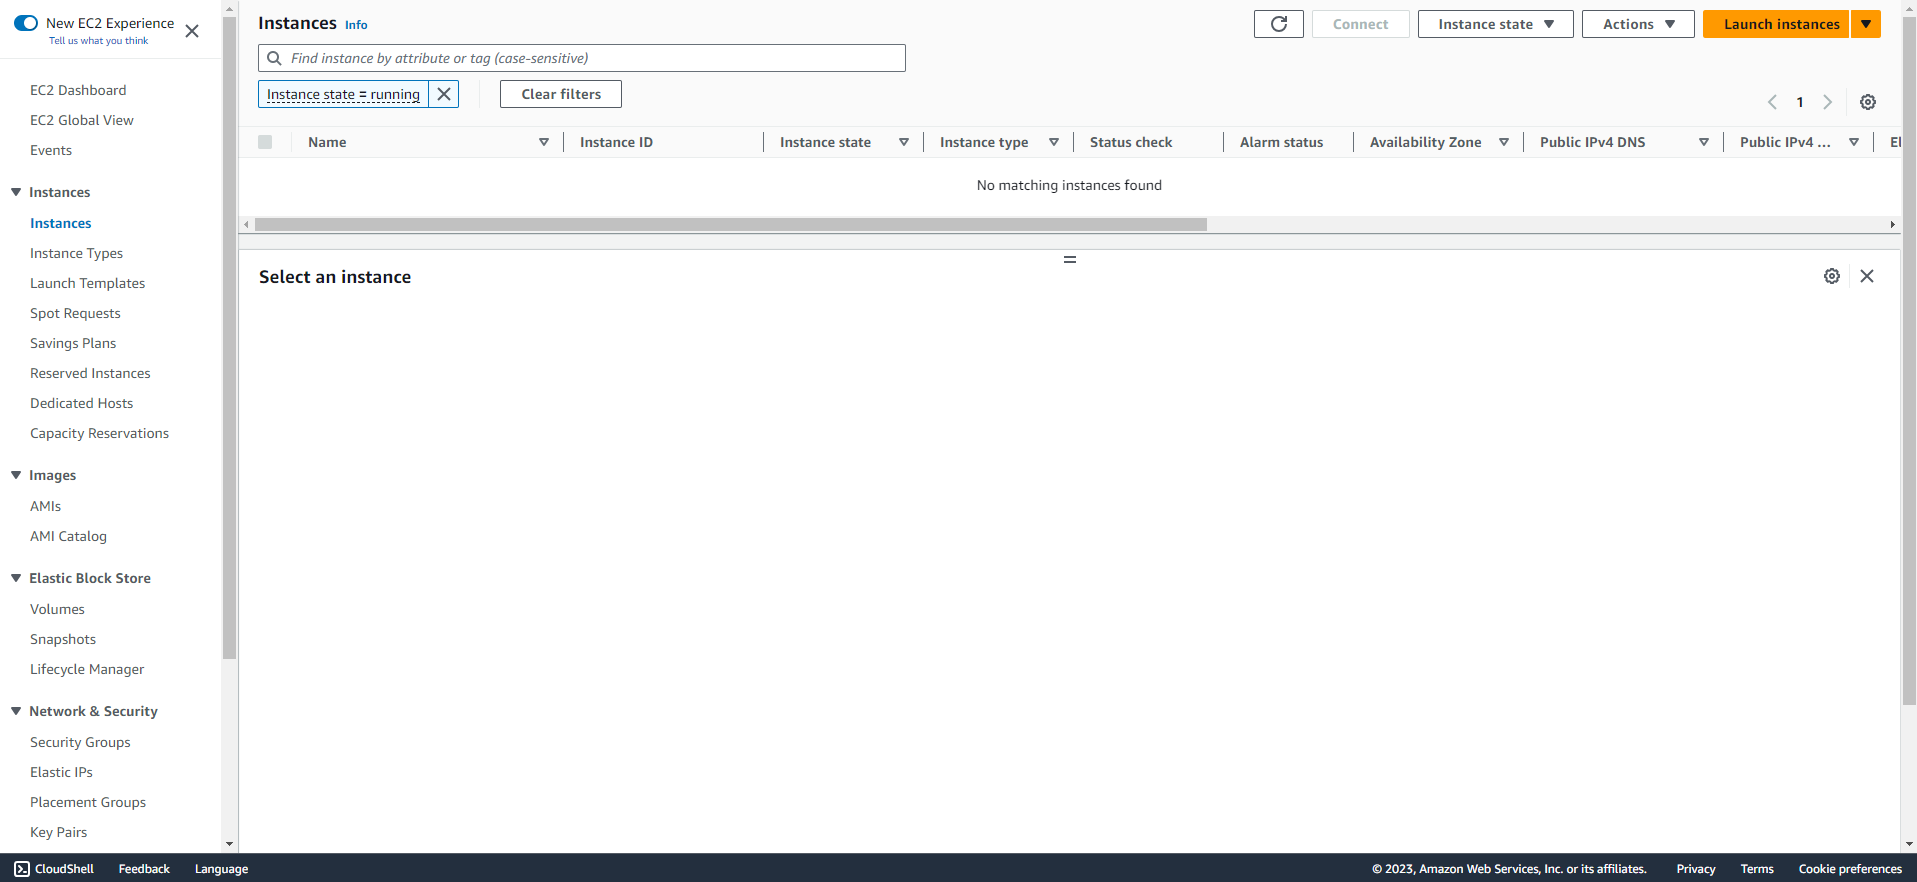
On the confirmation page, click View all instances to return to the EC2 console.
-
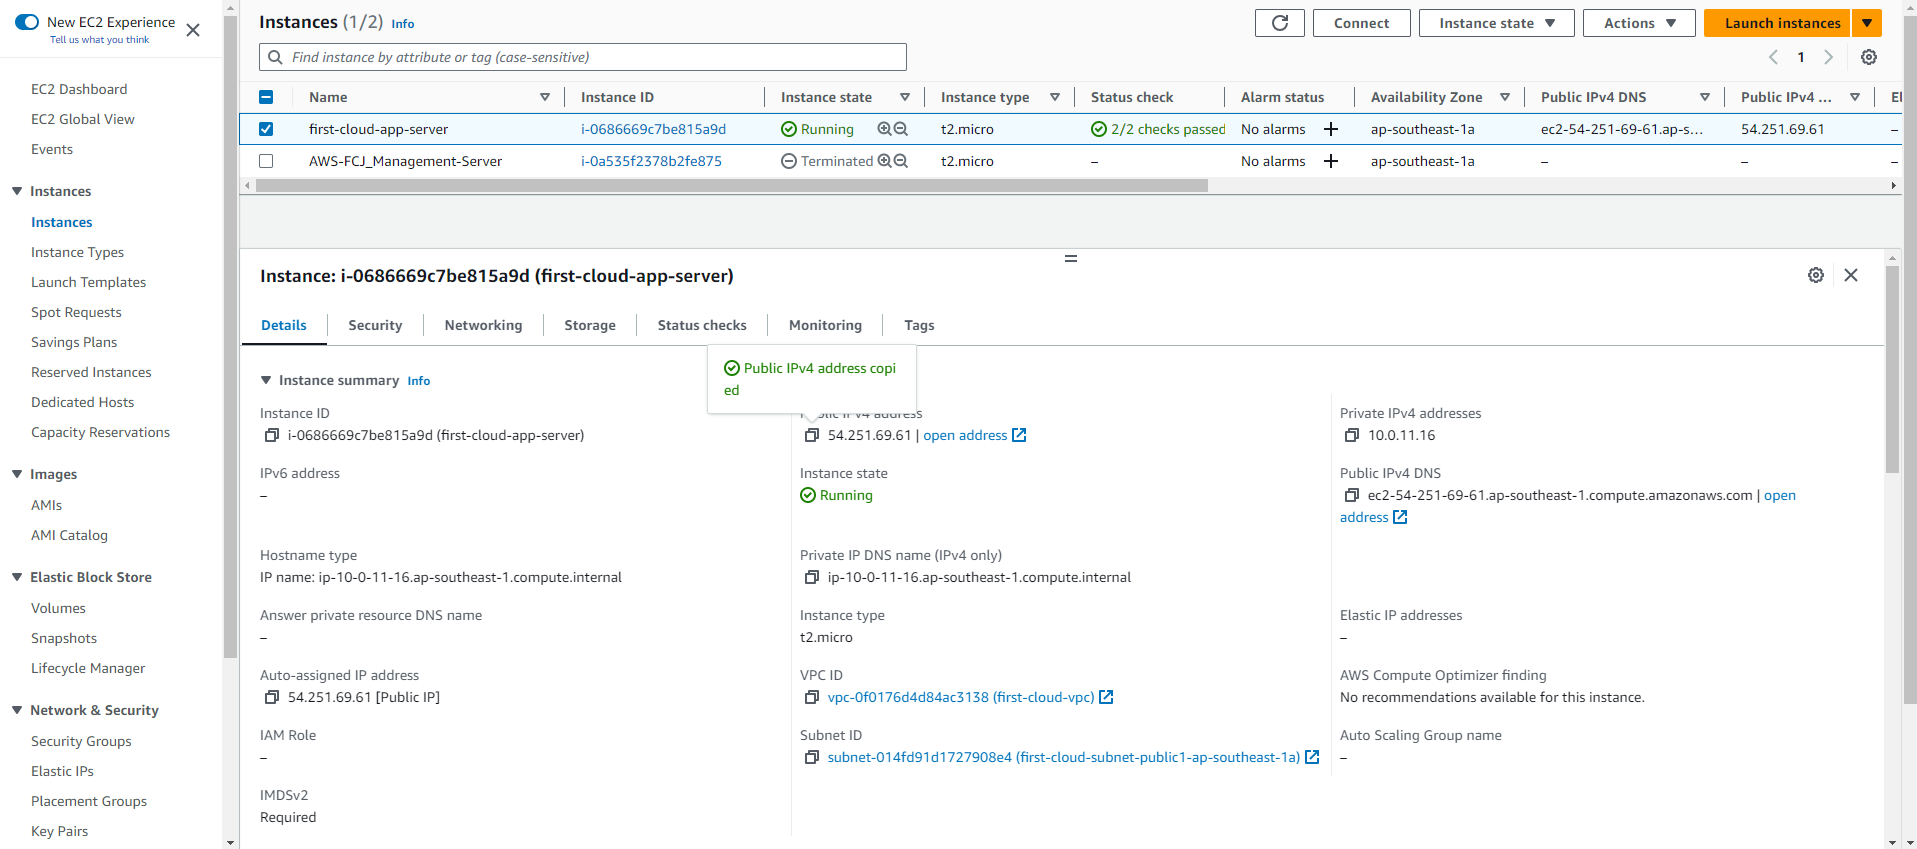
Monitor the instance status on the Instances screen:
- Initial state: pending
- Running state: running (with assigned public DNS name)
💡 Pro Tip: If the Public IPv4 DNS column is hidden, click the gear icon (Settings) in the upper right corner, enable Public IPv4 DNS, and click Confirm.
-
Wait for the instance to pass all status checks before attempting to connect.
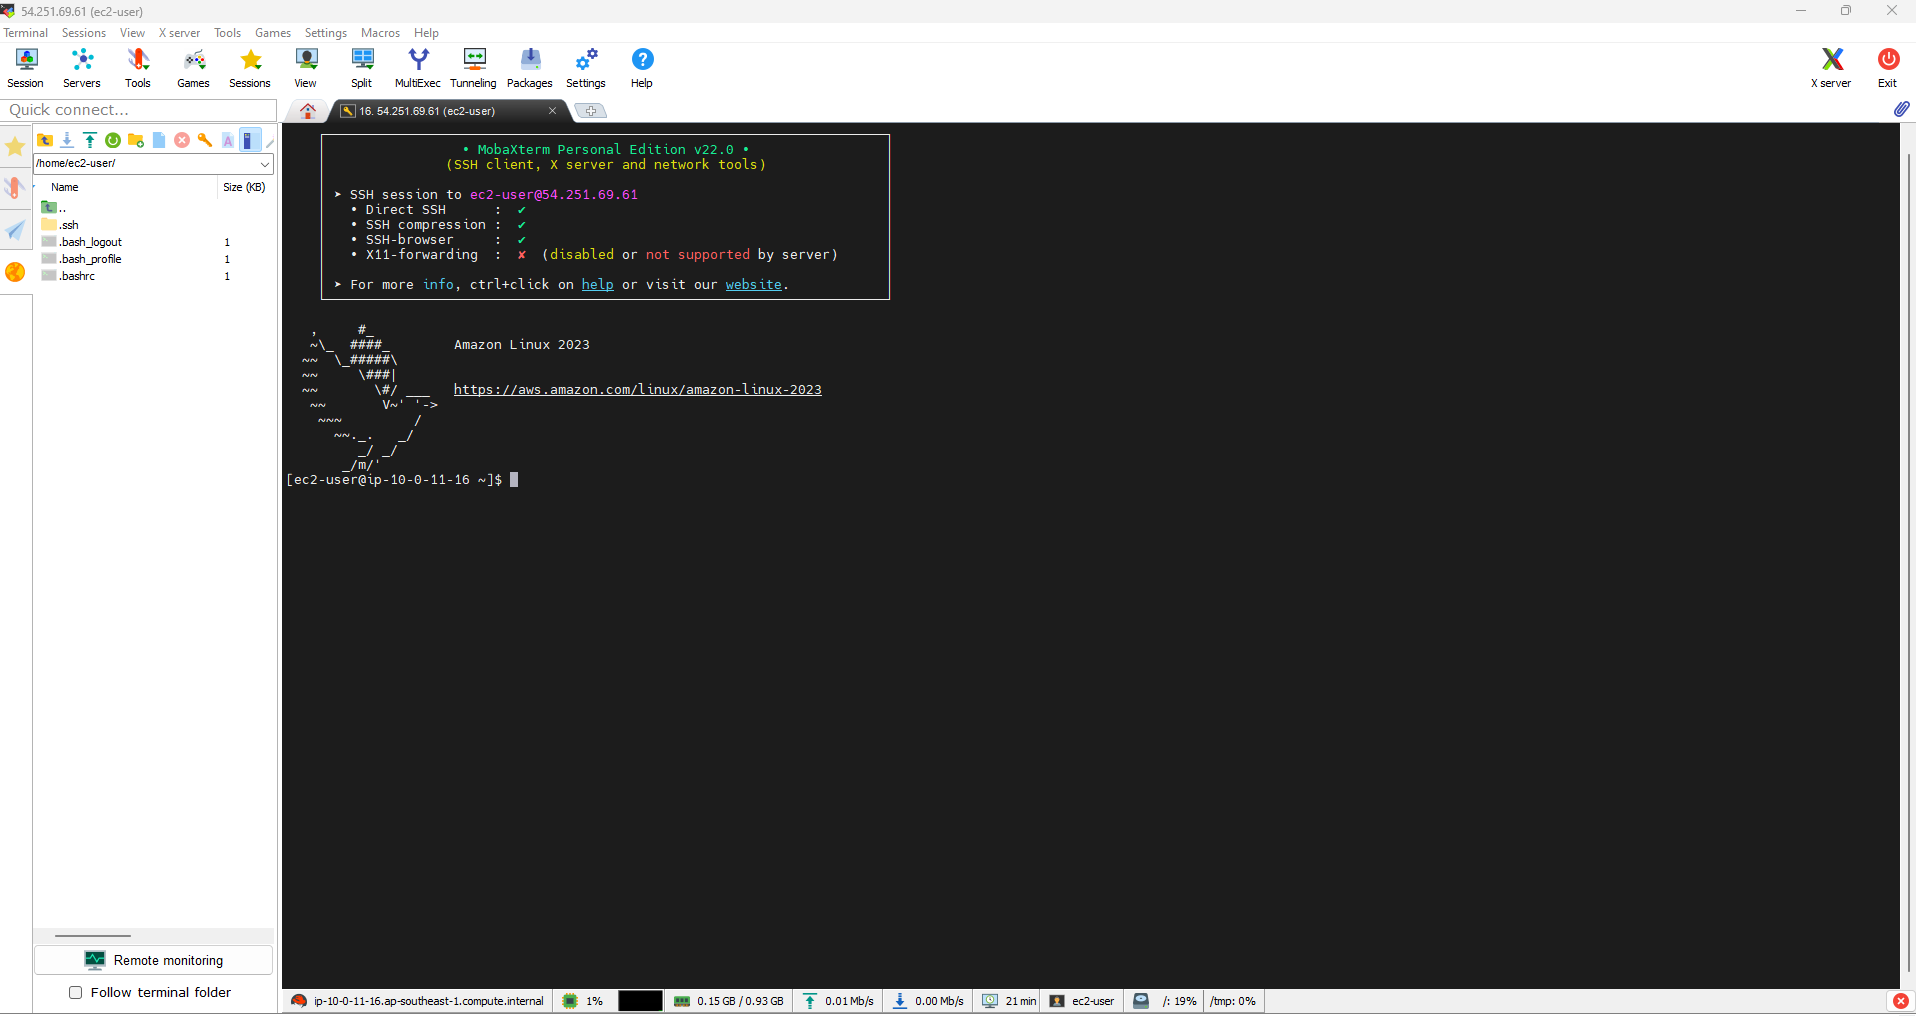
Connecting to Your EC2 Instance via SSH Using MobaXterm
ℹ️ Information: MobaXterm is an enhanced terminal for Windows with an X11 server, tabbed SSH client, and various network tools.
Follow these steps to connect to your EC2 instance using MobaXterm:
Install MobaXterm
- Download MobaXterm from the official website: MobaXterm Website
- Install the application on your computer
Configure SSH Connection
-
Launch MobaXterm
-
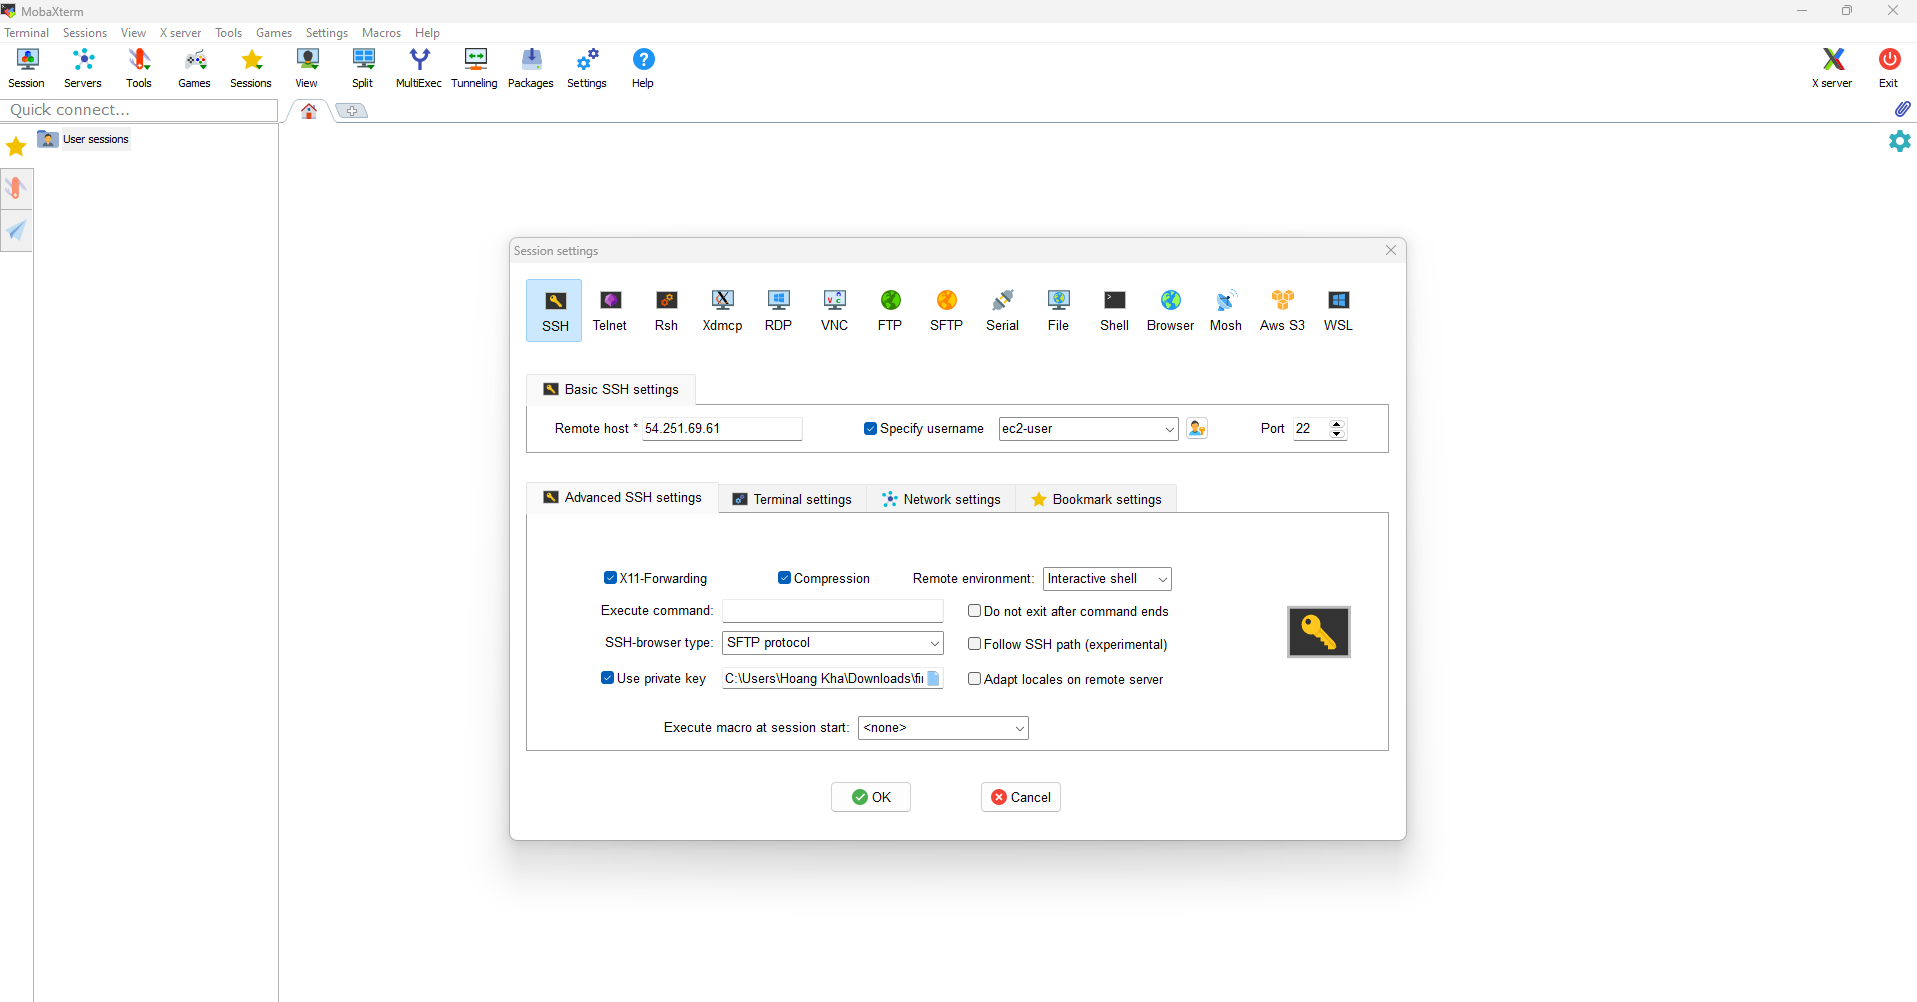
Click the Session icon in the upper-left corner
-
In the configuration window, enter:
- Remote Host: Your EC2 instance’s public IP address or DNS name
- Port: 22 (default SSH port)
- Username: The default user for your AMI (typically ec2-user for Amazon Linux)
- Advanced SSH settings: Browse and select your private key file (.pem)
Connect to Your Instance
- Click OK to save the configuration
- Click the connect icon to establish an SSH connection
🔒 Security Note: Ensure your private key file (.pem) has restricted permissions. On Windows, verify the file is not accessible to other users.
Successful Connection
Once connected, you’ll have terminal access to your EC2 instance and can begin managing your server.