Create a VPC
Creating a VPC with Subnets and Associated Resources
ℹ️ Information: Amazon Virtual Private Cloud (Amazon VPC) enables you to launch AWS resources into a virtual network that you’ve defined. This virtual network closely resembles a traditional network in your own data center, with the benefits of using the scalable infrastructure of AWS.
Follow these steps to create a VPC with all necessary components for your Amazon RDS deployment:
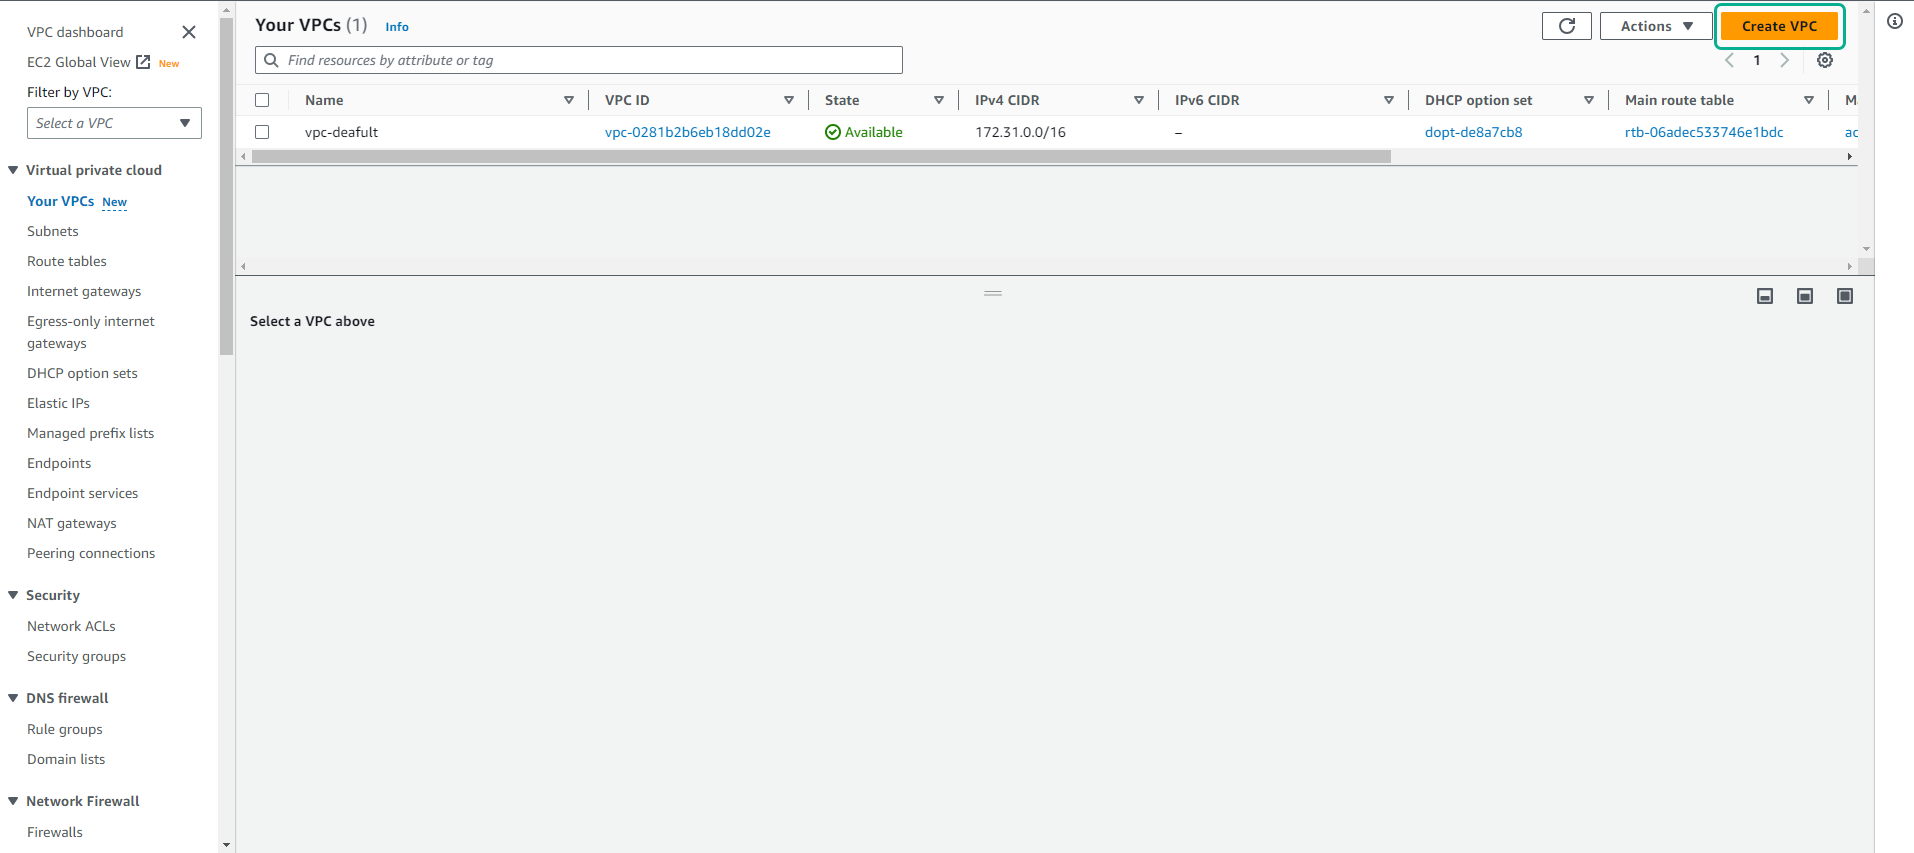
- Open the Amazon VPC console at https://console.aws.amazon.com/vpc/.
-
On the VPC dashboard, choose Create VPC.
-
For Resources to create, select VPC and more to create a complete VPC environment.

-
Configure the Name tag auto-generation option based on your preference. This allows AWS to automatically create consistent naming for all VPC resources.
-
Enter an IPv4 CIDR block range for your VPC (e.g., 10.0.0.0/16). This defines the IP address range available within your VPC.
-
(Optional) To enable IPv6 support, select IPv6 CIDR block and choose an Amazon-provided IPv6 range.
-
Select the appropriate Tenancy option:
- Default: EC2 instances use the tenancy attribute specified during launch
- Dedicated: All EC2 instances run on hardware dedicated to your account
💡 Pro Tip: Most workloads should use Default tenancy for cost efficiency. Only select Dedicated when you have specific compliance or licensing requirements.
-
For Number of Availability Zones (AZs), select at least two AZs for high availability.
-
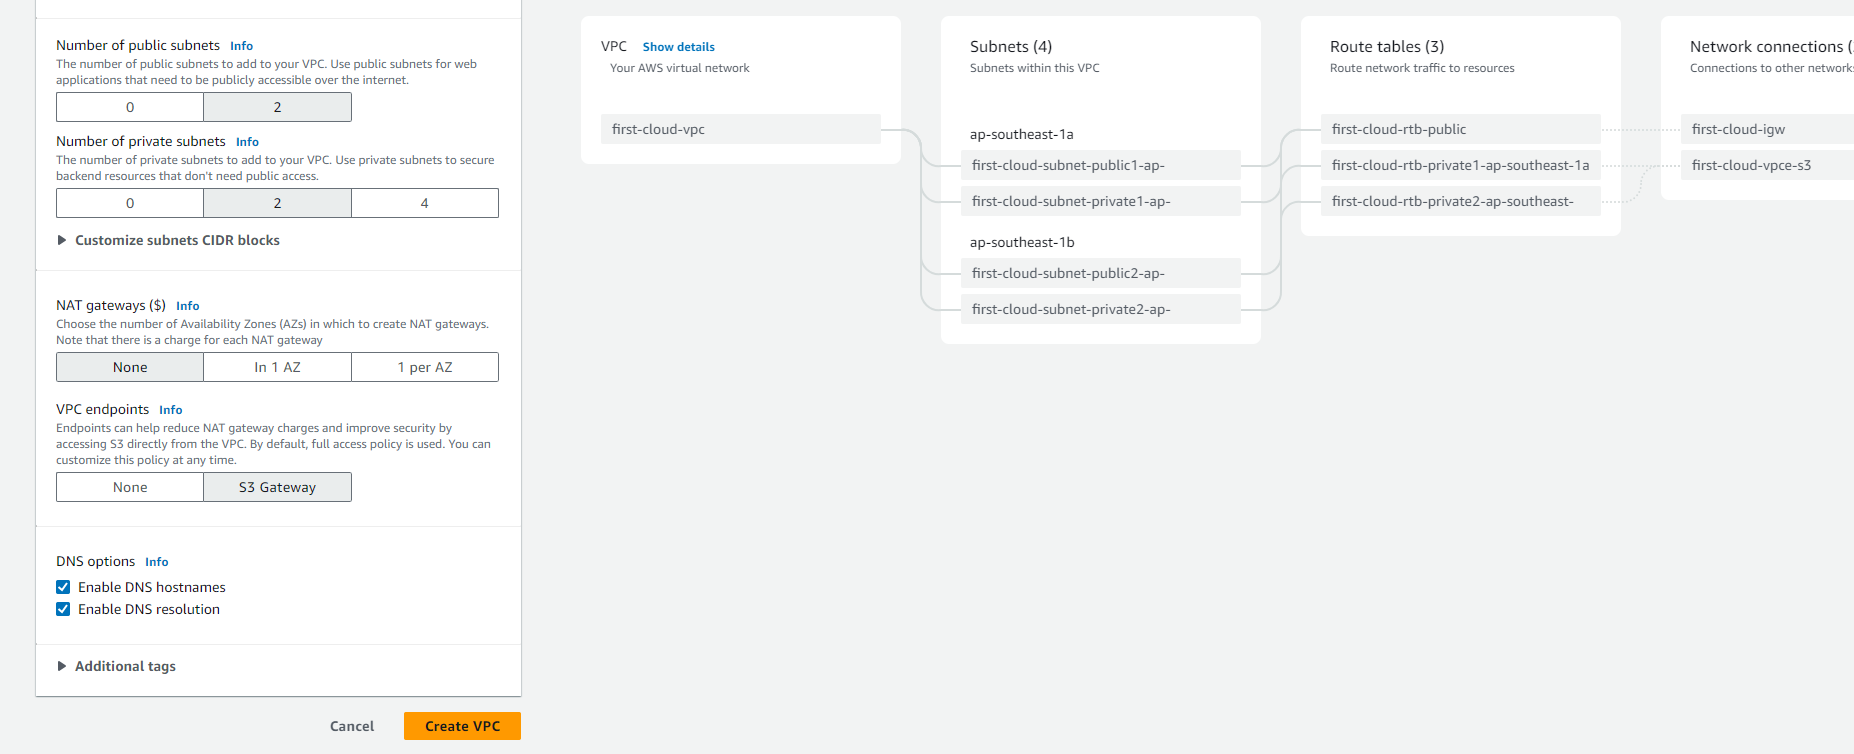
Configure your Number of public subnets and Number of private subnets. For Amazon RDS deployments, you’ll typically need private subnets for your database instances and public subnets for resources that need internet access.
🔒 Security Note: Place your RDS instances in private subnets to enhance security by preventing direct internet access to your databases.
-
(Optional) If resources in private subnets need internet access, configure NAT gateways in each AZ where you have resources requiring outbound connectivity.
💡 Pro Tip: For production environments, deploy NAT gateways in each AZ to eliminate cross-AZ dependencies and improve fault tolerance.
-
(Optional) For IPv6 outbound connectivity from private subnets, select Yes for Egress-only Internet Gateway.
-
(Optional) To enable private access to Amazon S3, select VPC endpoints, S3 Gateway. This creates a gateway endpoint that allows resources in your VPC to access S3 without using the public internet.
-
For DNS options, the default settings enable both DNS resolution and DNS hostnames, which are recommended for most deployments.
-
(Optional) Add tags to your VPC by expanding Additional tags and entering key-value pairs.
-
Review the Preview pane to see a visual representation of the VPC architecture you’ve configured.
-
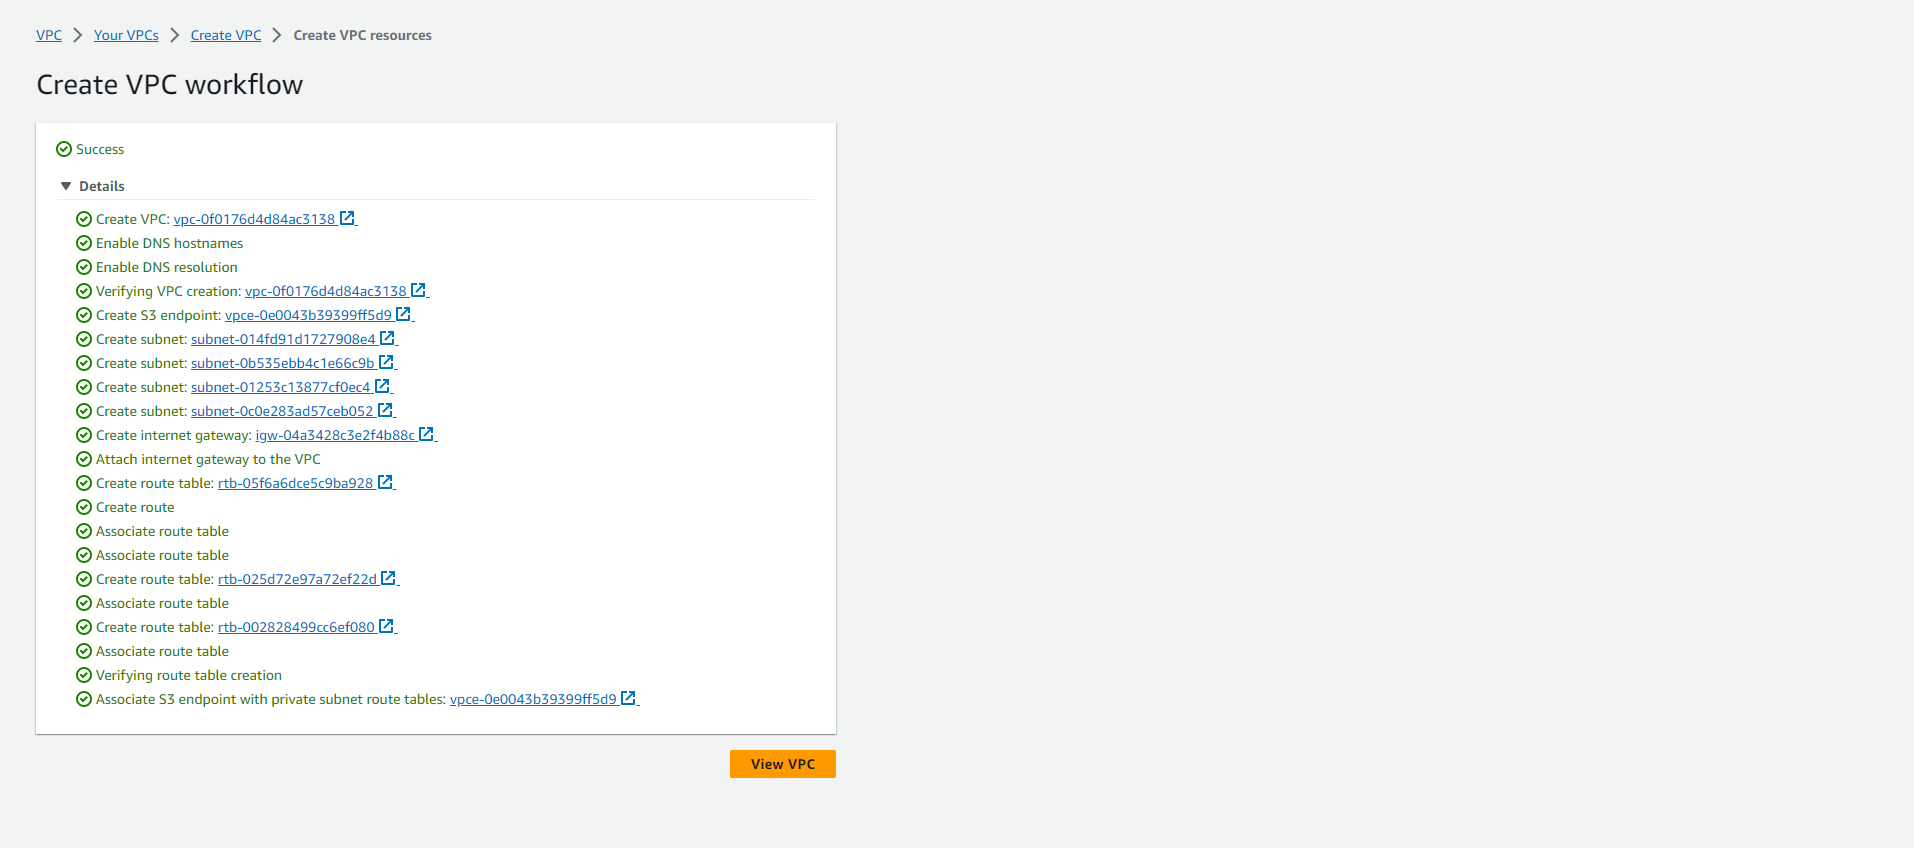
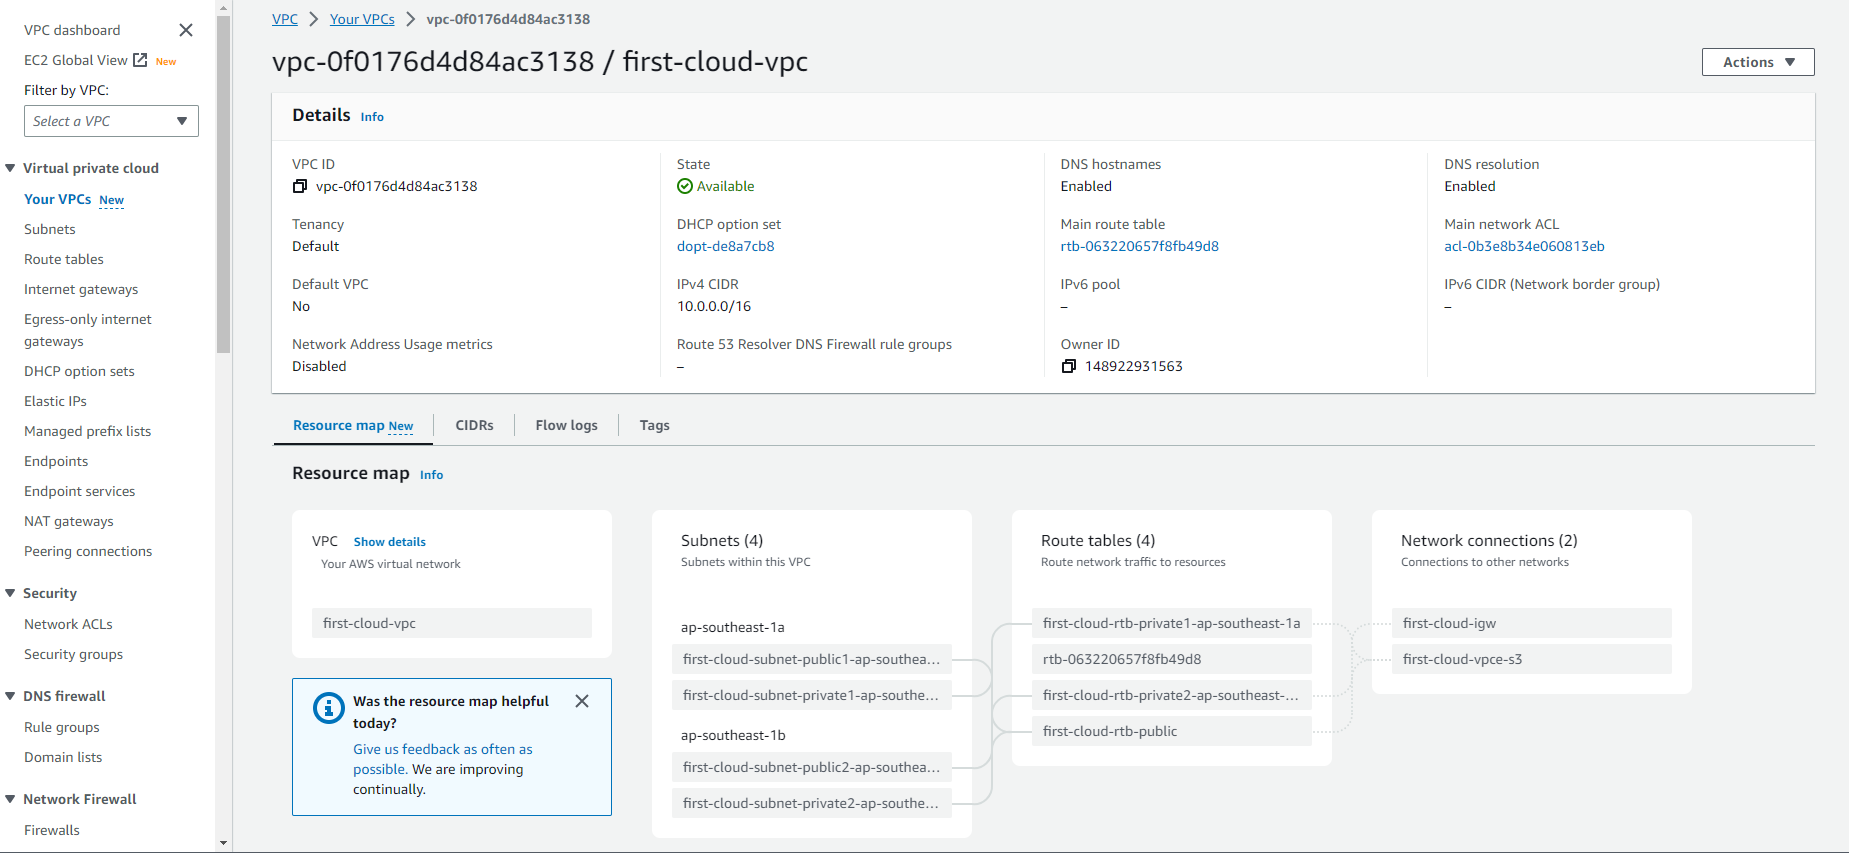
Choose Create VPC to provision all the configured resources.
Configuring Public IP Address Assignment for Subnets
ℹ️ Information: The auto-assign public IPv4 address setting determines whether instances launched in a subnet automatically receive public IP addresses. For RDS deployments, your database subnets should typically have this setting disabled.
To modify the public IP address assignment behavior for a subnet:
-
Open the Amazon VPC console at https://console.aws.amazon.com/vpc/.
-
In the navigation pane, choose Subnets.
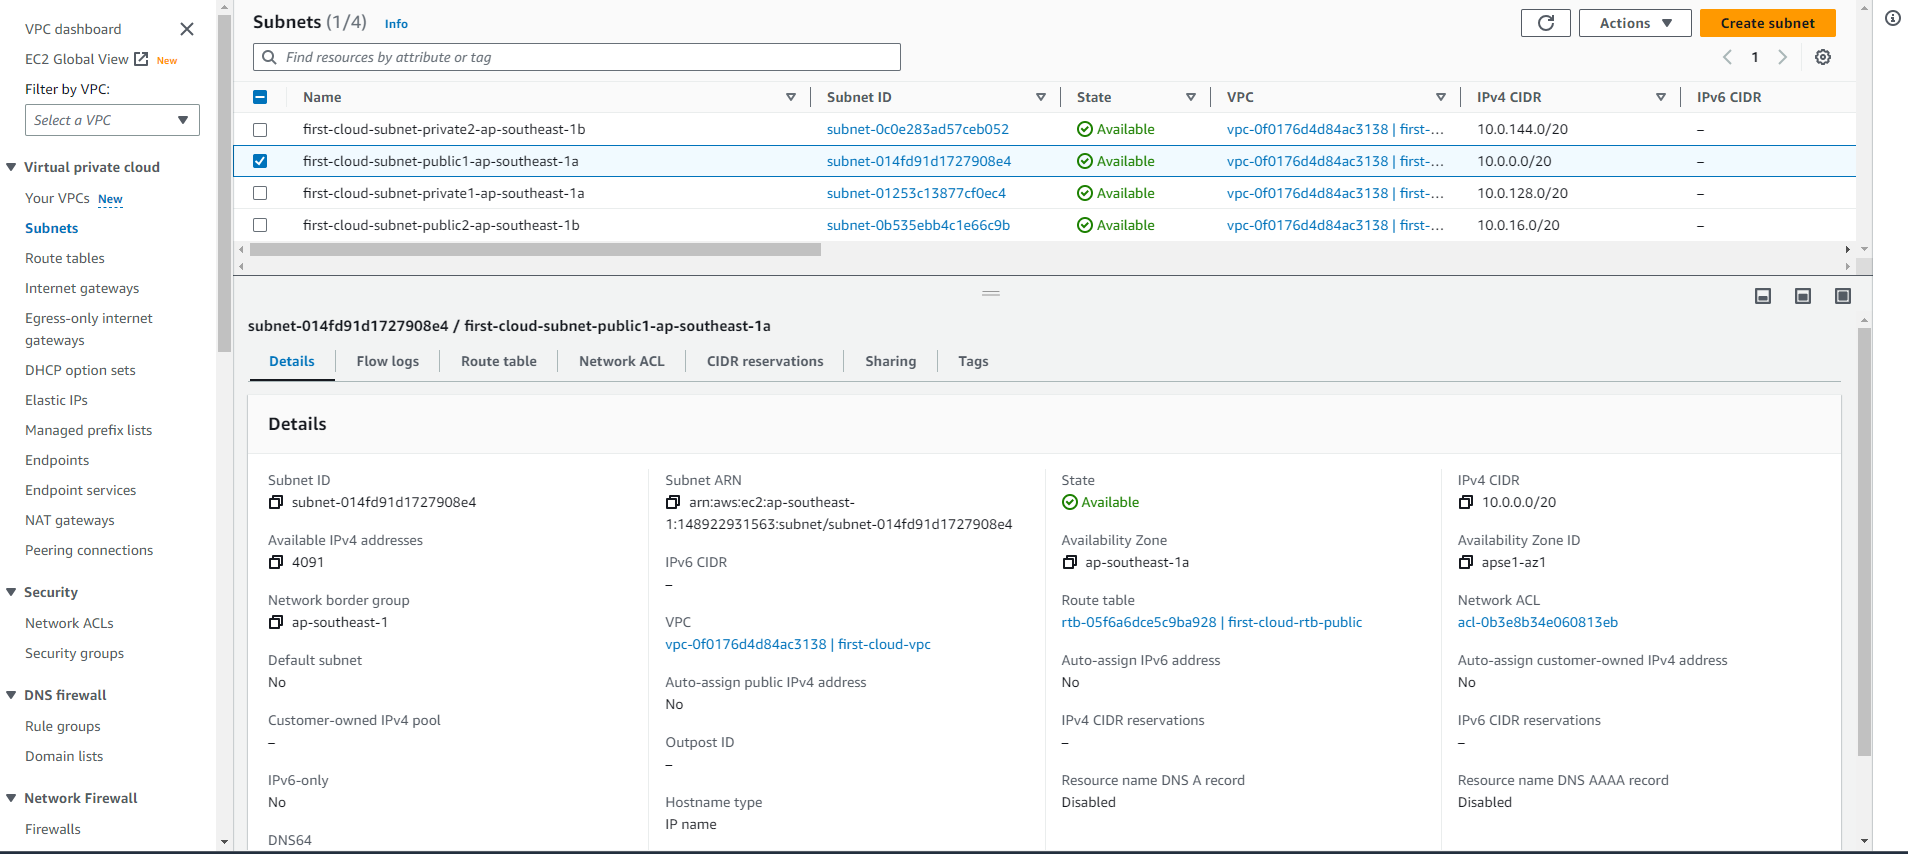
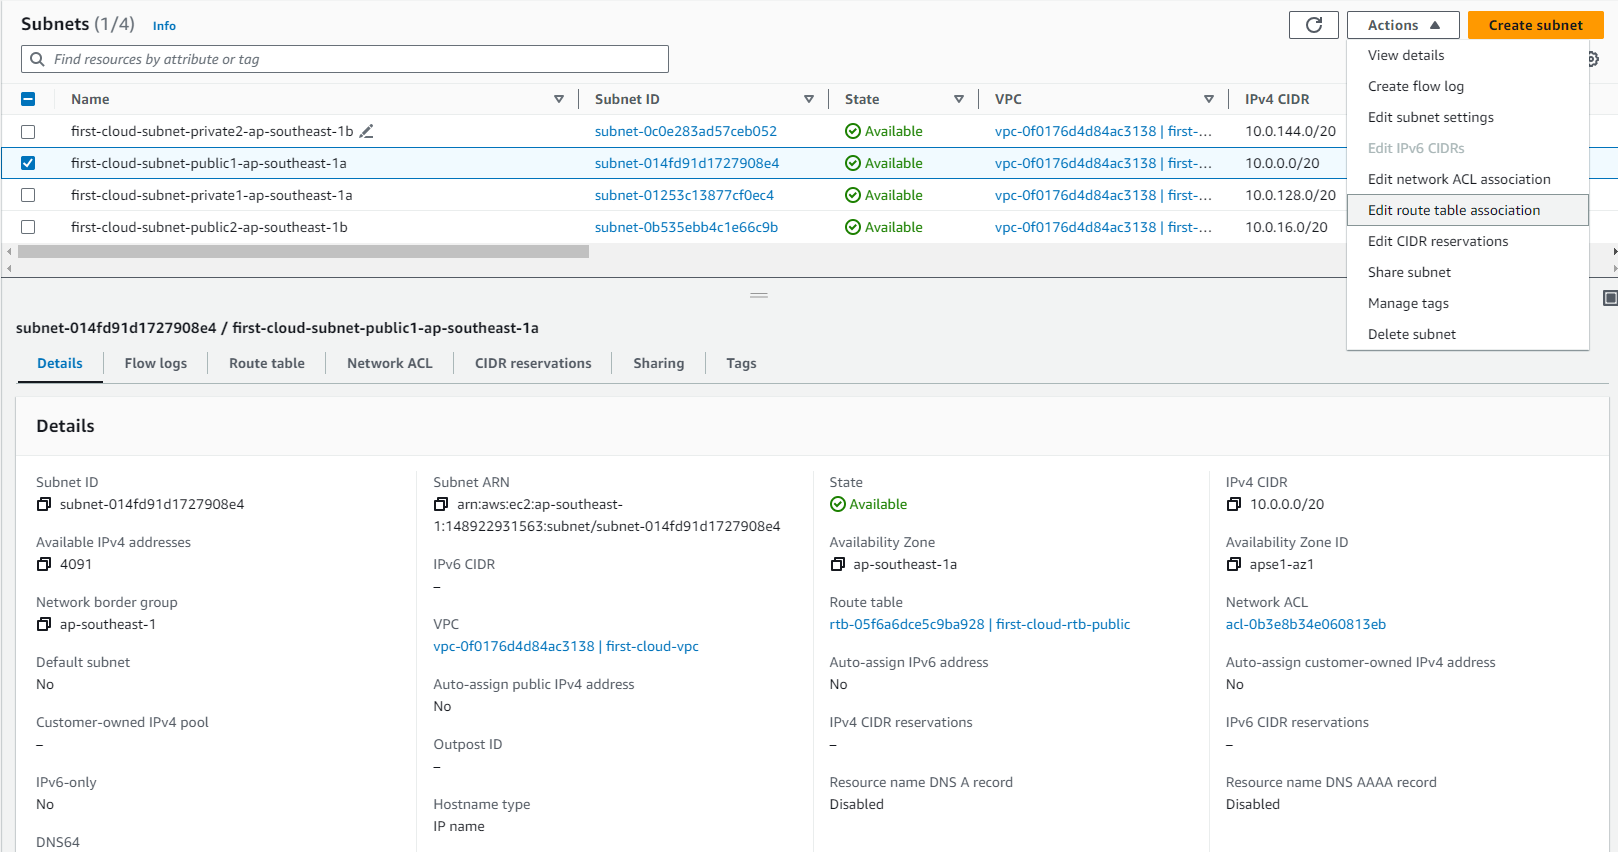
- Select your subnet and choose Actions, then Edit subnet settings.
-
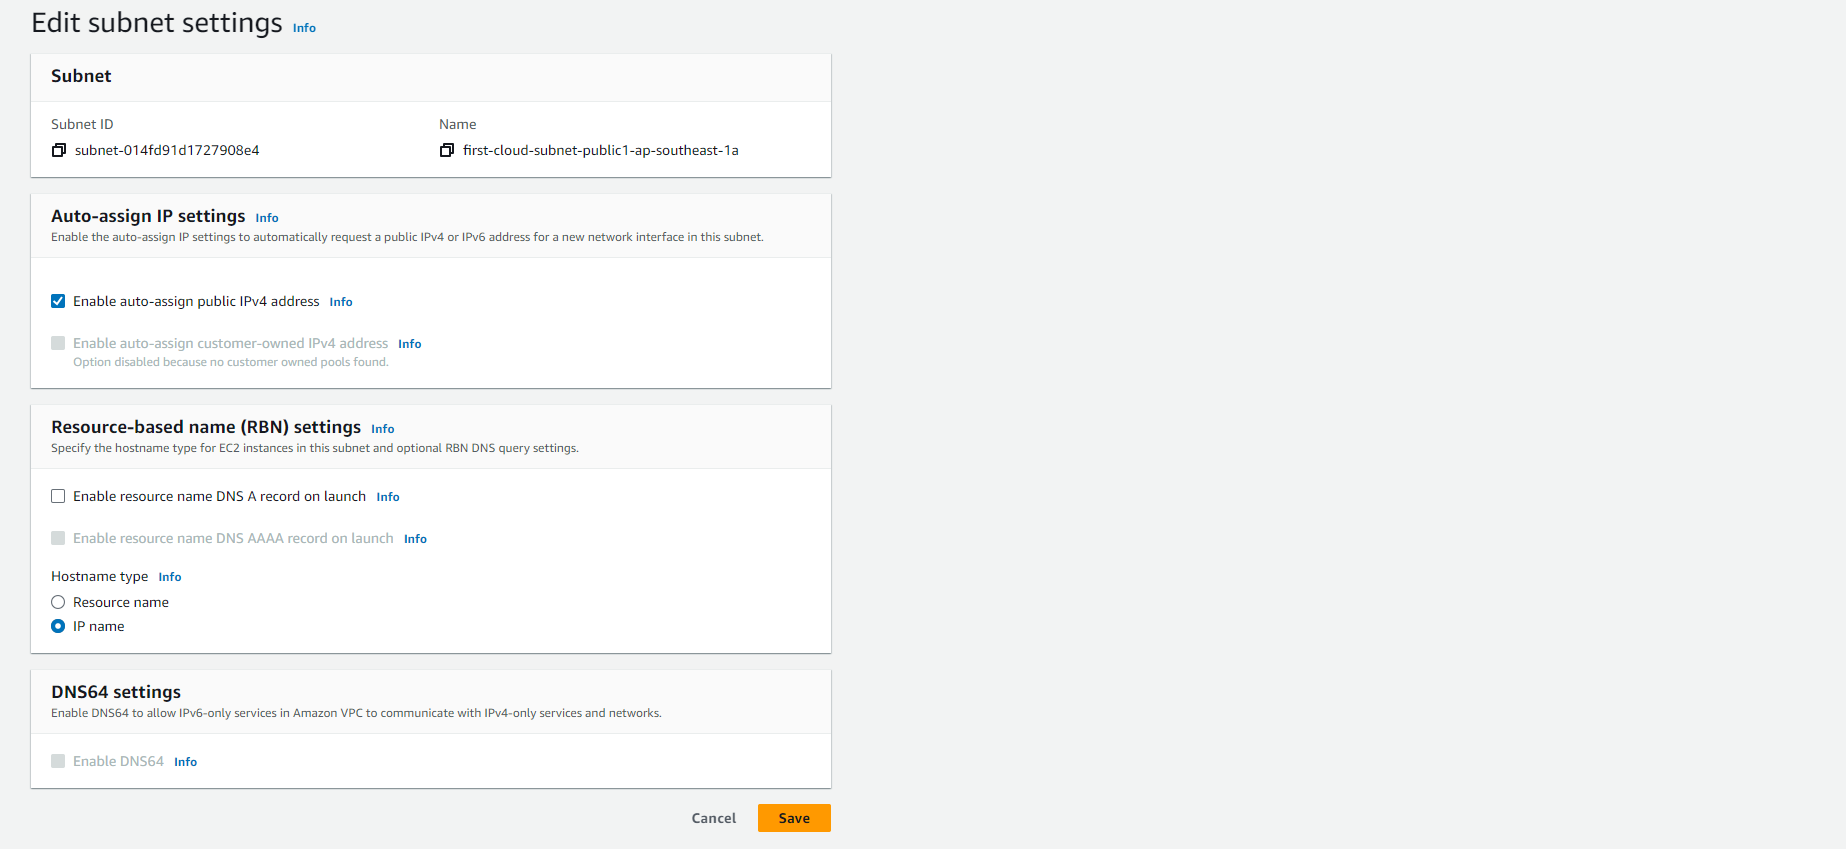
Configure the Auto-assign public IPv4 address setting:
- Checked: Instances launched in this subnet automatically receive a public IPv4 address
- Unchecked: Instances launched in this subnet do not receive a public IPv4 address unless specifically requested during launch
🔒 Security Note: For subnets that will host your RDS instances, ensure this setting is unchecked to prevent accidental public IP assignment.
-
Choose Save to apply your changes.
⚠️ Warning: Default subnets have auto-assign public IPv4 addresses enabled by default. Always verify this setting when using default subnets for database deployments.