Create a VPC
Creating a VPC with Subnets and Associated Resources
ℹ️ Information: Amazon Virtual Private Cloud (Amazon VPC) enables you to launch AWS resources into a virtual network that you’ve defined. This virtual network closely resembles a traditional network in your own data center, with the benefits of using the scalable infrastructure of AWS.
Follow these steps to create a VPC with all necessary components for your Amazon RDS deployment:
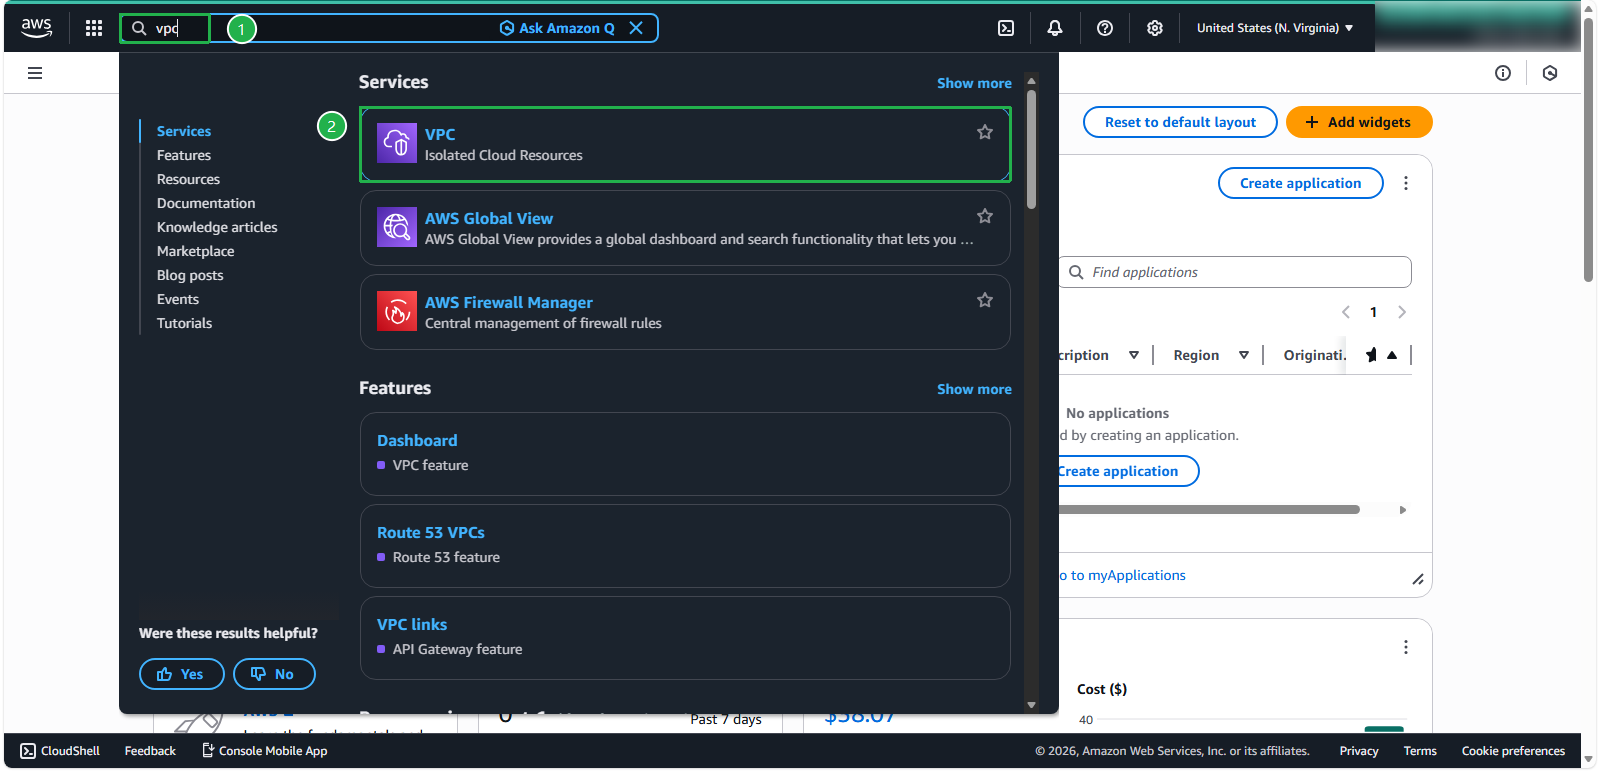
- In the search bar, enter
VPCto open the Amazon VPC console
- Choose Create VPC.
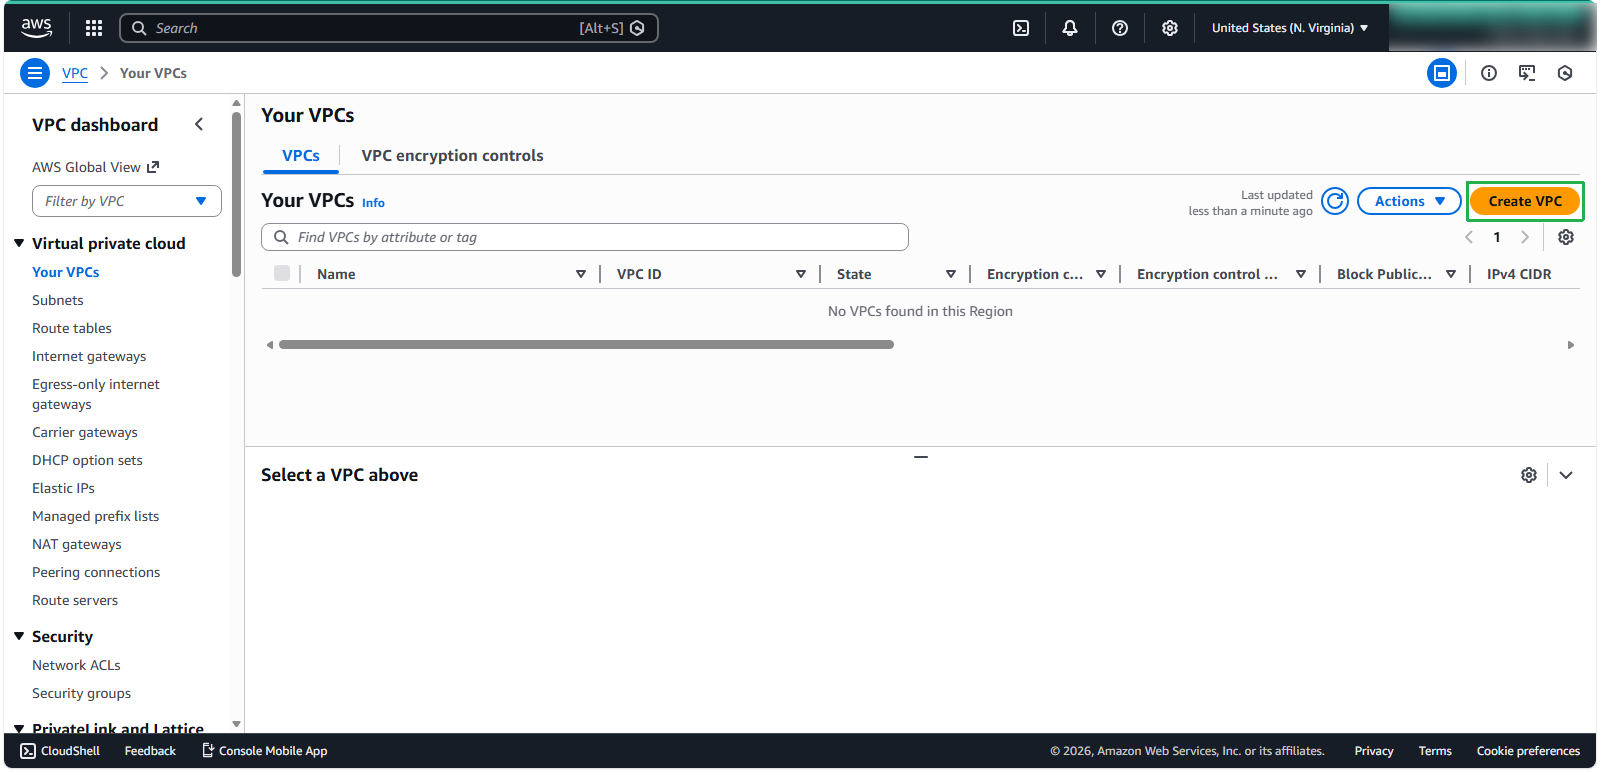
- Configure by following these steps:
- For Resources to create, select VPC and more to create a complete VPC environment.
- For VPC name, enter
rds. Auto-generate Name tags will automatically name your VPC resources as rds-vpc, ensuring a consistent and organized naming convention for your infrastructure - For IPv4 CIDR block, enter
10.0.0.0/16. This defines the IP address range available within your VPC.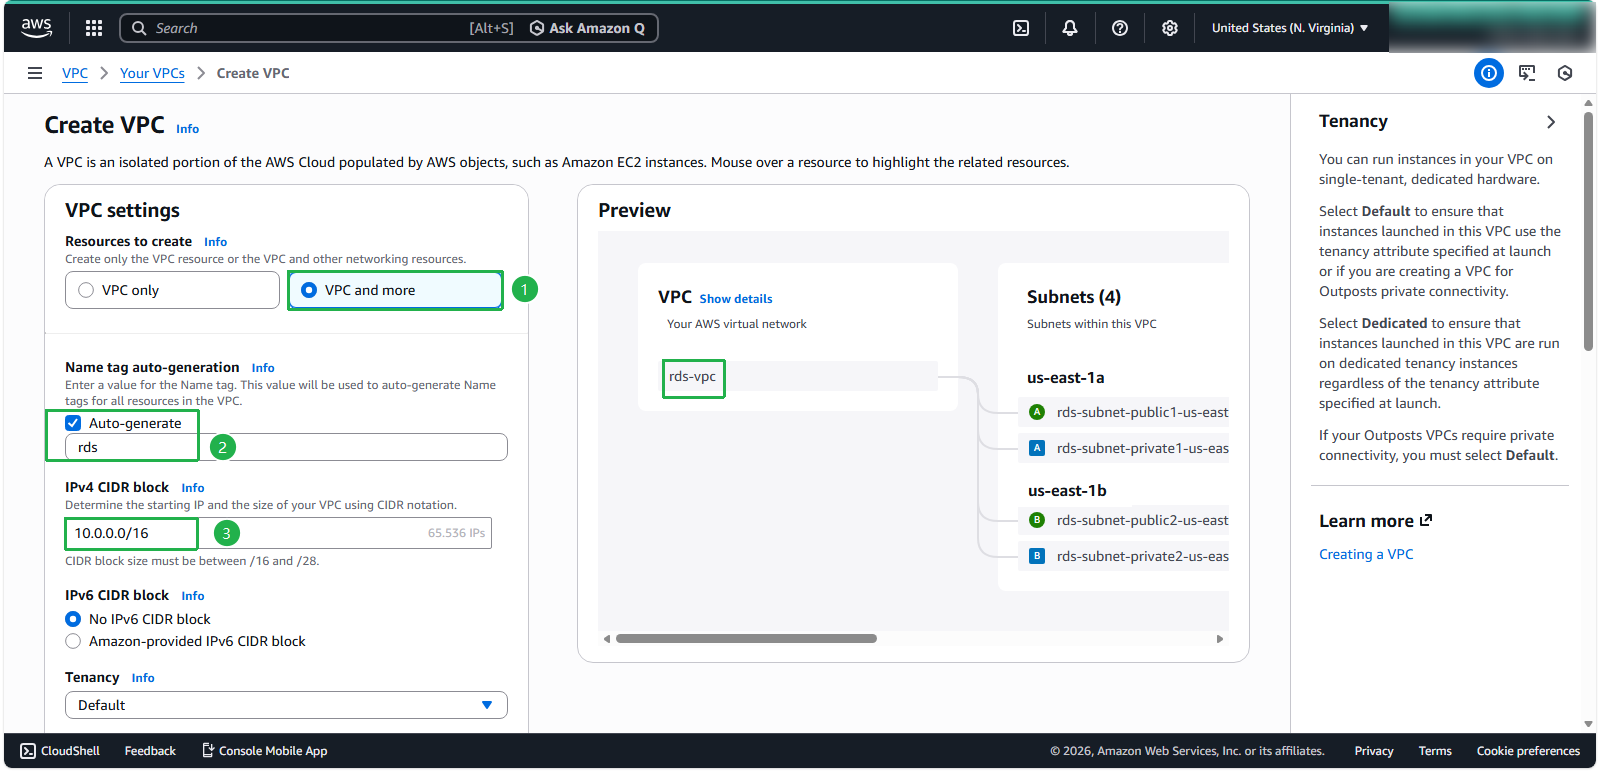
- Select the appropriate Tenancy option:
- Default: EC2 instances use the tenancy attribute specified during launch
- Dedicated: All EC2 instances run on hardware dedicated to your account
💡 Pro Tip: Most workloads should use Default tenancy for cost efficiency. Only select Dedicated when you have specific compliance or licensing requirements.
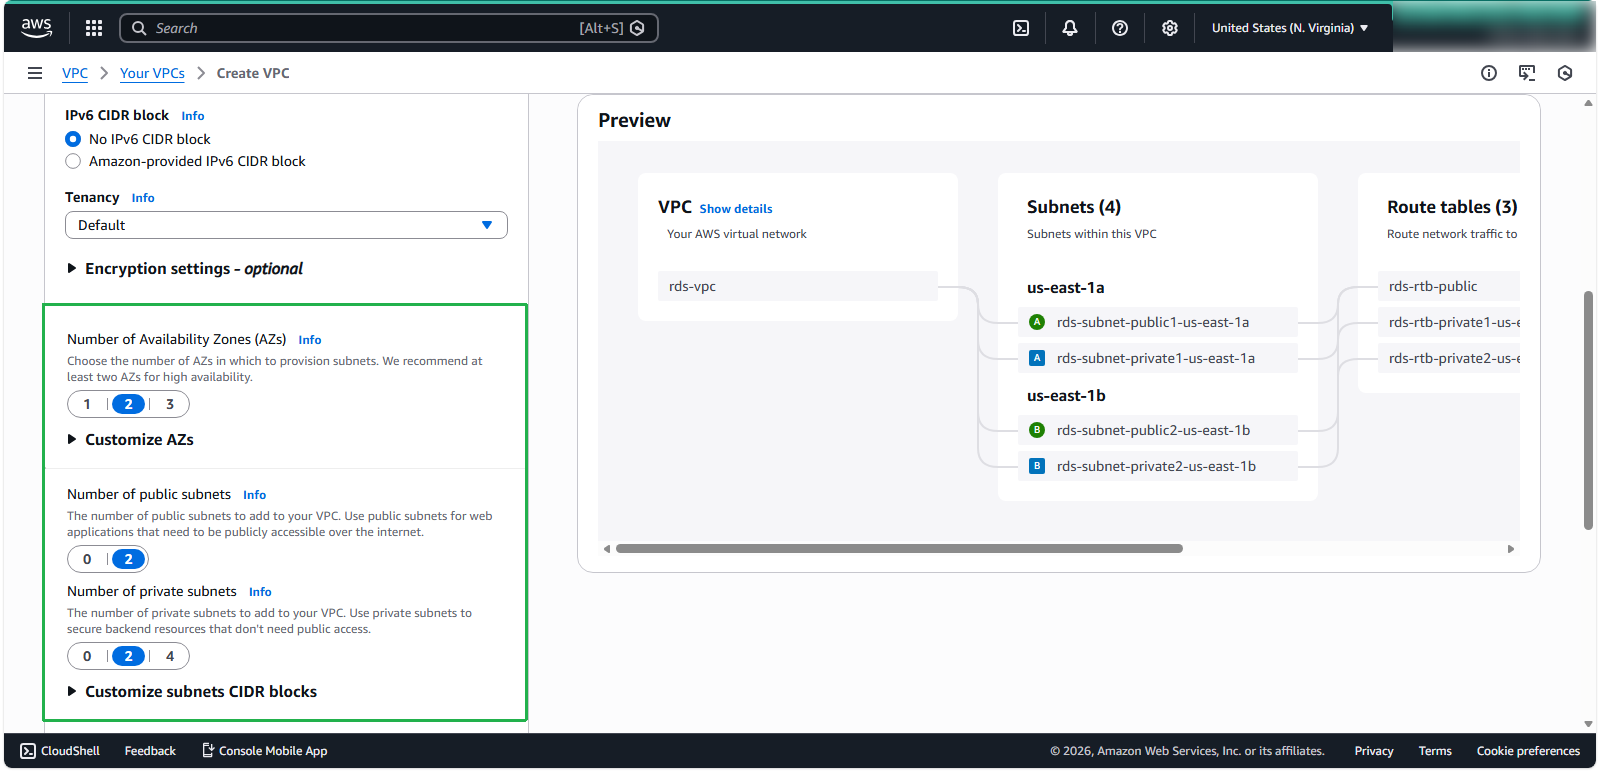
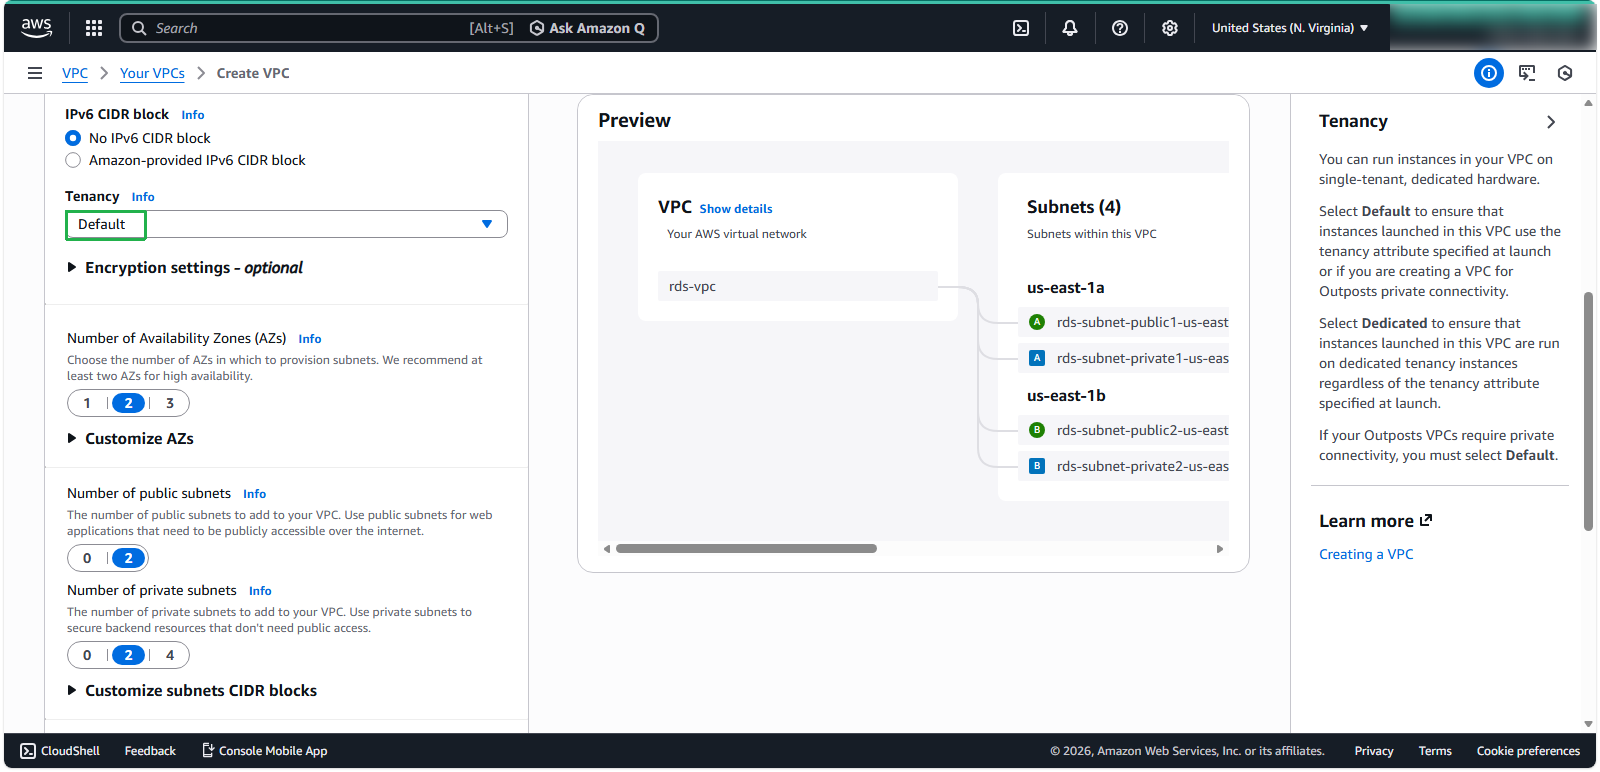 8. Configure the VPC architecture:
- Number of Availability Zones: 2
- Number of public subnets: 2 (one per AZ)
- Number of private subnets: 2 (one per AZ)
- NAT gateways and VPC endpoints: None. (we’ll keep costs minimal for this lab)
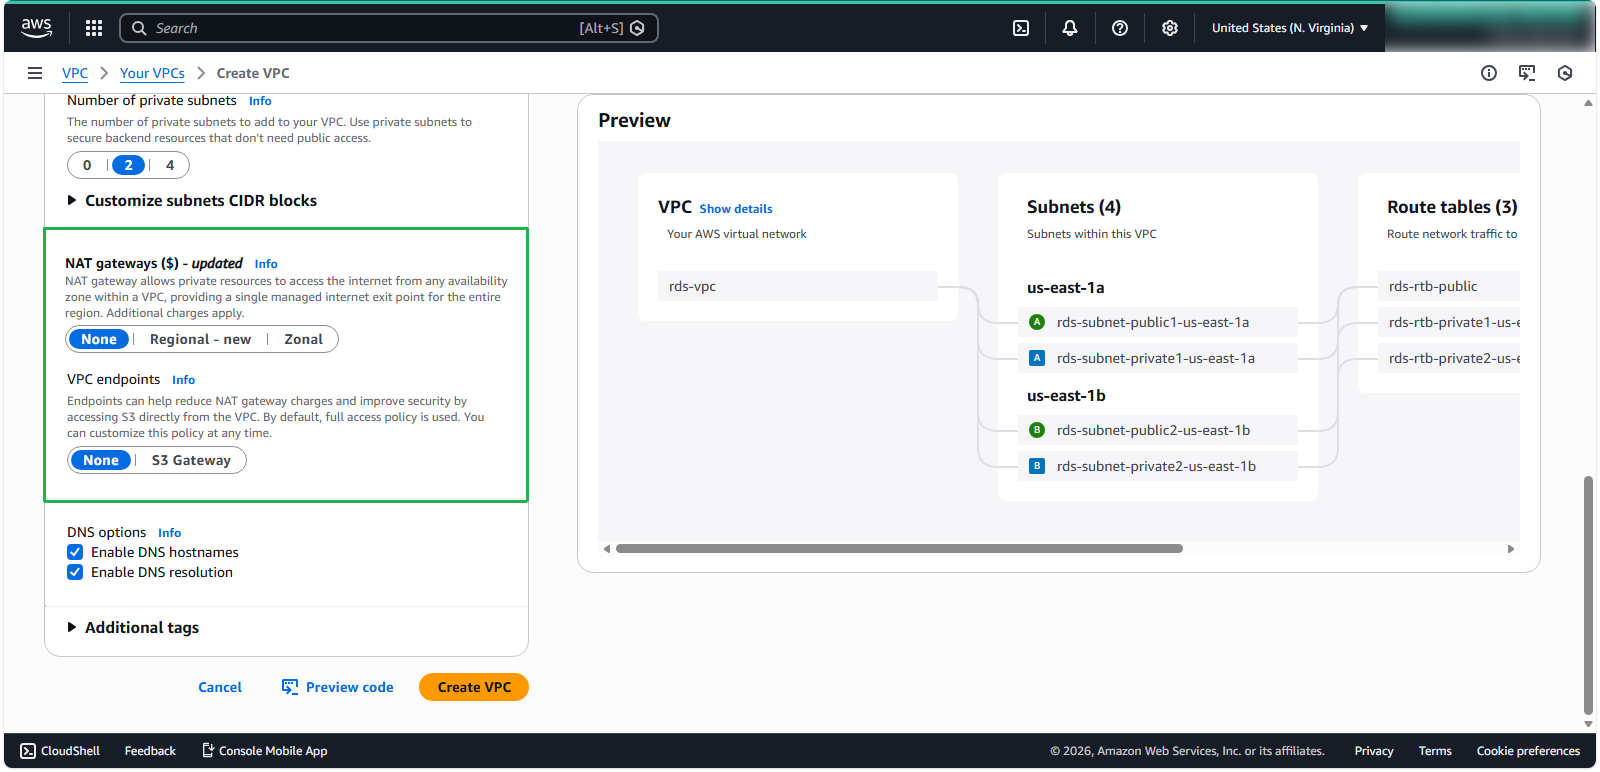
- (Optional) If resources in private subnets need internet access, configure NAT gateways in each AZ where you have resources requiring outbound connectivity.
💡Pro Tip: For production environments, deploy NAT gateways in each AZ to eliminate cross-AZ dependencies and improve fault tolerance. 10. (Optional) For IPv6 outbound connectivity from private subnets, select Yes for Egress-only Internet Gateway. 11. (Optional) To enable private access to Amazon S3, select VPC endpoints, S3 Gateway. This creates a gateway endpoint that allows resources in your VPC to access S3 without using the public internet.
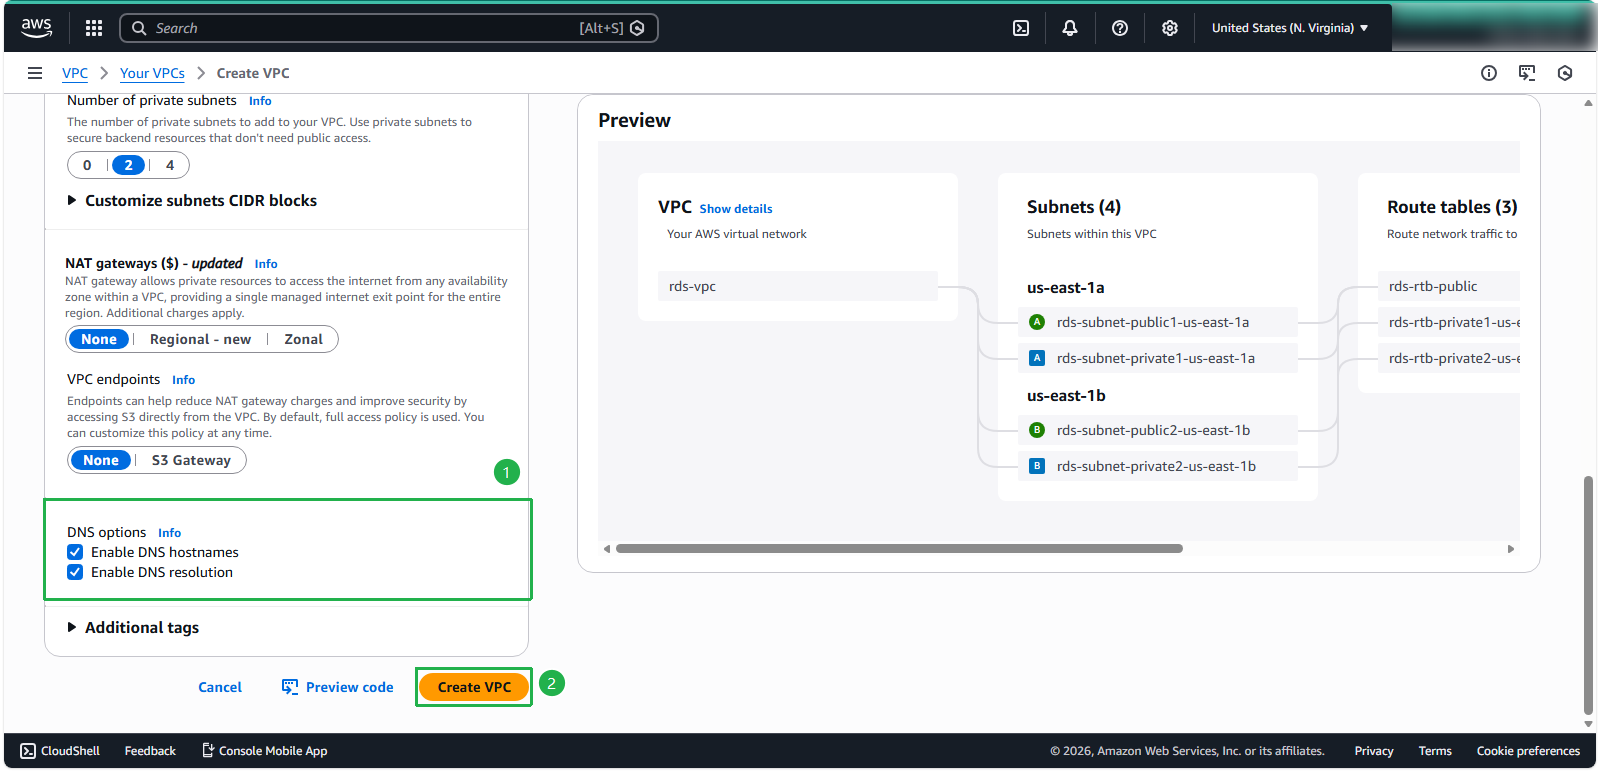
- For DNS options, the default settings enable both DNS resolution and DNS hostnames. Click Create VPC
Configuring Public IP Address Assignment for Subnets
ℹ️ Information: The auto-assign public IPv4 address setting determines whether instances launched in a subnet automatically receive public IP addresses. For RDS deployments, your database subnets should typically have this setting disabled.
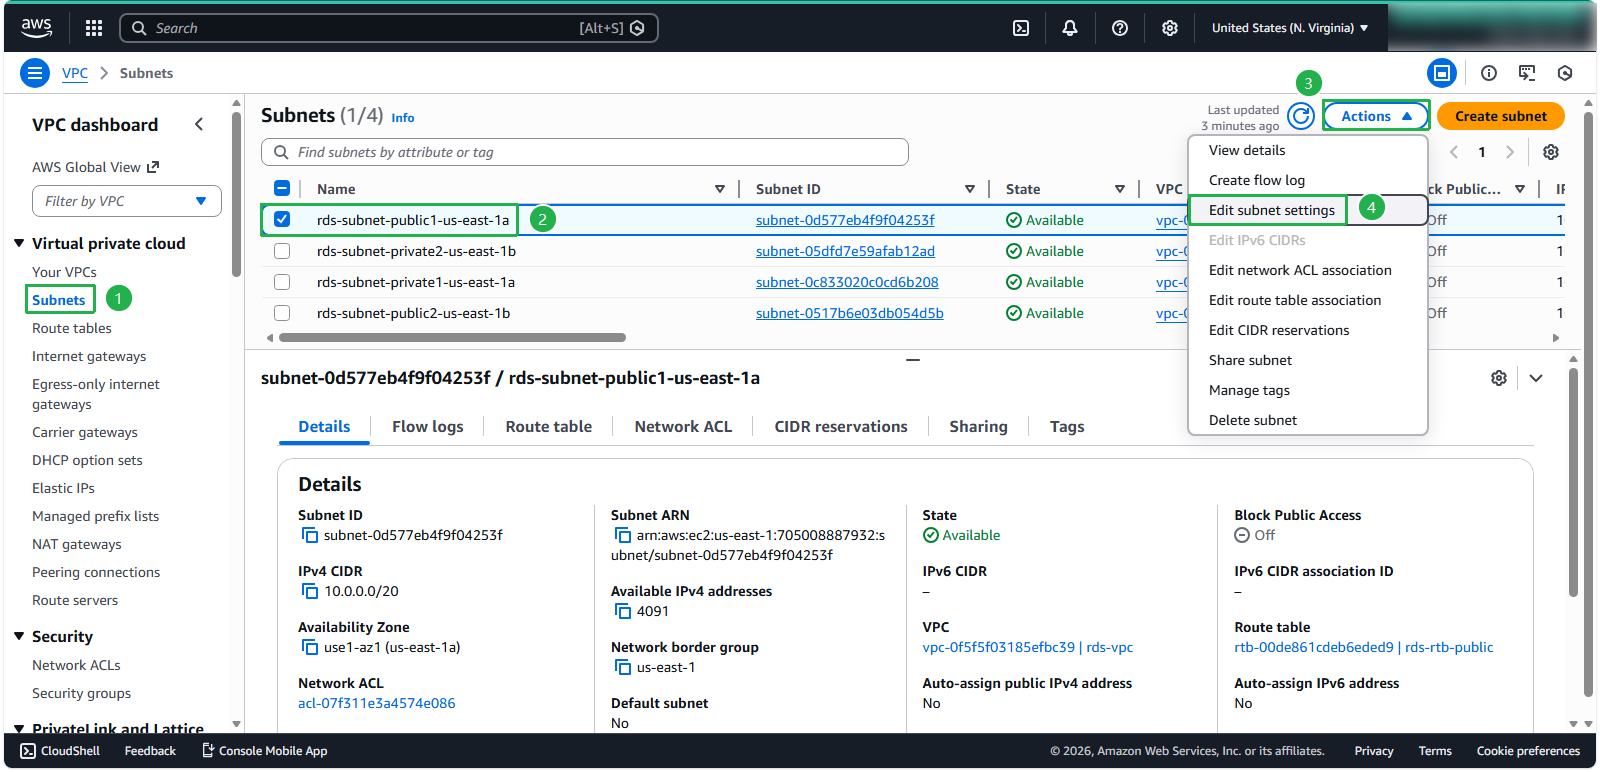
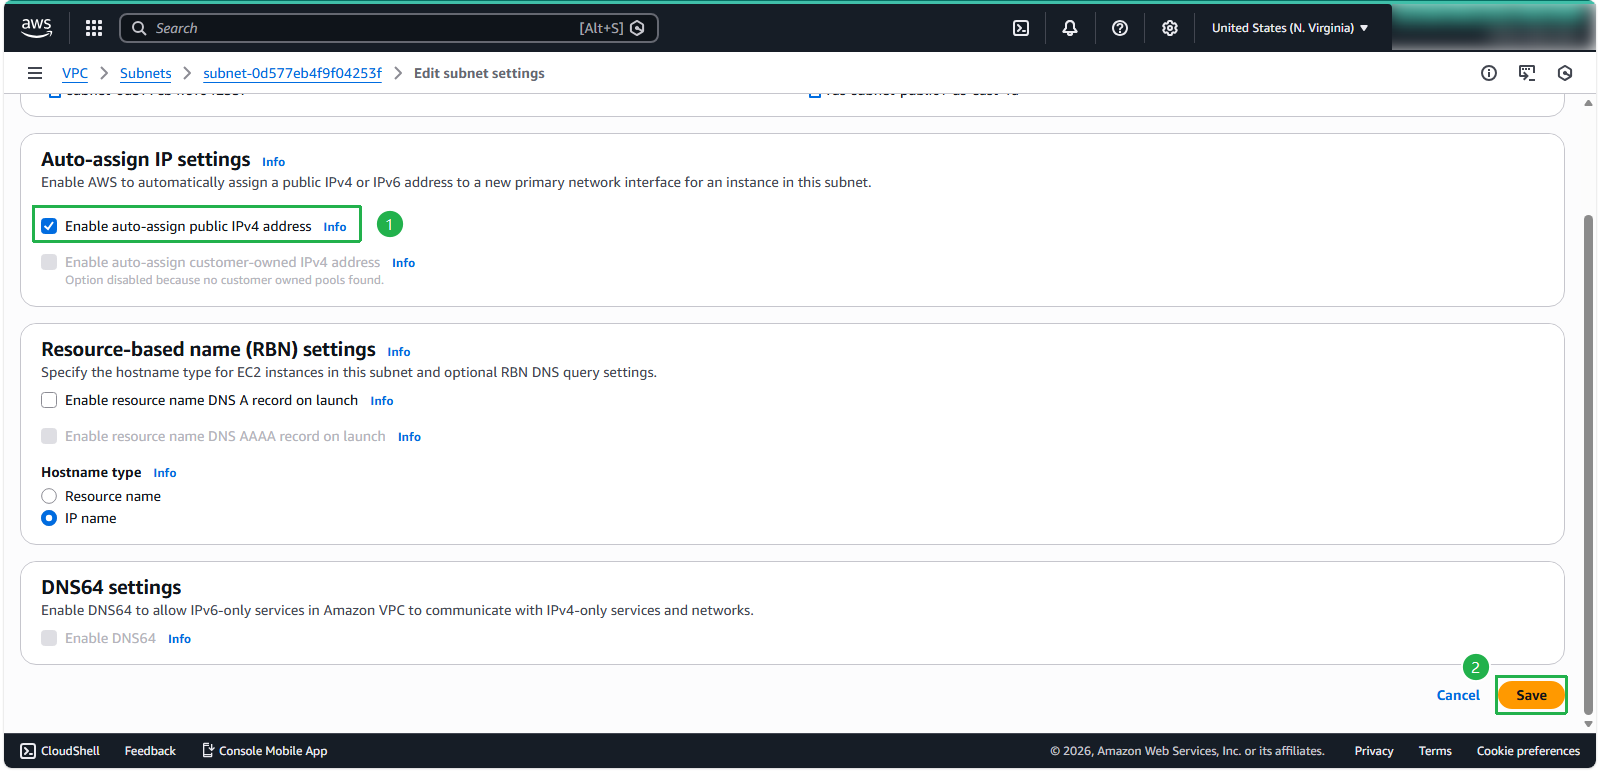
To modify the public IP address assignment behavior for a subnet:
In the left navigation pane, go to Subnets
Select a public subnet
Click Actions
Click Edit subnet settings
In the subnet settings:
- Check Enable auto-assign public IPv4 address
- Click Save to apply your changes.
🔒 Security Note: For subnets that will host your RDS instances, ensure this setting is unchecked to prevent accidental public IP assignment.
⚠️ Warning: Default subnets have auto-assign public IPv4 addresses enabled by default. Always verify this setting when using default subnets for database deployments.